My bedroom update

*Update: My bedroom has change a lot since writing this post! See it more recently here.

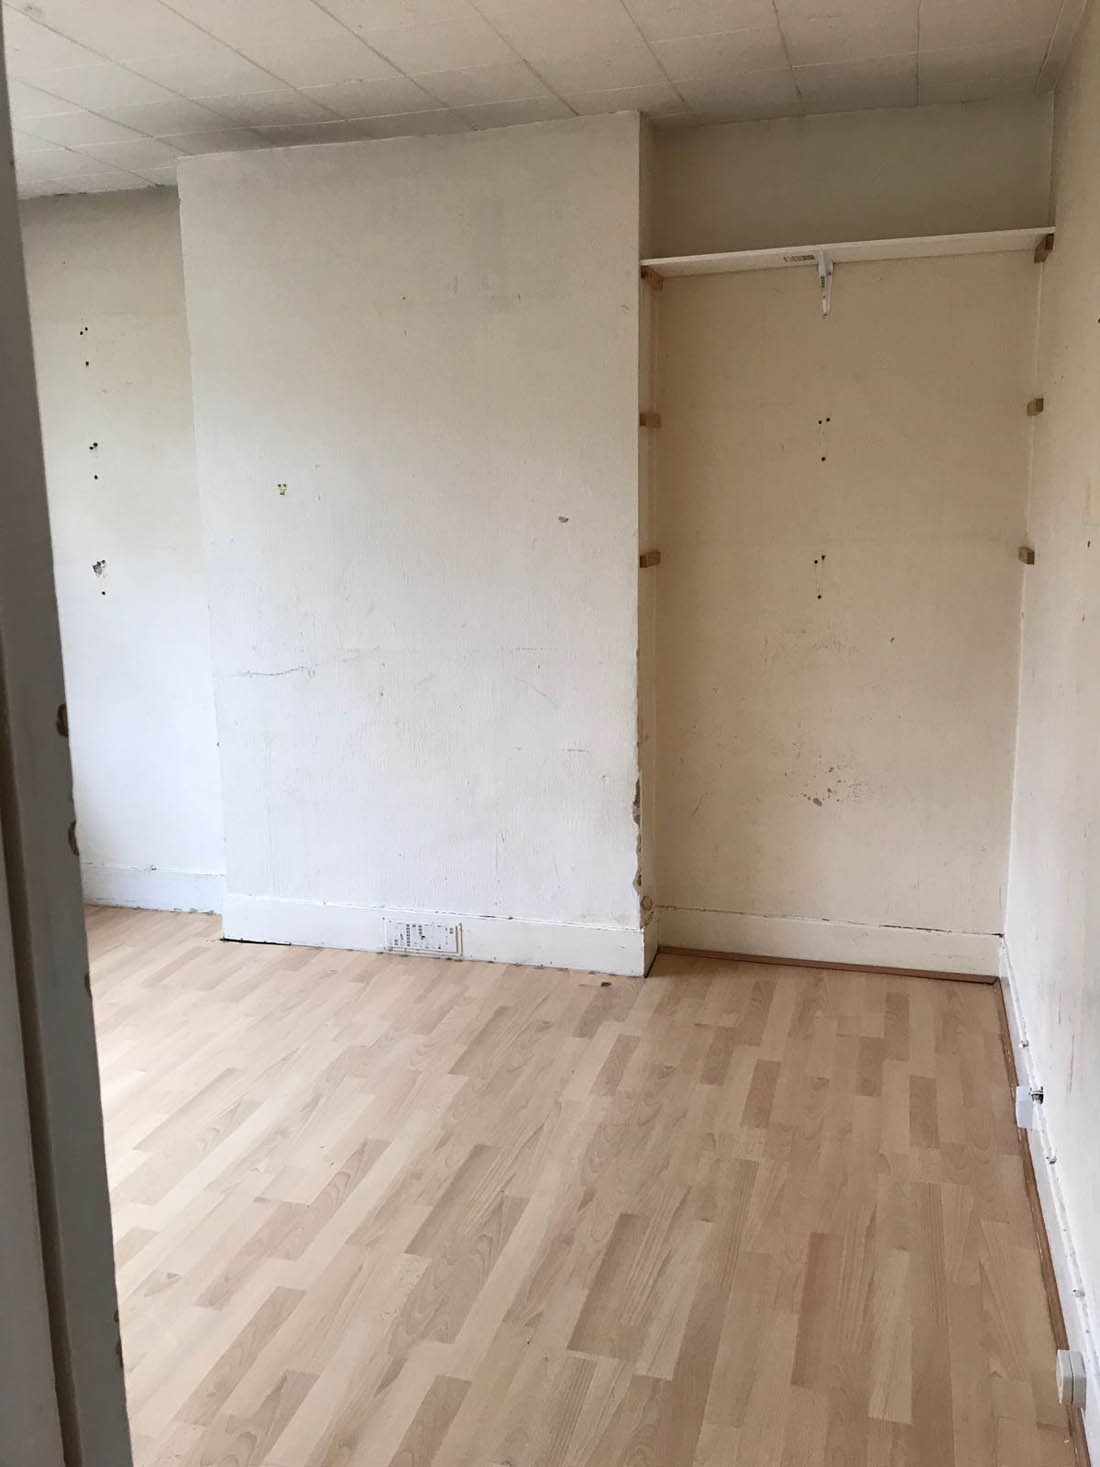
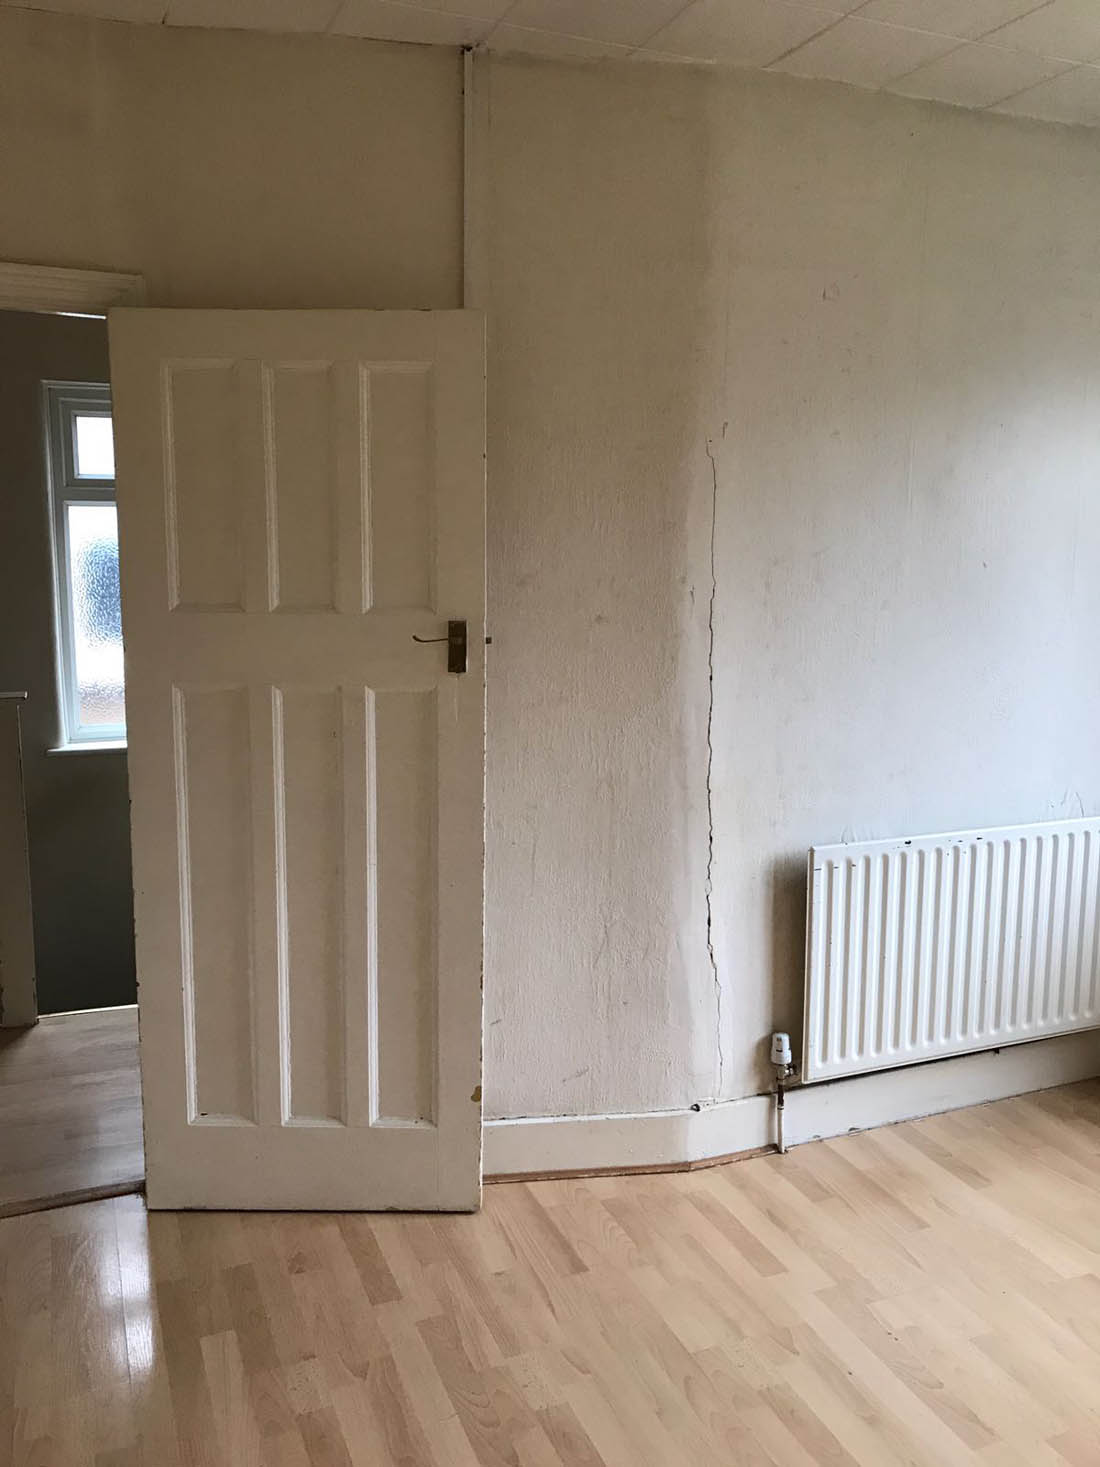
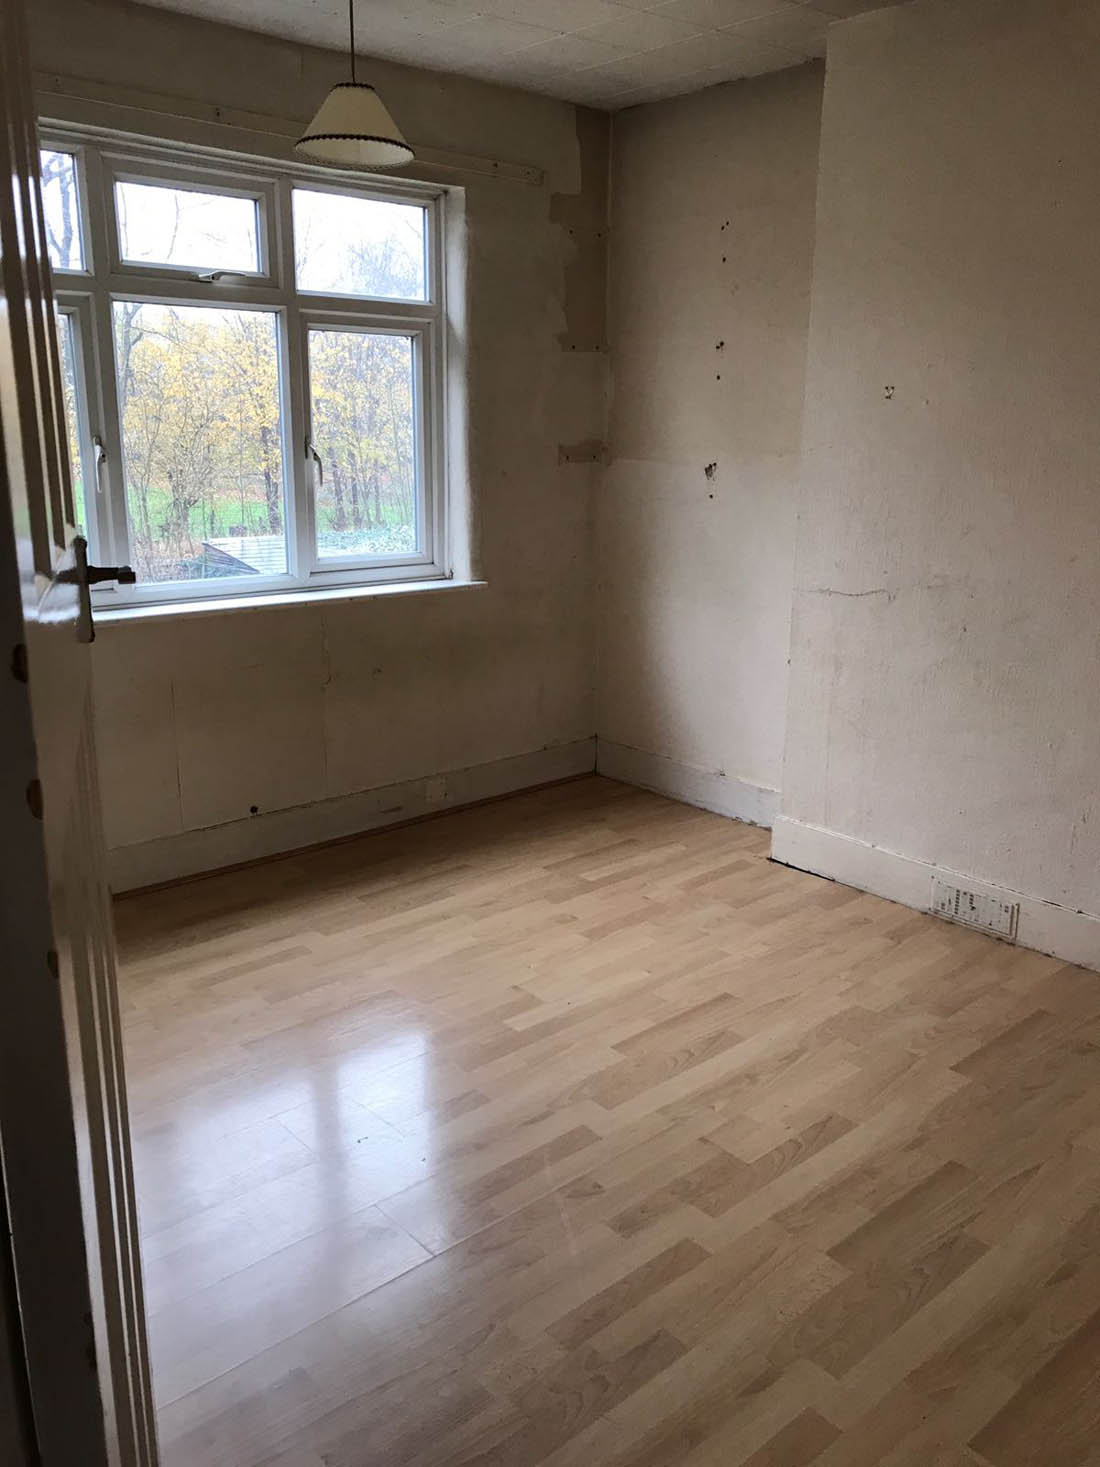
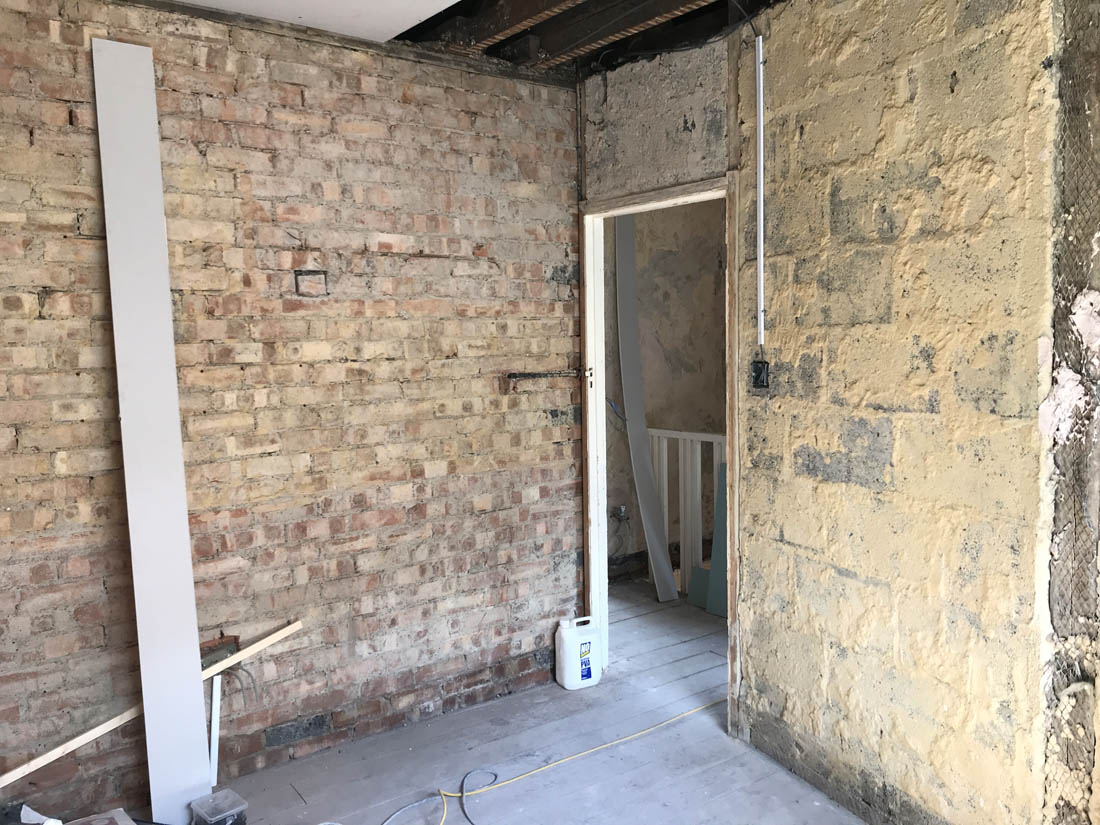
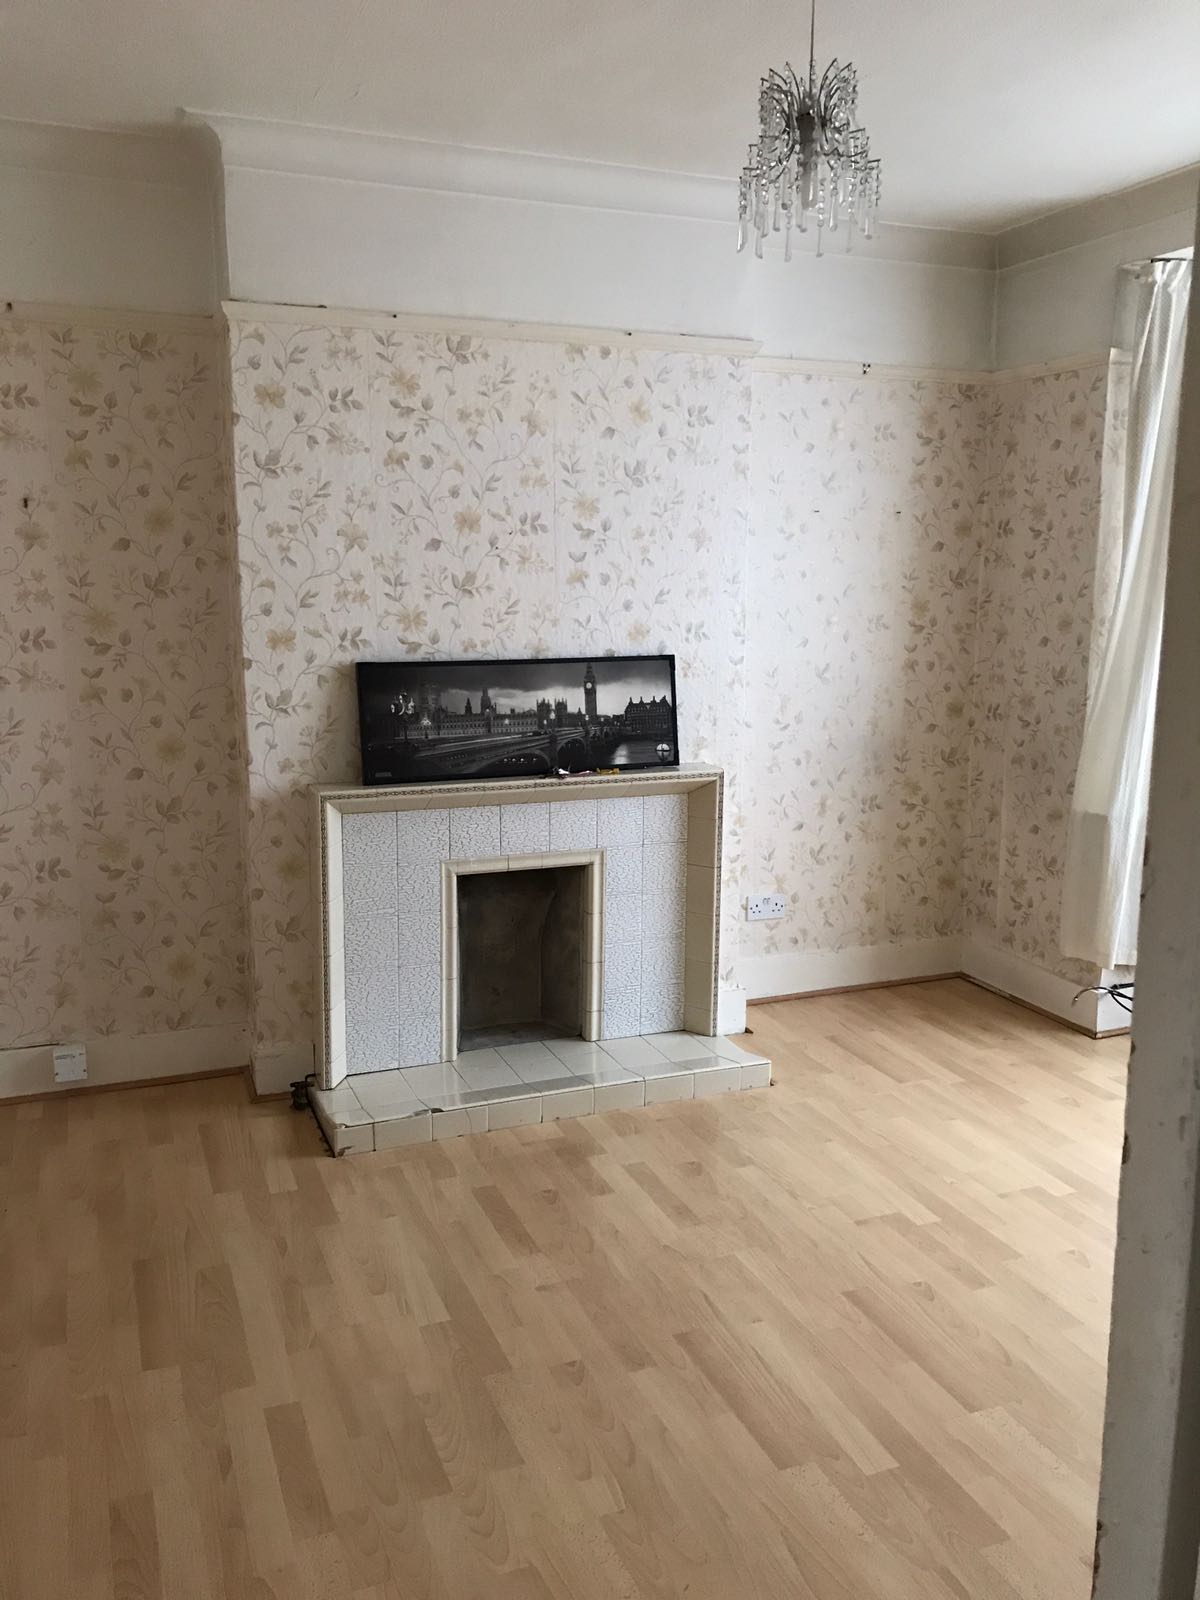
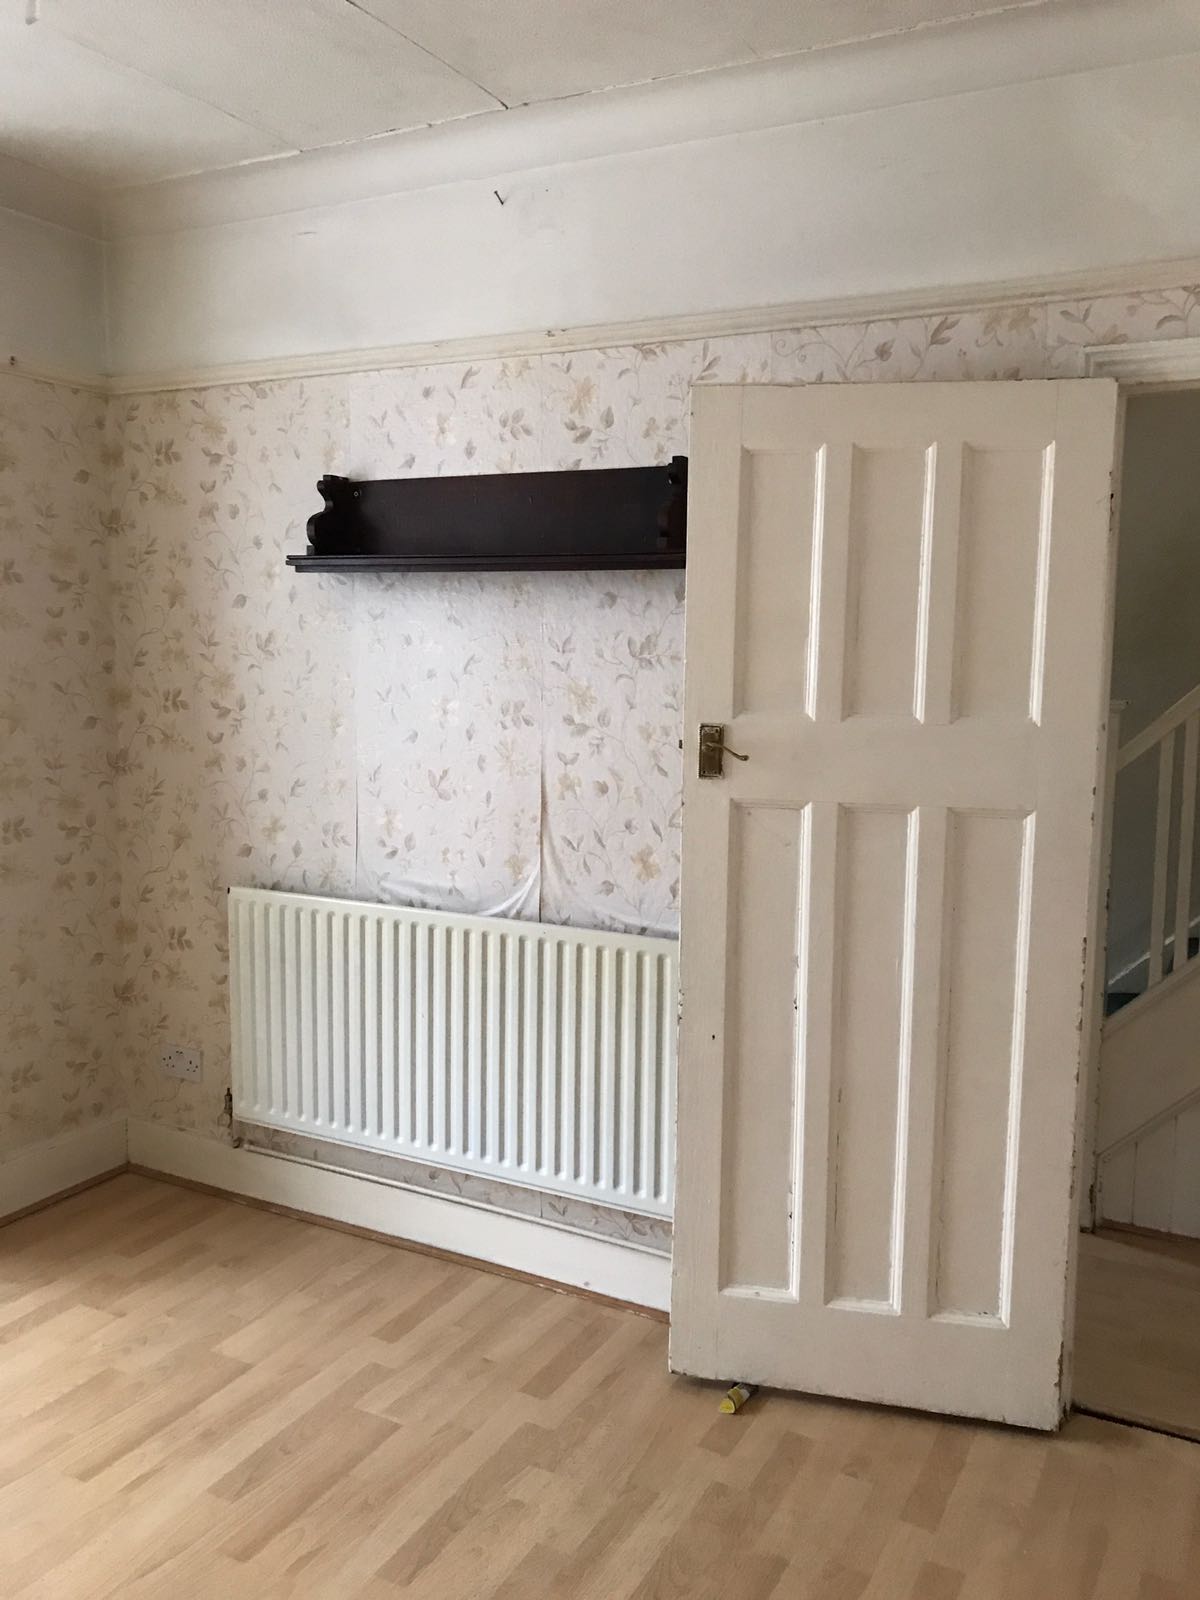
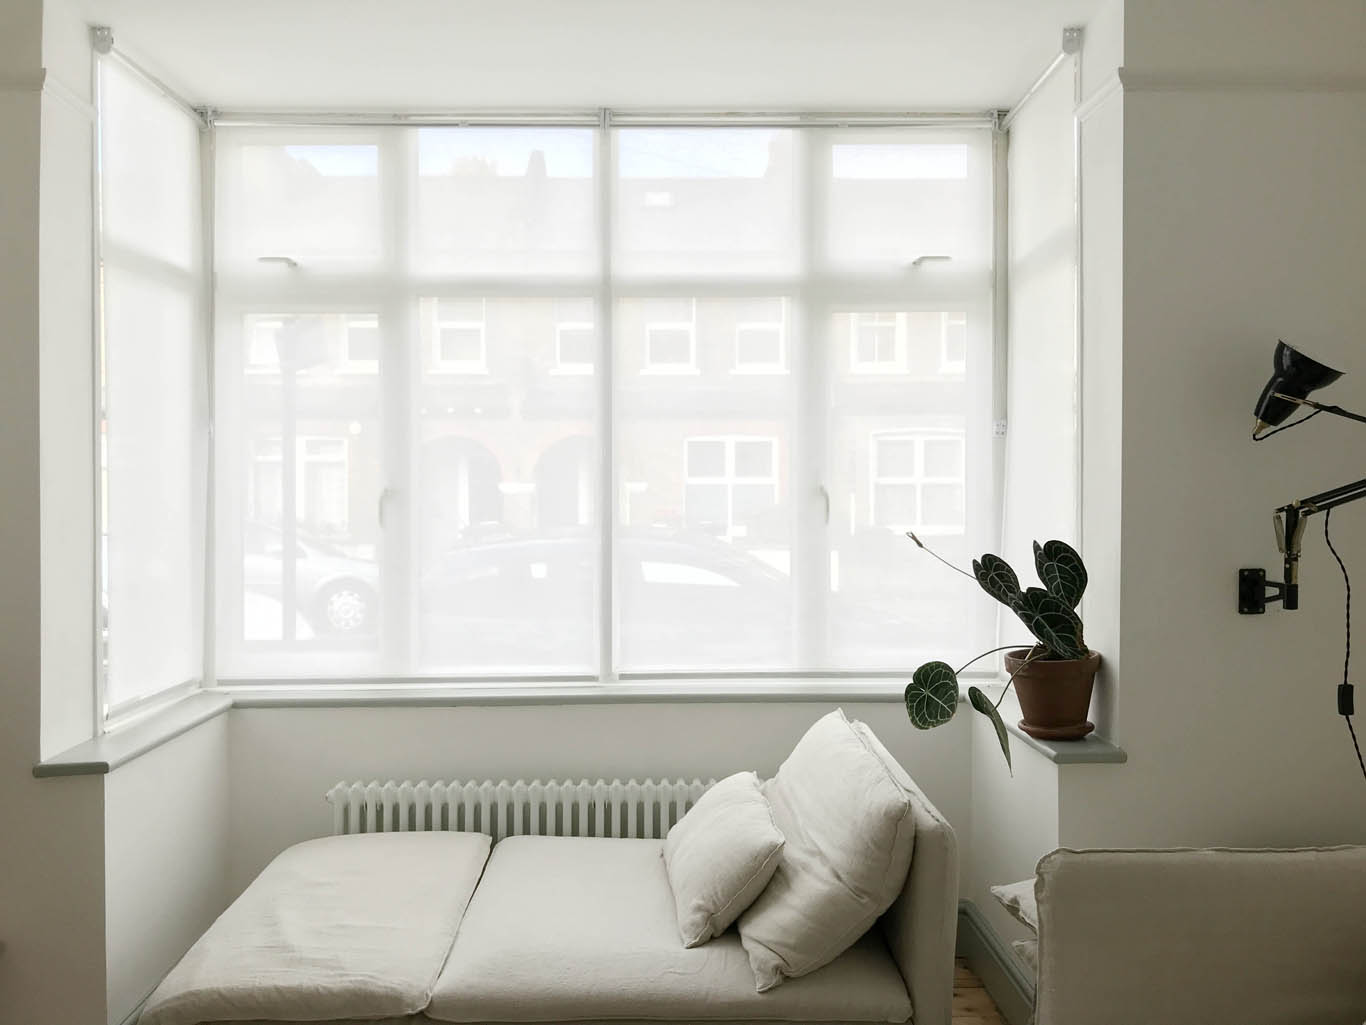
My bedroom is the room in the house that I have been struggling with the most. I think that is because we want fitted wardrobes in both alcoves and until we can afford them we have got a makeshift rail and a chest of drawers that we don’t intend to keep in here so I don’t feel like I can commit to making decisions as it all feels quite temporary. Also, I can not for the life of me decide on bedside tables and am going back and forth, back and forth so the room feels very unfinished. Saying all that, we have come a long way in this room, especially when I look back at what the room looked like when we viewed it…

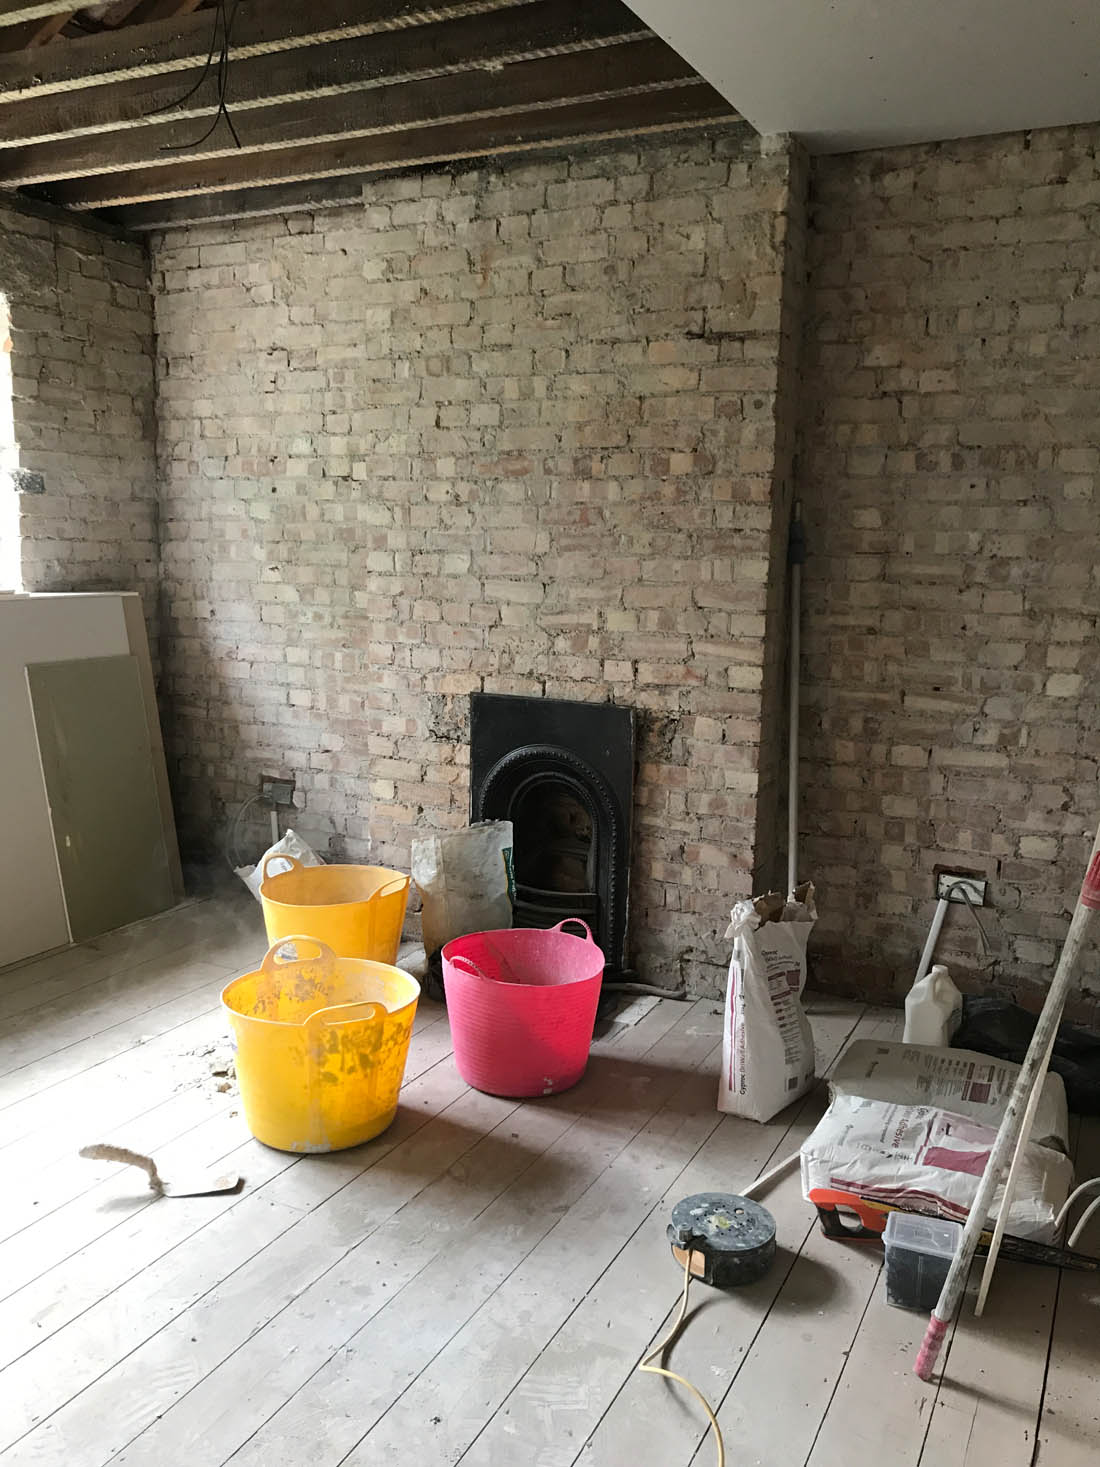
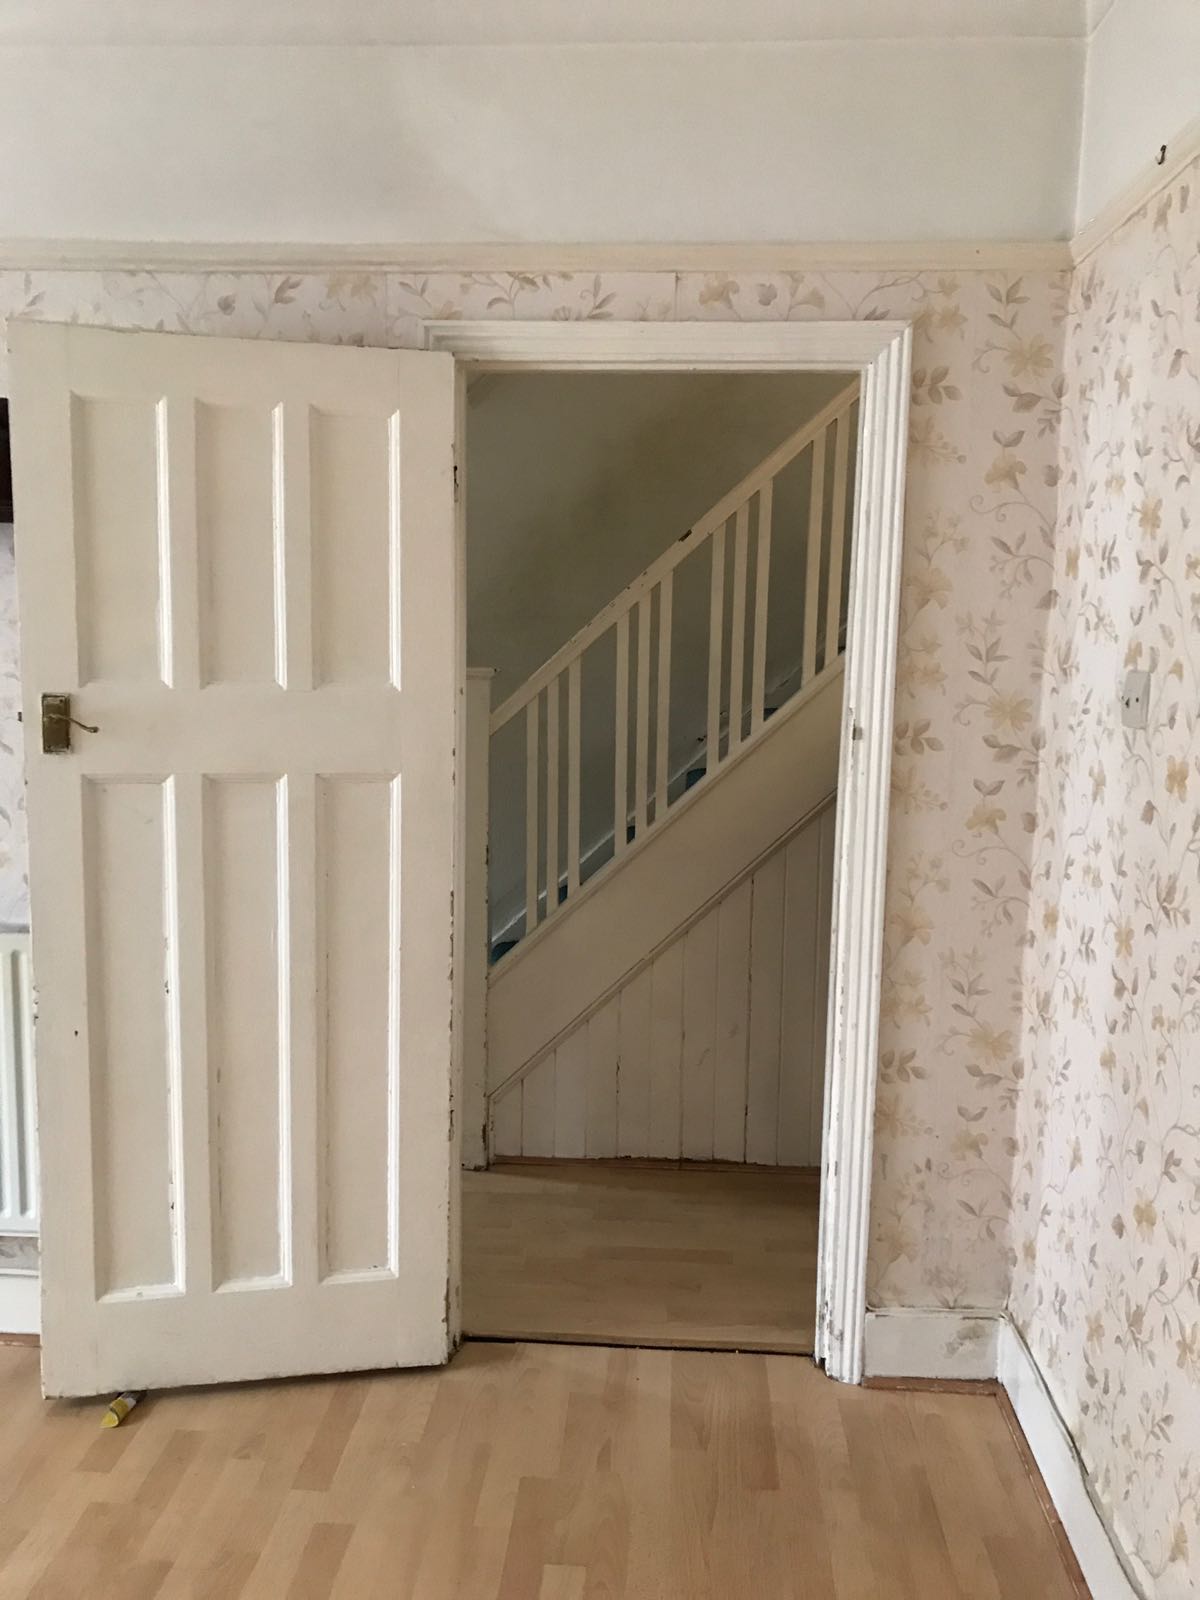
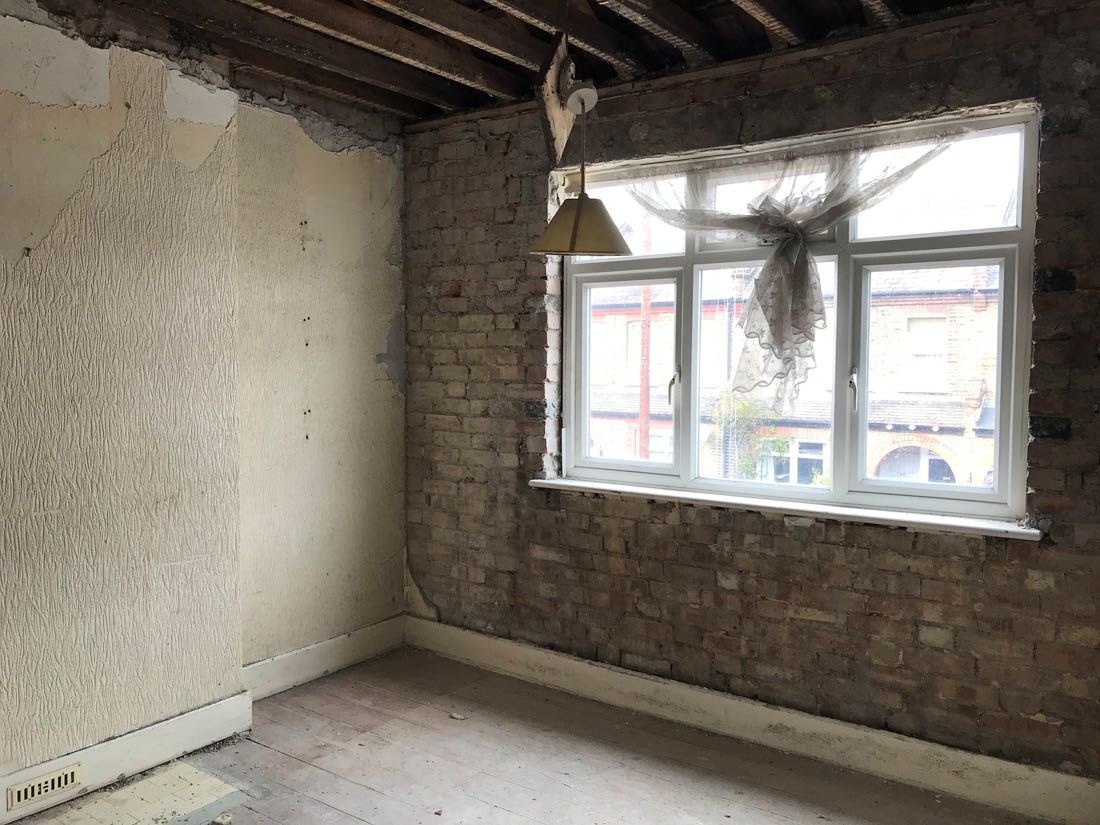
And what it was like once emptied…

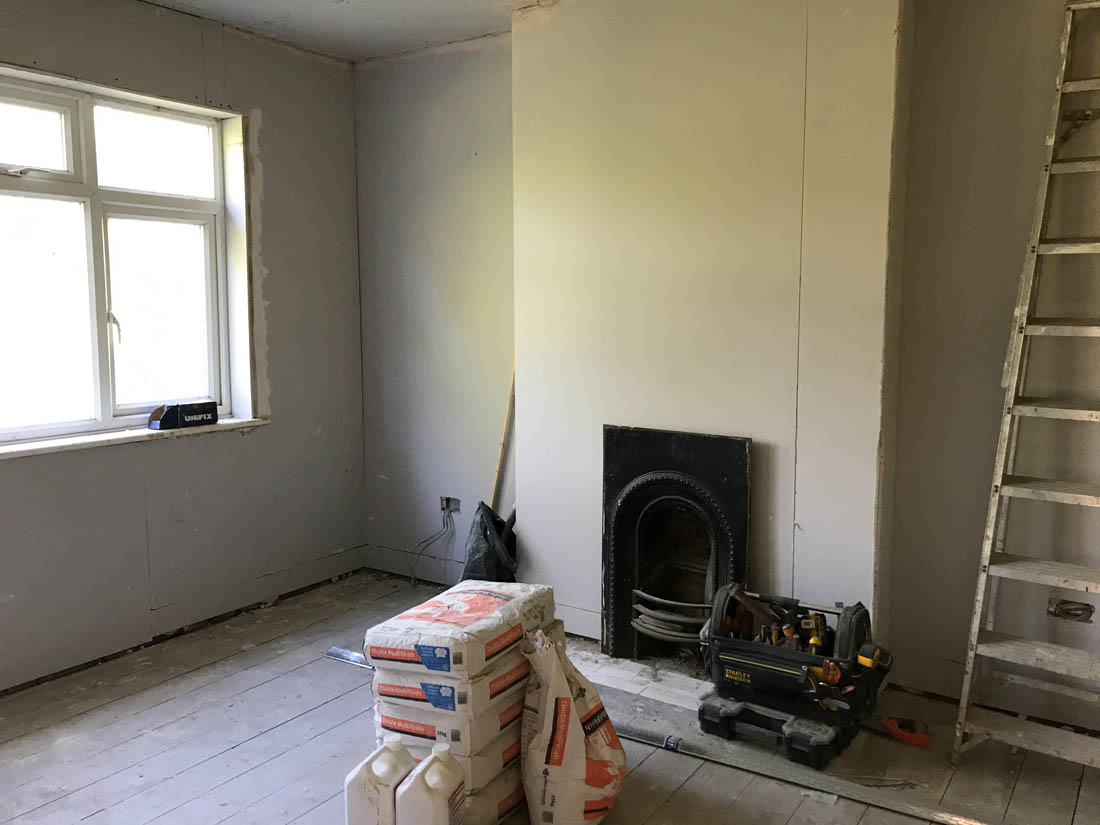
And during the works…

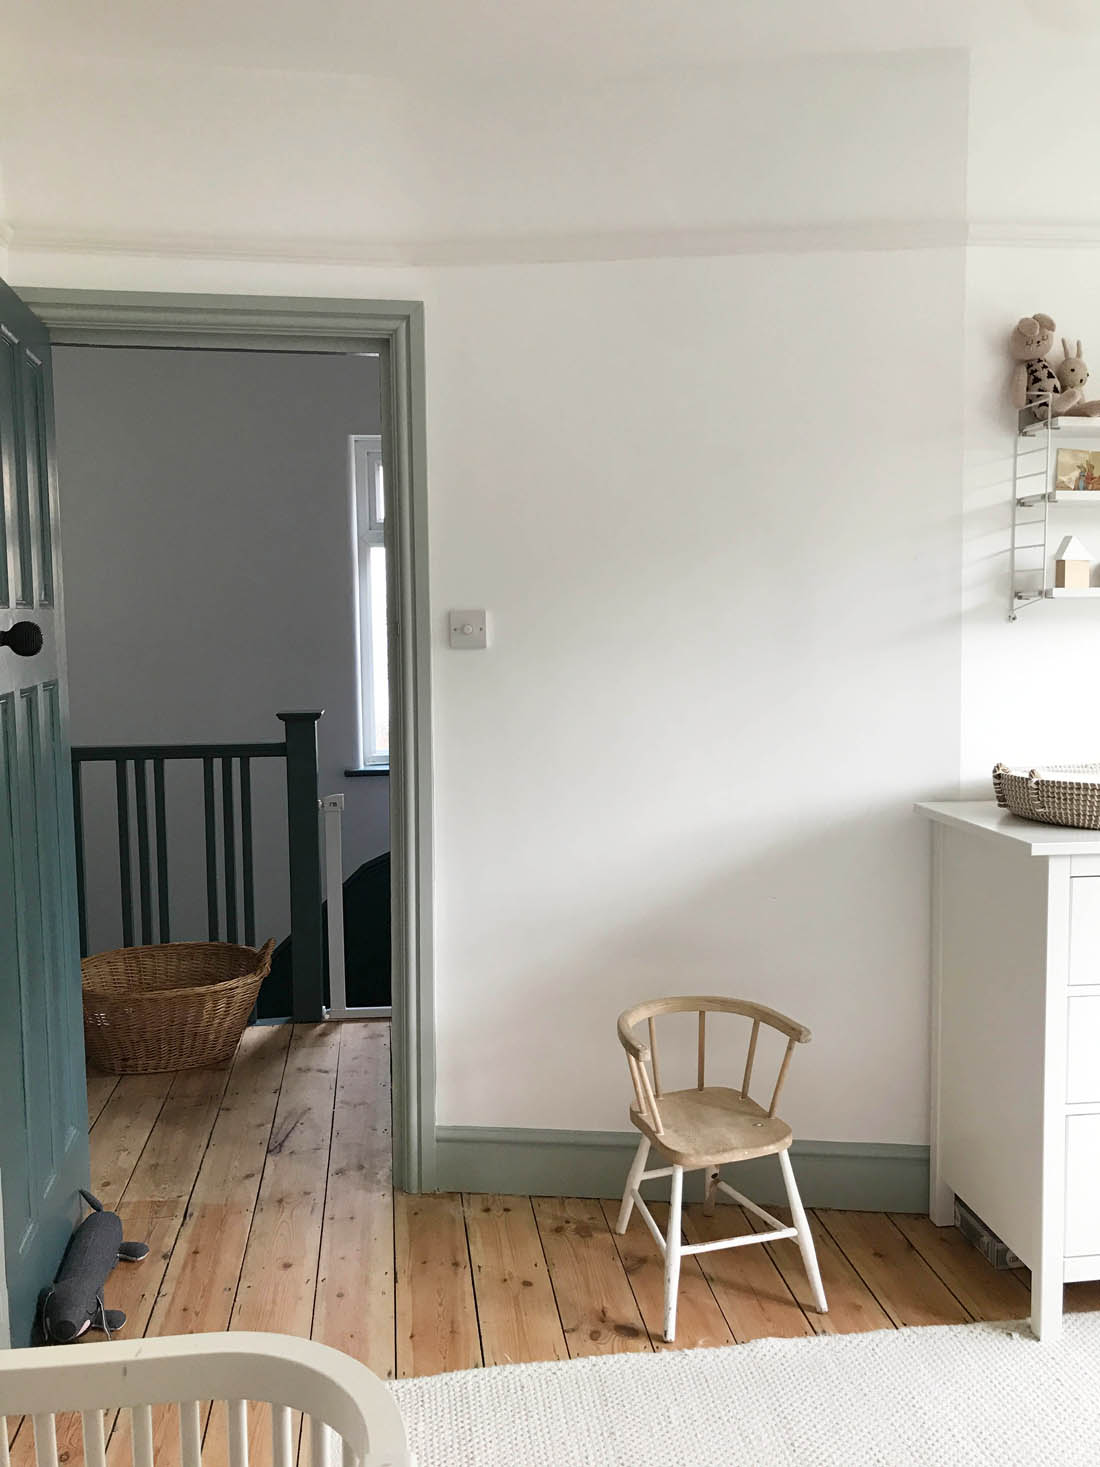
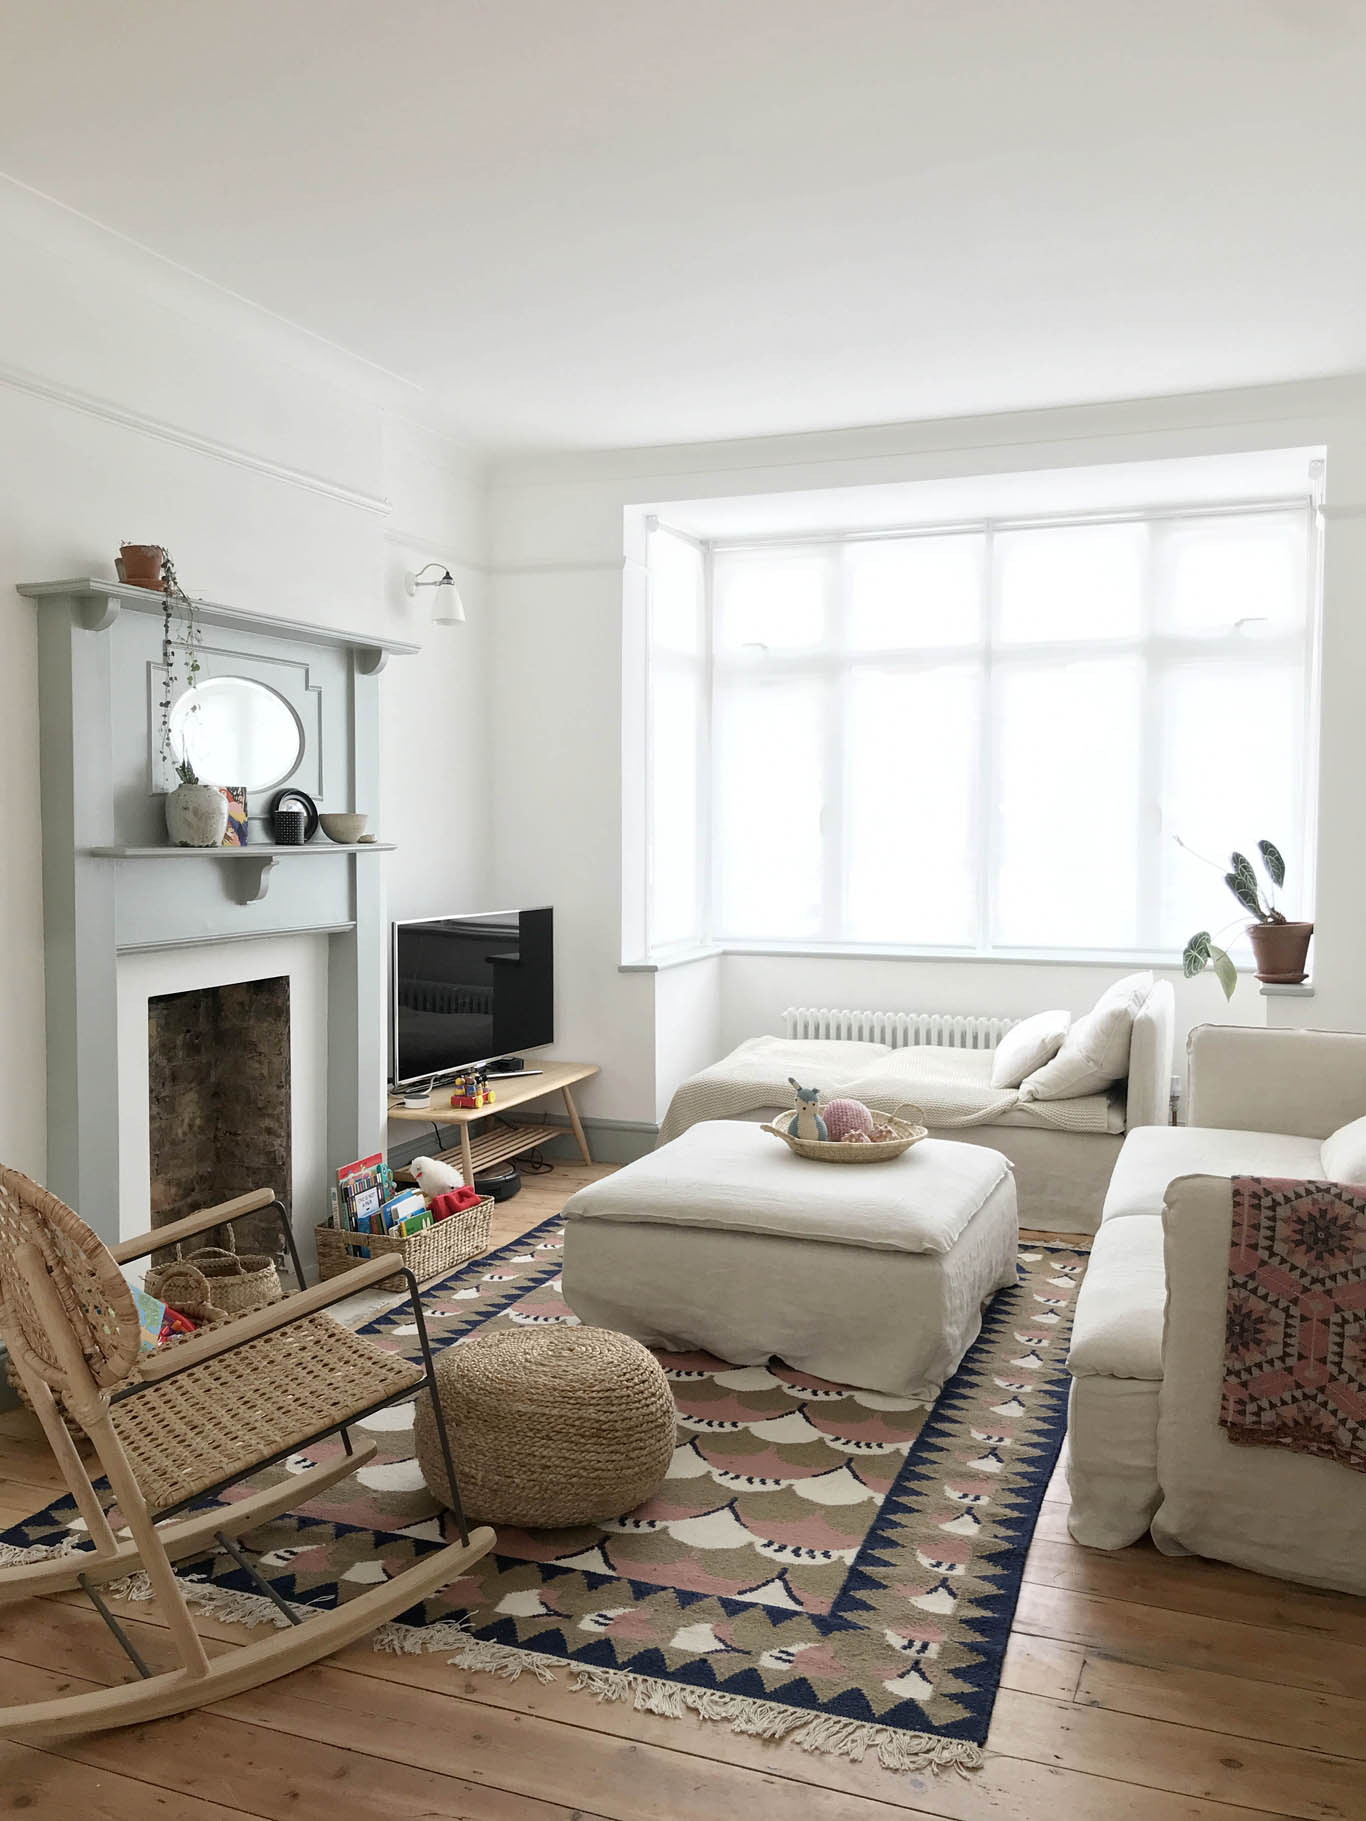
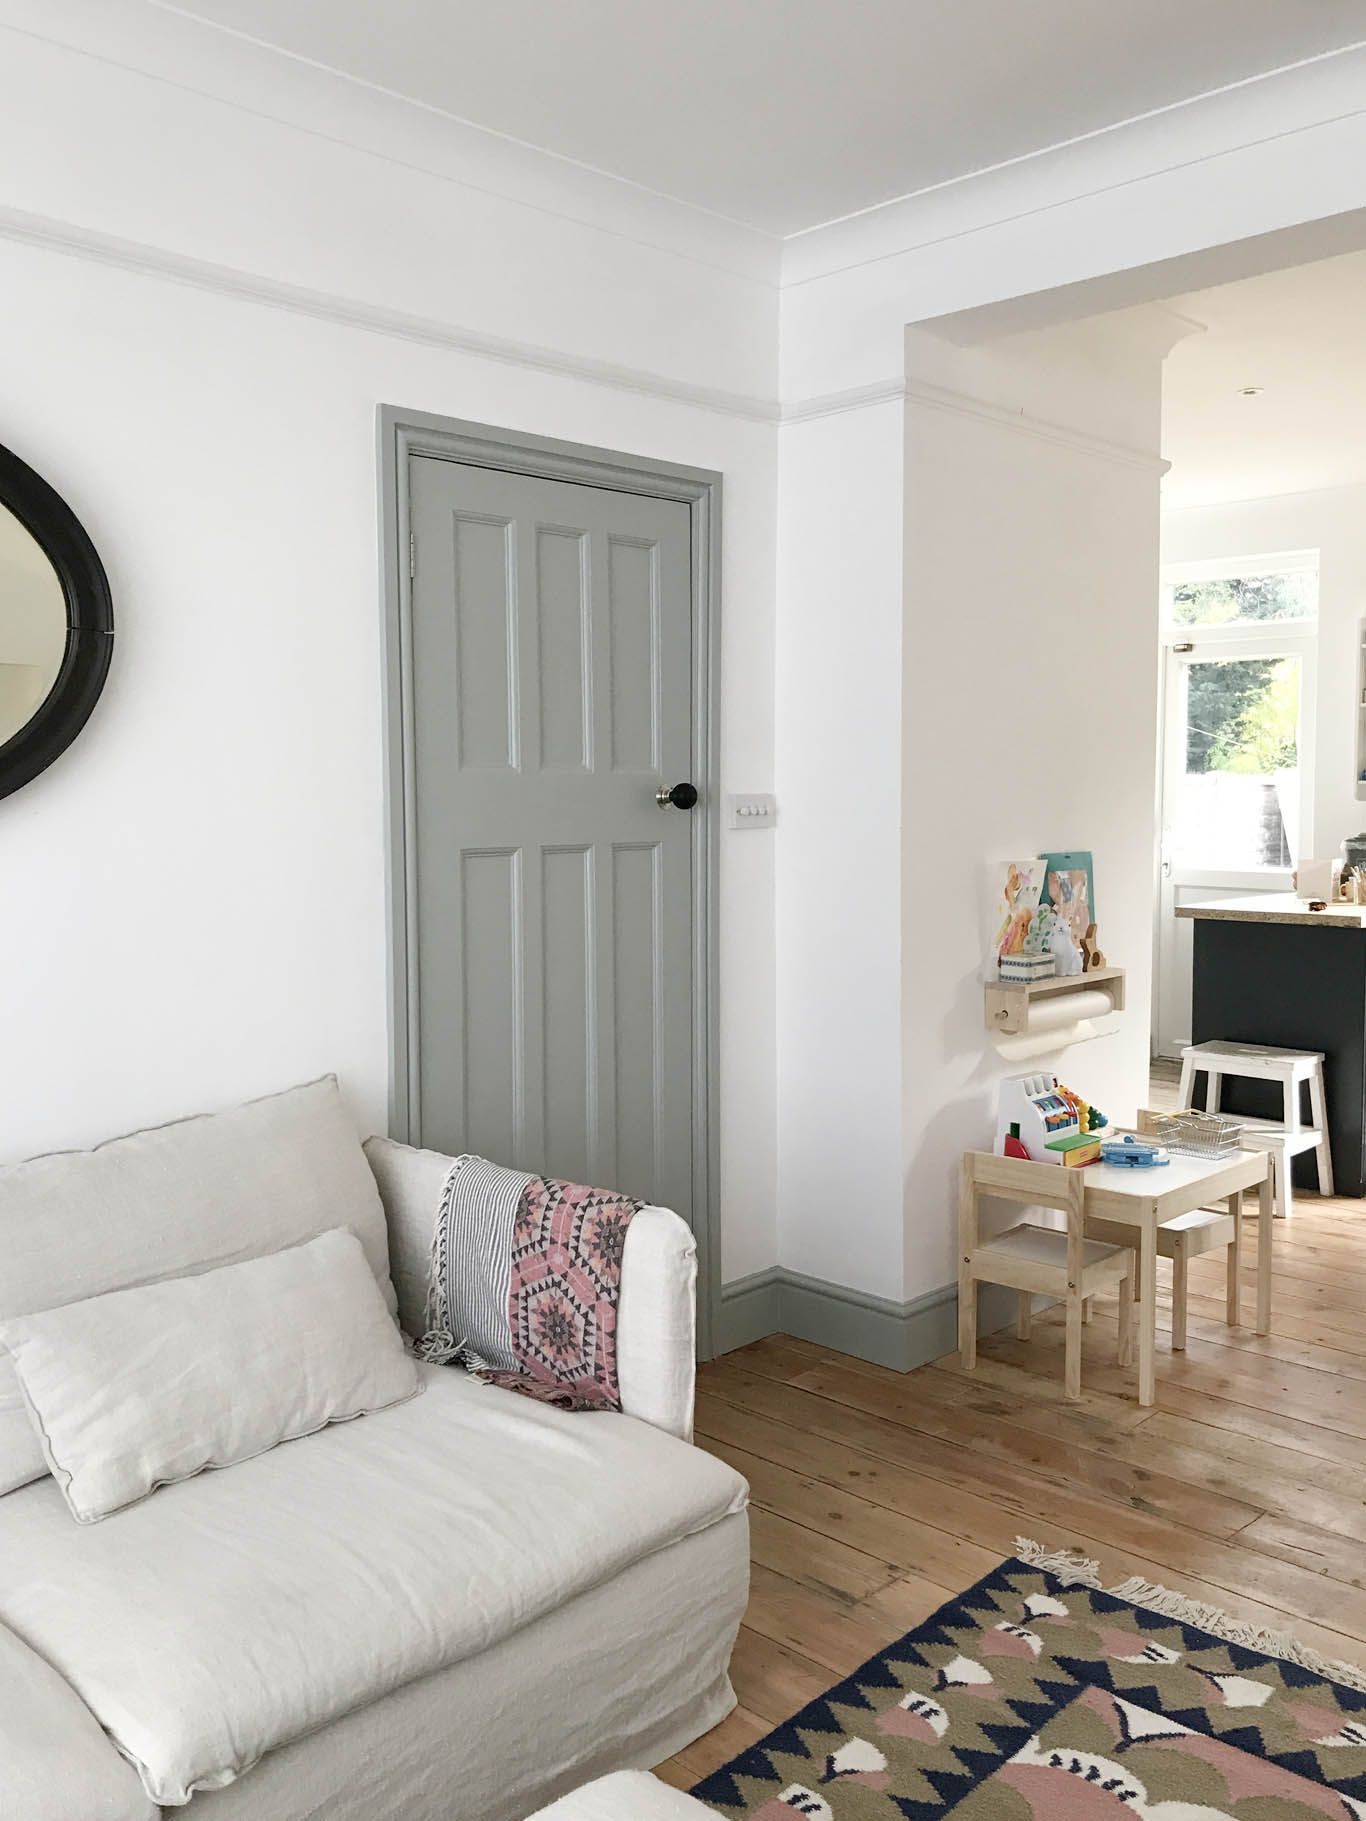
Compared to what the room was like I am very pleased with where we have got to so far…

Basically, I love the bed (such a fab ottoman bed from Button & Sprung that is loaded with clothes in the absence of wardrobes – I will do a full blog post about it because I wish I had always had one of these), the bedding, the lights, the fireplace, the radiator, the colour of the walls (although I regularly think about changing it already!!) and the mirror. In order to make the room feel more ‘me’ and to make it work better on a practical level the alcoves need inbuilt cupboards, the walls need artwork and pictures, I must make a decision on bedside tables one of these days and I need a piece of furniture on the wall on the left as you come into he room. But, you know what? All in good time. I hate rushing decisions on these things as I always regret it and I know I will find exactly the right things if I am patient. Watch this space!

In the meantime I have added a few little Christmas touches to the room that were kindly gifted to me by Cox & Cox and I have taken a few snaps to show you how the room looks at the moment…

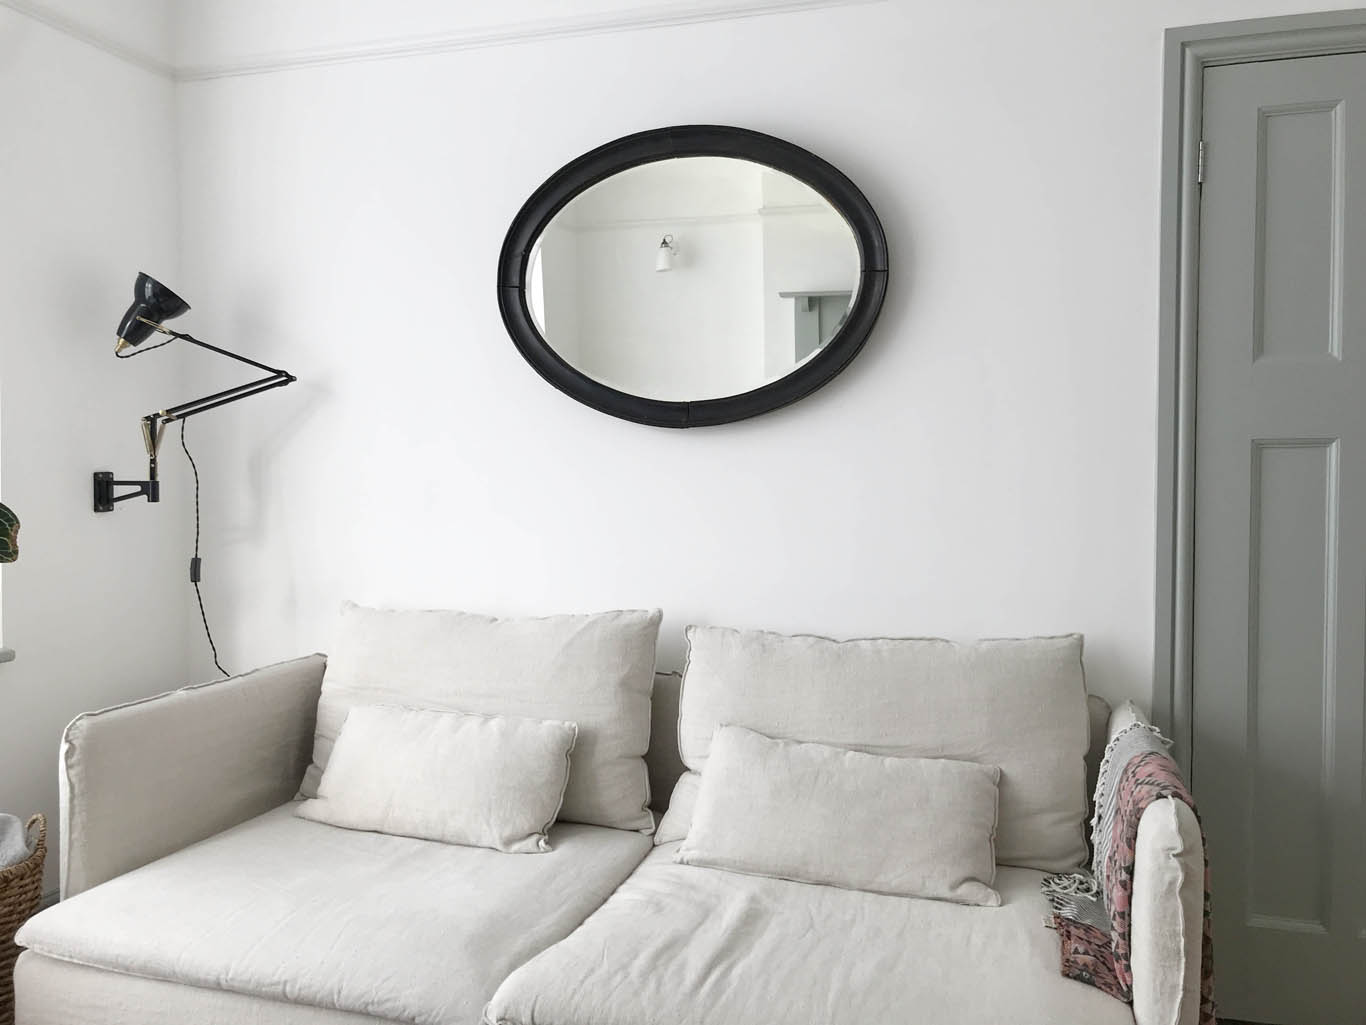
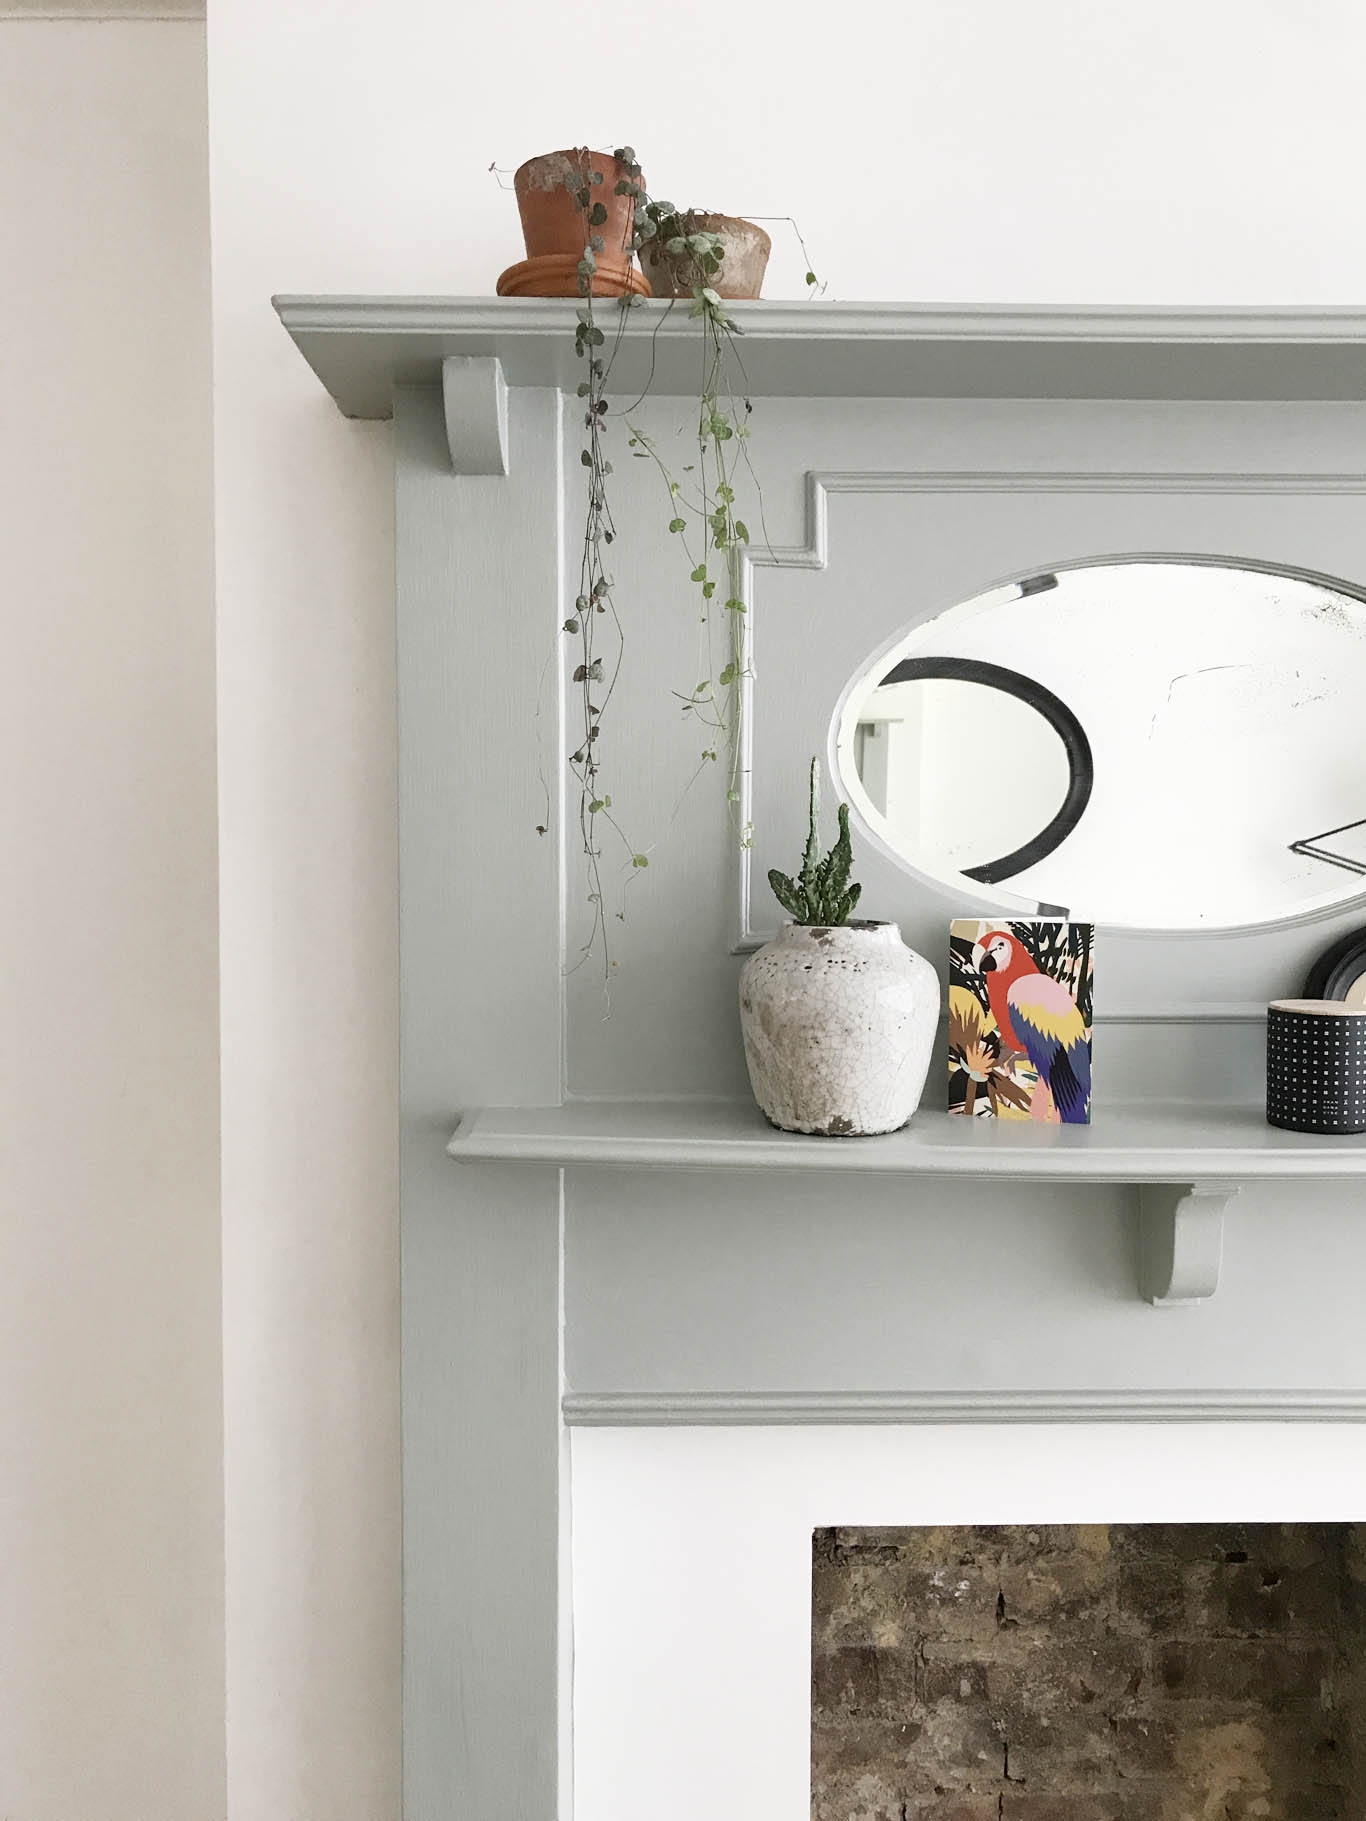
I salvaged the fireplace from another local 1930s house and I’m so pleased with the character it has added to the room. The vintage bevelled mirror is from Cox & Cox and it fits the period of the house so well. I also love the Christmas lights which Mimi loves and every morning asks for ‘Christmas lights on! Christmas lights on!’

The ottoman bed (Burdock headboard in Linen coloured plain viscose linen fabric) from Button & Sprung is proving to be the perfect choice for this room as it gives us SO MUCH extra storage. I’m not sure what we would have done without it to be honest. The bedside lights are made by Anglepoise and made of ceramic so they emit a lovely soft light. The room is very small so we need smallish bedside tables, which is why we wanted to save space with these lights instead of table lamps. I look forward to finding artwork to go above the bed and finally settling on some bedside tables!

I bought the blind from John Lewis and it is the Steel linen black out Roman blind. I think it’s a good choice as it doesn’t take up lots of space in this small room. It also ties in well with the charcoal light cables, pillow cases and the stripe on the quilt (also from Cox & Cox but no longer available). This quilt has totally changed the way I see the room and made it feel so much better. I alternate the white linen with the beautiful rose coloured cotton bedding from Bedfolk that you can see on my Instagram.

The wall colour is Light Blue from Farrow & Ball and all the woodwork and above the picture rail is brilliant white.

A makeshift rail and chest of drawers fill the alcoves at the moment but we have two original 30s doors from the house that we will use to make fitted wardrobes.

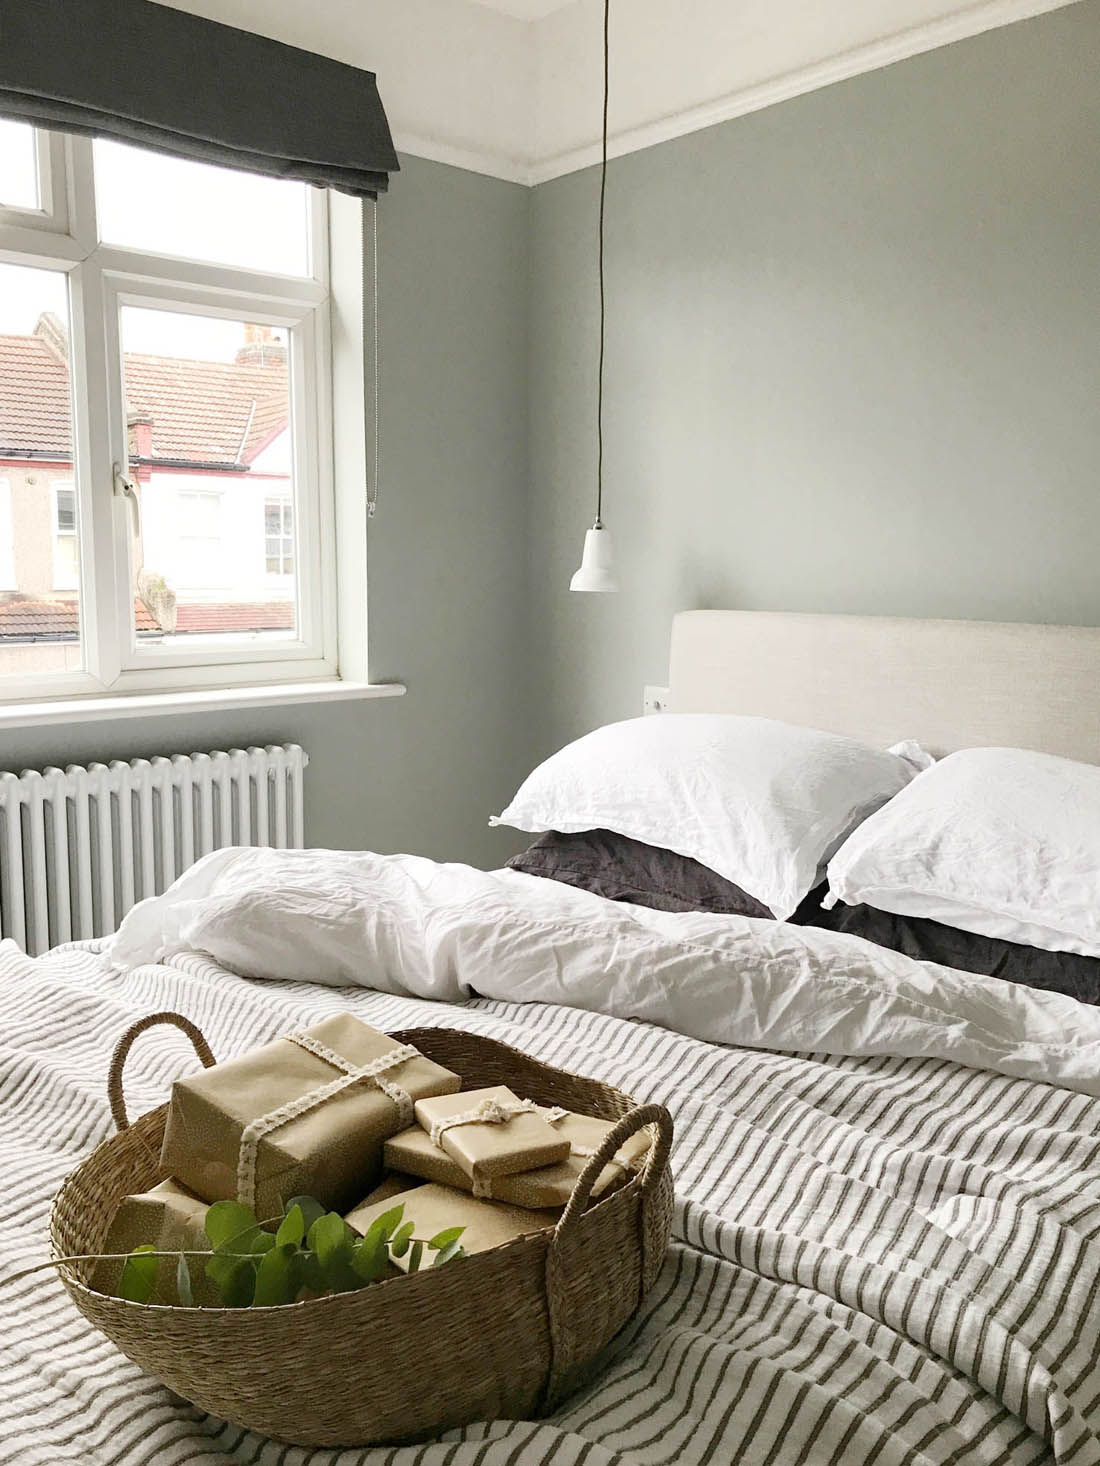
Baskets | Wrapping paper | Tassle ribbon 

I am  in LOVE with these shallow baskets (see a selection of the other equally beautiful baskets here) that are going to be so useful around the house and they are a great shape for everything from blankets to toys.  I’m going to use them to put the presents in under the Christmas tree.

So, lots to do but all the fun stuff! I really look forward to adding to this room over the coming months and making it much cosier and more practical.

Katy x

Mimi’s room before and after

I’d say Mimi’s room is the only room in the house that is basically finished. The reason for this is that we pretty much lifted everything that was in her old room and placed it all in this new room and it all fitted and worked really well. In fact, the paint on the woodwork is what we used in her nursery in our flat and is what inspired me to use it throughout our new house as I loved it in her room so much. The only real difference in here is that the daybed has moved to our third bedroom and I have to say that we really miss it in here as it was where we would dress her and give her milk and read stories before naps and bedtime. Before long though the Sebra cot will extend into a junior bed so we can use that instead.

Other than that we have kept the room very neutral and there are a couple of blank walls that we can add to with book shelves and height charts and things like that. The only addition we have made is the linen canopy above her cot that my mum bought Mimi for her 1st birthday and she loves it and I love the burst of colour it adds to the room.

Have a little look for yourselves…

Sebra rose canopy | Sebra cot | Vintage shelf | Hot air balloon light | Whale (no longer available but this is a close match) | Sausage dog | Luggy trolley

Princess and the Pea print | Elephant | House cushions | Animals book | Rug

We removed the laminate throughout the house including this room and as you can see above the walls were in a pretty bad state and there were foam tiles on the ceiling. There was only one electric point, the ceiling light was right next to the window, the radiator was in the wrong place and it all needed gutting.

One of the things that I wanted to do to bring some character back to the room was to knock out the fireplace as we uncovered the original tiled hearth when the laminate was removed. I actually got the fire insert from eBay for £30 (it’s Victorian, not 30’s) and didn’t bother with a surround as it’s a small room and the insert did exactly what I wanted without the need for a surround. The room is painted in brilliant white with Light Blue woodwork and the outside of the door is Inchyra Blue. The floorboards were sanded and finished with Osmo Raw oil.

Chest of drawers | Vintage chair | Print | Curtains from our old house – made to measure by John Lewis | Radiator

We completely re-plumbed the house and replaced all of the radiators as well as moving them to below the windows. I’m really pleased that we chose to spend the extra for traditional style ones.

A big difference was made by re-hanging the doors in all the rooms so that they opened onto the walls instead of out into the rooms. I also love that you get a glimpse of the Inchyra Blue from the hallway when the door is open.

Before

Changing basket | Pocket string shelf

And this is what the room looked like during the works if you are interested. In terms of the structural work we did in here it was taken right back to brick and the ceiling was pulled down.  The window lintel had to be replaced, the room was replastered and we replaced the skirting, picture rail and architrave. Take a look…

All plaster was removed.

The ceiling was removed and rebuilt and the fireplace was knocked out.

Plasterboard then went up.

The room was then beautifully plastered.

And decorated.

Our builder also sprayed the fire insert with a matt black paint that gave it a really nice finish.

So, there you have our one finished room! Hope you like it.

Katy x

Our unfinished hallway and need for storage

I hope you enjoyed having a look at our living room last weekend and as promised I want to show you the hallway today more than anything to gee me up to get this space looking and feeling a bit more finished and homely as it feels neither of those things right now.

I absolutely adore the colour that I chose for the hallway, which is Inchyra Blue by Farrow & Ball (they kindly gifted us just the paint for the hallway – not the rest of the house) and I love how it emphasises the beautiful original banisters and I chose to install a dado rail, not original to the house, to add even more of the colour (as well as hide mucky hand prints and dog scuffs). I also love the original internal doors that I chose to leave natural and I think the tone of the wood works really well with the blue (actually more green in this space).

However, the stairs are waiting for a carpet that may be a long time coming as it is SO expensive to carpet stairs and this makes the hallway feel and look very unfinished so I think we will paint them in the meantime (probably Railings, the same colour as our kitchen). Another problem is that we have a lot of shoes and boots to contend with so we are desperate for some storage as all we currently have are some hastily mounted pegs and a shelf from the old flat that don’t look great.  A lovely 1930s bevelled mirror and maybe a rug like this one and we’ll all be feeling much better about the space, I’m sure. In the meantime I’m going to show you some storage pieces from the Wooden Furniture Store that would work well in a hallway as they are kindly sponsoring this post.

Before and after

Just to give you an idea of what the hallway was like when we bought the house and how it looks today…

The hallway was very, very tired with peeling wallpaper, a horribly dirty green carpet, the woodwork was chipped and battered, the walls were filthy, the plaster was shot and the doors were painted. We completely stripped the place back to brick, replastered, re-wired with spot lights (which I HATE but we’ll talk about that another time) and re-plumbed and installed a new traditional style radiator that we painted the same colour as the walls. We had the picture rail, architrave, skirting and coving replaced as it was but I also added a dado rail, which I love for the style and practical benefits. The doors were dipped and left natural on this side (they’re painted on the other side in the living room) and I bought new handles.

My greatest sadness when we bought the house was that the previous owner had taken out the original front door. All of the other period features in the house were left alone and I was fine with the fact that that windows are uPVC but the front door makes me weep. However, as it is purely aesthetic it got pushed to the bottom of the list when it came to how we spent our renovation budget.

Future plans

This is the only storage we have as it stands – just a cheap peg rail and wall shelf that we brought from our flat and nothing for shoes and boots.

We will be carpeting the stairs in this sisal, which from previous experience is amazingly hard wearing and does not show up the dirt and wear like wool carpets can. We will also replace the front door and its frame with an original 1930s one like this, which will totally transform the feeling of the space as well as letting in more day light. For now though we are going to focus on less expensive and more practical pursuits like figuring out the storage, which I know will make this hallway a very useable and useful space.

Taking inspiration from the hallway furniture at Wooden Furniture Store, I am thinking of a storage bench that we will be able to sit on as well as storing shoes and boots. The other option is a dedicated shoe cupboard, which we may be able to fit alongside a bench as very soon Mimi’s buggy won’t be needed (sob!) so we will have extra space and she will no doubt have more shoes.

I really like having a wall mounted set of cubby holes that can be used to store mail, keys, dog leads etc. Even though this wall shelf with pegs isn’t intended for the hallway it would be perfect or a more conventional wall mounted set of coat hooks is very useful, especially if it has a shelf above.

I had ruled out a console table as I had in my mind that it wouldn’t enough storage for us but looking at this one it could work for shoes below and then all those bits that just need to be shut away in a drawer and forgotten about 😉


We will also be painting and organising the under stairs cupboards as our next job so watch this space for progress on that (our weekends are soooo fun at the moment!).

During

And just to give you an idea of what was involved in getting smooth walls, restored doors, a new radiator and re-wired lights in our hallway here are the ‘during’ pics…

So, there you are. If anyone has an extra couple of thousand pounds floating around fling them my way for some carpet and a new front door – ha!

Katy x

*This post was kindly sponsored by the Wooden Furniture Store.

Living room progress so far

Right. I’ve finally bitten the bullet and taken some snaps on my iPhone around the house to show you how it looks so far. Usually I don’t feel very comfortable sharing a room until it is finished but this house is going to be an ongoing project for us over years rather than weeks and months so even though it doesn’t look how I would like it to yet, I want to show you around now and tell you about my plans for the future. It’s certainly not a flashy or highly styled interior, mostly dictated by my simple taste but also ruled by our restricted budget. Basically all of our funds went on bringing this house back to life and up to date structurally so there wasn’t much left for furnishing the house other than what we were able to bring from our flat (well, the items that fitted as our bed and sofa didn’t!). Anyway, I’m totally happy about not being able to make it ‘perfect’ from the start as I really do think the best interiors grow organically over time and there would be no fun for me if it was all done – what would I possibly have to do if I wasn’t continuously making plans about what to add or takeaway to each room? 😉 Also, I haven’t put anything on the walls yet really so that is all to come too.

I thought it would be useful to work through one room at a time on the blog so I’m starting in the sitting room that has now been knocked through to the dining room and kitchen to make one large room downstairs but I will show you those two spaces separately as there is too much to say in one post.

Throughout the house the walls and ceilings were taken back to brick, re-plastered, re-wired, re-plumbed, painted and new picture rail, skirting, architrave and coving were added (we tried to make these as close to the originals as possible). We also removed the laminate sheeting and sanded the original boards. One day I would like a new wood herringbone floor as although I like the way the original boards look the floor isn’t insulated and can’t be except at massive expense as there is a four foot chasm under the house. Also, when the uPVC windows are due to be changed I would replace them with grey/black uPVC (as we’ll never be able to afford to reinstate wooden windows).

So, for now, the sitting room is quite pared back with brilliant white walls, Light Blue woodwork, an original 1920/30s fire surround that I bought from eBay for £60 and that was painted in the same colour as the woodwork. We still need to choose tiles for the hearth and I’m loving the Claybrook studio range and colours.

We hung sheer blinds at the windows to maximise the feeling of space and light. The radiator was moved to under the window and we chose traditional column style ones to help add to the period feel of the house. I chose not to have an overhead light in this room as I just never, ever use them and instead we have wall lights in the alcoves from Original BTC and the black angled one that you can see in the previous photo is from Anglepoise. They are all wired in so that they can be dimmed and turned on and off from the light switch on the wall by the door as you enter or leave the room. The wicker rocking chair is from Ikea and is likely to change at some point and we hope to have in built cupboards in the alcoves for the tv to sit on etc.

The main decision I had to make before we moved was choosing new sofas for this room as our old sofa was 4cm too long and the shape woundn’t have worked in the space. I knew I wanted really big comfy sofas to make the room feel welcoming and cosy but we had very little to spend. I had seen the Soderhamn range of sofas from Ikea in lots of lovely houses on Instagram but I wasn’t massively keen on the covers they are sold with as the colours weren’t ideal for the room but the price was ideal. For the three seat sofa at £450 and £295 for the chaise in the window I think they’re quite a bargain (NB the matching footstool is no longer sold in Ikea in the UK so I bought it on eBay for £50 – just search for Soderhamn footstool). I came across Bemz years ago when I didn’t have an Ikea sofa and thought their business idea was a brilliant one – they make bespoke covers and legs for any Ikea furniture so that you can personalise your sofa or armchair. They were my first port of call when I decided on the Soderhamn sofas as I knew a set of their linen covers would transform the look of the sofas and in turn the room itself. Bemz very kindly sent me a set of covers to showcase on my blog but had they not I would have bought them myself. I absolutely LOVE them. Some may think I am mad choosing the natural linen covers with a dog and toddler but these covers are fully removable and wash at 40 degrees. I’ve already washed them after Mimi climbed up onto the chaise with muddy wellies on and I can confirm that they are so easy to wash (there’s very little bulk to the fabric so they fit in the machine easily) and when you put them back on it is not a tight fit like it can be when you wash Ikea sofa covers. They don’t lose their shape or colour – you would never know it’s been washed basically. I will write a full post dedicated to them and photograph them in more detail, which will helpfully answer all your questions. In the meantime, for those of you who would like to know, my covers are the Loose Fit Urban covers in Rosendal Pure Washed Linen Unbleached.

We had all the original 30s doors dipped, which our builder organised for us at a cost of about £20 per door, and then they were either oiled or painted. In the sitting room I decided to have the inside painted Light Blue and the side facing into the hallway I kept natural. The reason for this is that the Light Blue brings a nice dose of colour to the room but in the hallway there is a lot of colour so the natural wood is a nice contrast. The door handles are these ebonised beehive doorknobs, which were the cheapest of this style that I could find. I’m very happy with them so far and I know quite a few of my friends have bought them on my recommendation so fingers crossed they will last.

Before

Here are some pics of the works as they progressed to give you an idea of what the renovation involved…

This is looking into the sitting room from the dining room once the wall was removed and before the steel went in.

The room was then completely replastered.

This is looking from the sitting room down to the dining room and the kitchen to the left to give you an idea of the whole space.

The new fire surround was installed as well as coving, picture rail and skirting to bring the period feel back to the room.

Jules started sanding the floorboards at this point. He would recommend paying someone if you can to do it as he HATED the job.

The colour then went onto the woodwork and the doors were re-hung.

After

And here we are today…

The mirror is a very old one that used to hang in my parents’ wine bar

The Soderhamn chaise fits perfectly in the bay window and Jules and I fight over who is going to lie on it every evening because it is soooo comfortable.

We are still deciding on the tiles for the hearth and we hope to install a woodturner here some time in the future. We also need to figure out storage for Mimi’s toys.

So there you have it. The sitting room as it looks today – nothing fancy and no styling. I look forward to keeping you up to date with changes and additions I make to this room over time. I will also do a more detailed post on the Bemz linen sofa covers that I was kindly gifted so keep an eye out for that.

Katy x

P.S. My next post will be about the hallway and I will publish it in a few days, promise!

Stripping the house out

It’s been a few weeks since we completed on the house and even though our contractor doesn’t start until the end of May we wanted to get a head start by stripping out the floor and plaster from the house so that we can get the electrics and plumbing redone. For various reasons we have been forced to remove most of the plasterwork (rather than just skimming over what was there) so even though brand new electrics and plumbing aren’t completely essential it makes a lot of sense to get it all done at this point whilst the house is stripped back.

This is what will be Mimi’s bedroom with the nice surprise of another original door in the loft.

The cost of paying for a skip and someone to strip the plaster has been cheaper than the quote to remove the wallpaper throughout the house so we decided not to do it ourselves – there’s just no way we could have juggled it with looking after Mimi especially as there will be so many other DIY jobs to be done along the way.

As a result of removing the plaster we will have to reinstate all the coving and picture rails but I’m very much looking forward to lovely smooth walls and perfectly positioned light switches, power points, radiators and the assurance of a brand new boiler. Apart from anything I just love being able to see the bare bones of the building and discovering original doors stashed in the loft!

Here is how the house looks now…

Downstairs

The carpet has been ripped off the stairs and I’m still not decided yet as to whether we will re-carpet them. I’m a bit worried that a carpet on the stairs will get very dirty with a dog so I’m going to think about it a bit longer. The laminate has also gone from all the floors downstairs. I am very, very pleased that the floorboards are in such a good condition as that will save us a fortune on new flooring (although a little sad I can’t justify herringbone parquet).

We are actually going to keep this side of the kitchen as it is until we have the budget to completely re-do it and push it out into an extension. This is a big compromise but I’d much rather have a brand new bathroom and make do with the kitchen as it is for a while (I know a lot of people will disagree with that preference!).

The back reception has had a lot of its plaster removed and floor stripped – we just need to get rid of the fireplace now.

The plaster in the front reception has been partially stripped as it wasn’t in too bad a condition and again we need to get rid of the fireplace although some who have seen it rather like it…what do you think?! I would like to have a wood burning stove in this side of the room if budget allows.

Upstairs

All of the ceilings upstairs have been taken down as they were plastered so long ago they need updating. Therefore we can now see right up into the loft space, which is quite amazing. We also found an original hearth in the front bedroom, which will be our room. It’s a shame that the tiles are so cracked. I think we will carpet upstairs so these will get covered up again unless I can get Jules to agree to adding a fireplace to our room. It would be purely for aesthetics but I think it would be so nice to add a bit of character back to the house.

The small bedroom has also been stripped out and it will eventually become a small guest room.

It feels very exciting to see changes happening to the house already and so much easier to visualise the space now that the previous owner’s stuff has all gone. I’ll keep you updated!

Katy x