The Garden Edit

The Garden Edit is a new online store set up by gardener, John Tebbs, who has brought together a beautiful collection of timeless pieces for, and inspired by, the garden.  If you are looking for a functional piece of art for a Christmas present this year, then you’ve found the right place. Everything is handcrafted: planters by ceramicist Pilar Wiley, copper bird feeders designed by American Vasse Vaught and made using vintage tools in the Blue Ridge Mountains of Virginia, brass and cane watering cans by Bauhaus trained designer Carl Aubock – this is no ordinary collection of products and no ordinary shopping experience.

Take a look for yourselves…

The Garden Edit. Designed in 1948, this indoor watering can is handmade from polished and patinated brass, with cane wrapped around its handle.

Designed in 1948 by Carl Aubock, this indoor watering can is handmade from polished and patinated brass, with cane wrapped around its handle.

The Garden Edit:Designed by American Vasse Vaught, the Pediment Bird Feeder is handcrafted using vintage machines and tools in the Blue Ridge Mountains of Virginia.

Designed by American Vasse Vaught, this fly-through feeder has a watertight removable copper tray and can be used as a bird bath. Made from 16oz copper, it can be cleaned to retain its shine or left to patinate.

The Garden Edit:Handcrafted by American ceramicist Pilar Wiley. These meteor planters are wheel-thrown and made from altered stoneware.

Handcrafted by American ceramicist Pilar Wiley. These meteor planters are wheel-thrown and made from altered stoneware.

The Garden Edit: Spade with Steps by Sneeboer & Zn. This spade has a turned handle made of ash and a hand-forged stainless steel blade. It has a “D” handle for ease of grip, a step to protect your boot, and a smaller, shorter blade making it perfect for turning over an allotment or decorative border.

Spade with Steps by Sneeboer & Zn. This spade has a turned handle made of ash and a hand-forged stainless steel blade. It has a “D” handle for ease of grip, a step to protect your boot, and a smaller, shorter blade making it perfect for turning over an allotment or decorative border.

The Garden Edit: Matthias Kaiser is an Austrian potter who uses unrefined materials for his ceramics and often exposes the process of making to give pieces a raw quality. This vase is made from porcelain and makes a wonderful container for long-stemmed flowers or a single twig.

Matthias Kaiser is an Austrian potter who uses unrefined materials for his ceramics and often exposes the process of making to give pieces a raw quality. This vase is made from porcelain and makes a wonderful container for long-stemmed flowers or a single twig.

The Garden Edit: Designed in 1949 by Carl Aubock and crafted from brass. This handmade piece was conceived post war when cut flowers were too expensive, allowing you to grow more affordable ivy in the house.

Designed in 1949 by Carl Aubock and crafted from brass. This handmade Ivy Vase was conceived post war when cut flowers were too expensive, allowing you to grow more affordable ivy in the house.

Such wonderful design and craft; I’m in awe.

Katy x


DIY laundry hamper

So, before I get too festive on you I wanted to share some glorious pink flamingo fabric that I was sent by designer Venture de Saboulin, who launched My Little Venture  in 2013.  Venture’s Pink Flamingo design is printed on beautiful quality cotton poplin and would be perfect for any number of sewing projects. I’ve decided to join the current craze for embroidery hoops but I’m going to use it in a slightly different way to normal to make a laundry hamper. This is very easy to make and it’s very useful because it can be hung anywhere and it takes up no floor space. Also, if you can’t sew you can just use a pillow case for this project. Bonus.

You will need:

DIY laundry hamper by www.apartmentapothecary.com

12 inch/30cm Embroidery hoop

Two pieces of fabric each measuring 52cm x 83cm

11mm Grommet and tool – I bought mine from John Lewis

Hook for the finished laundry hamper to hang on

Tutorial:

DIY laundry hamper by www.apartmentapothecary.com

1. Press a 1cm hem at the top of each piece of fabric (the short side). Then fold over and press a hem of 7cm.

DIY laundry hamper by www.apartmentapothecary.com

2. Sew the hem.

DIY laundry hamper by www.apartmentapothecary.com

3. Pin the two pieces together, hems at the top, right sides together. Sew the sides and bottom, leaving the top open.

DIY laundry hamper by www.apartmentapothecary.com

4. Mark the centre point on the inside of the bag in the middle of the hem.

DIY laundry hamper by www.apartmentapothecary.com

5. Use the grommet tool to punch out a hole, where you have marked the centre point.

DIY laundry hamper by www.apartmentapothecary.com

6. Follow the instructions on the packet to insert the grommet.

DIY laundry hamper by www.apartmentapothecary.com

7. Make sure the right side of the grommet is in the inside of the bag, as this will be the side that you can see.

DIY laundry hamper by www.apartmentapothecary.com

8. Put the hoop with the screw to one side and pull the other hoop up over your bag so that the hem is folded over the top.

DIY laundry hamper by www.apartmentapothecary.com

9. Place the other hoop over the top and fasten the screw. Make sure you line up the screw and the grommet.

DIY laundry hamper by www.apartmentapothecary.com

10. Fix a hook in place and you’re done! Do you like my new chalkboard door in the bathroom?!

Thanks again to Venture for the beauteous fabric. Do pop by the My Little Venture site – Venture’s other designs are just as charming as the pink flamingos.

Katy x


Handmade Christmas

Call me crazy, but my mission this year is to make handmade gifts for everybody this Christmas! Not only are these gifts more cherished but making and creating really gets you into the festive spirit – if it’s a toss up between an afternoon on the high street or a craft session, I know which I would choose every time.

I’ve been inspired by The Amazings (did you see my previous post about this brilliant organisation?) to try another of their online classes to help achieve my goal. This time I went for the heirloom patchwork quilt class, led by Virginia. Admittedly, I took lots and lots of shortcuts (such as buying the hexagons ready-cut from Liberty!) but I got there in the end. This is my hand sewn cot quilt that one lucky little kinder will be getting this Christmas:

How to make a cot quilt by www.apartmentapothecary.com

Find out more from The Amazings about why you should go handmade this year and check out the cute pug in this video they’ve made…

Have a browse on The Amazings website and give one of their online classes a try – or why not buy a class for someone for Christmas?!

Thank you to The Amazings and to Viriginia for the brilliant hand-quilting class; I’m going to find it really difficult to give that little quilt away.

Katy x


Vintage cottage

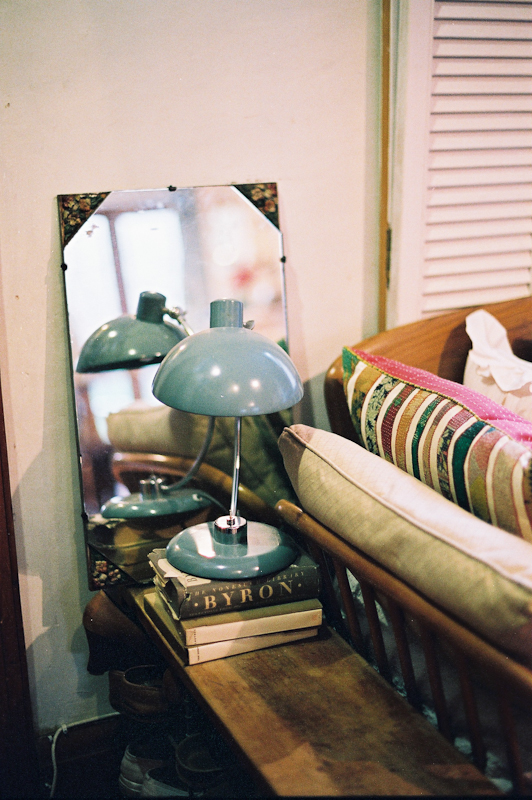
I’m delighted to share some photographs today of one of my all time favourite homes. Katharine Peachey of Peachey Photography lives in Lime Tree Cottage in Greenwich and it is filled to the brim with her beautiful furniture and vintage finds.  In every corner there is something that grabs your attention or attracts the eye and she has an enviable ability to style her home in such a unique and organic way, which so many aspire to (including myself). Working with Katharine on home tours is an absolute delight as we ogle over amazing homes together and her genuine passion for interiors shines through (see a home tour we did together here).

Katharine has taken some shots of Lime Tree cottage herself; they are all from different days, seasons and times but they come together to create a beautiful, orignal collage. As always, her photography is stunning and all shot on film (find out why she shoots on film here), which lends itself so beautifully to her wonderful home. Enjoy and be inspired…

Vintage cottage home tour. Photography by www.peacheyphotography.co.uk

The cottage has a double reception room that leads onto a kitchen at the back of the house.

Vintage cottage home tour. Photography by www.peacheyphotography.co.uk

The kitchen is full of gorgeous vintage finds displayed for all to see, which gives the kitchen character and warmth.

Vintage cottage home tour. Photography by www.peacheyphotography.co.uk

Vintage cottage home tour. Photography by www.peacheyphotography.co.uk

Vintage cottage home tour. Photography by www.peacheyphotography.co.uk

Vintage cottage home tour. Photography by www.peacheyphotography.co.uk

Vintage cottage home tour. Photography by www.peacheyphotography.co.uk

Lovely original floorboards run throughout the downstairs of the cottage and there is a beautiful Ercol daybed in the sitting room (I have wanted one these for years!).

Vintage cottage home tour. Photography by www.peacheyphotography.co.uk

Vintage cottage home tour. Photography by www.peacheyphotography.co.uk

Vintage cottage home tour. Photography by www.peacheyphotography.co.uk

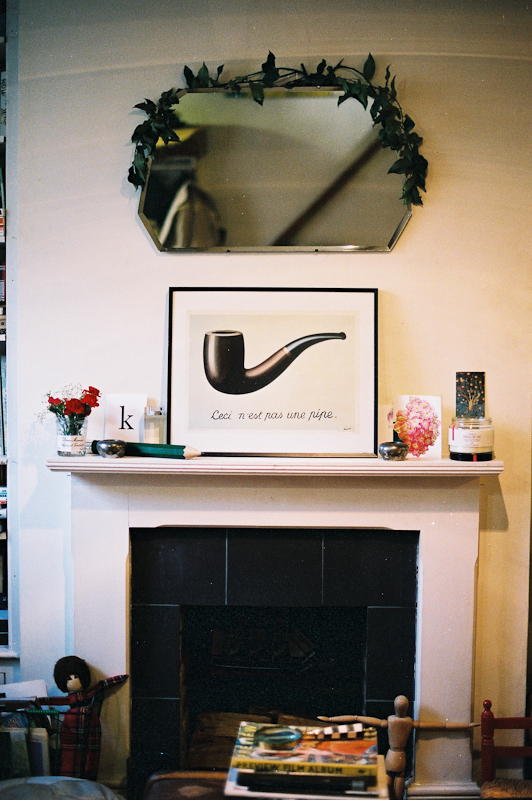
There are two period fireplaces in the double reception room that have been beautifully styled by Katharine.

Vintage cottage home tour. Photography by www.peacheyphotography.co.uk

Vintage cottage home tour. Photography by www.peacheyphotography.co.uk

Vintage cottage home tour. Photography by www.peacheyphotography.co.uk

Vintage cottage home tour. Photography by www.peacheyphotography.co.uk

Vintage cottage home tour. Photography by www.peacheyphotography.co.uk

Vintage cottage home tour. Photography by www.peacheyphotography.co.uk

The bedroom is light, bright and filled with vintage furniture and pictures.

Vintage cottage home tour. Photography by www.peacheyphotography.co.uk

Vintage cottage home tour. Photography by www.peacheyphotography.co.uk

Vintage cottage home tour. Photography by www.peacheyphotography.co.uk

Vintage cottage home tour. Photography by www.peacheyphotography.co.uk

The bathroom is simple but still feels vintage with clever touches such as the hanging mirror and enamel soap dish.

Vintage cottage home tour. Photography by www.peacheyphotography.co.uk

Vintage cottage home tour. Photography by www.peacheyphotography.co.uk

Vintage cottage home tour. Photography by www.peacheyphotography.co.uk

Katharine’s desk is a sweet 1950’s kitchen table.

Vintage cottage home tour. Photography by www.peacheyphotography.co.uk

There’s also an idyllic cottage garden.

Vintage cottage home tour. Photography by www.peacheyphotography.co.uk

Vintage cottage home tour. Photography by www.peacheyphotography.co.uk

Thank you, Katharine, for the stunning photographs. To see more of Katharine’ s film photography drop by her website www.peacheyphotography.co.uk.

Katy x


How to make a dried hydrangea wreath

I am very excited to introduce my very first guest blogger here at Apartment Apothecary! The lovely Tamsyn has a passion for all things vintage and shares all her beautiful finds over on her blog, The Villa on Mount Pleasant. She also loves shabby chic style and is the co-owner of  The Rustic Rose, beautiful French style hand-painted furniture. I saw a tweet she wrote about collecting hydrangeas to dry and I jumped at the chance to ask her to show us how to make a dried hydrangea wreath. I can not wait to make my own! Over to you, Tamsyn…

Hello everyone! My name is Tamsyn and I blog over at The Villa on Mount Pleasant.  I was so delighted that Katy asked me to write a guest post for Apartment Apothecary, as her blog is such an inspiration to me! Here’s my tutorial for making a hydrangea wreath…

Hydrangeas can be bought cheaply enough from markets or car boot fairs, and it’s worth getting a couple to plant out in the garden, as the flowers turn beautiful faded colours in September, and look fantastic dried and placed in big zinc florist buckets.  If you don’t have any dried hydrangea heads, you could use ivy, dried roses, berries, pine cones, seed heads, artificial flowers – anything really!

Dried Hydrangea wreath tutorial

You will need:

A natural rattan wreath (I got mine from Hobbycraft)

Dried hydrangea heads

Thin pliable wire

Ribbon of your choice

Scissors

Dried Hydrangea wreath tutorial

Tutorial:

1. Take your dried hydrangeas, and trim the stalks right down to the flower heads.  I roughly planned out my wreath by placing the heads on the wreath, and working out where I wanted to put them according to colour and shape.

2. Cut a length of wire approximately 30cm long.  Thread it through the flower head just above the cut stalk, and then attach the head to the wreath.  Wrap the wire round the wreath and twist it together at the back to fasten it.  Don’t trim the wire yet, as you may decide you want to take it off and reposition your flower once you have more heads on.

Dried Hydrangea wreath tutorial

Dried Hydrangea wreath tutorial

3. Work your way around the wreath fastening your heads on with the wire.  As I didn’t have quite enough full heads to complete my wreath, I used smaller heads clustered together to fill the gaps.

Dried Hydrangea wreath tutorial

4. Once my wreath was covered I had some smaller gaps to fill, so I took some of my large individual petals, and twisted the top of a piece of wire approx 15cm long around the stalk.  I then threaded  the wire through from the top of the wreath through to the back, and fastened by twisting it round the rattan.  Berry sprigs would look lovely dotted around too, using this method.  At this point, I kept my wreath looking quite rustic – maybe I could have trimmed some of the heads a little to make more of a perfect circle shape, but I didn’t want  to get in a tizz about it – rustic is good!

Dried Hydrangea wreath tutorial

Dried Hydrangea wreath tutorial

5. Finally, cut a piece of ribbon, and choose where you would like the top of your wreath to be.  A wide piece of vintage lace would look lovely too.  Thread the ribbon through the rattan and tie in a knot to make a large loop.

Dried Hydrangea wreath tutorial

Thank you so much Tamsyn for being my first guest blogger! This is such a beautiful idea and definitely one I am going to try for Christmas.

Make sure you drop by Tamsyn’s blog for lots of vintage inspiration.

Katy x