Fabric panelled doors

So far, I have re-styled my dressing table, changed the pictures on my bedroom wall and planted some indoor bulbs, which are numbers 4, 7, and 10 on my list of ways to rejuvenate my home in the new year. I’m on a roll!

Number 8 on the list requires a bit more work as it is a furniture makeover, of which I did a few last year. I do have a cupboard in my sitting room that requires a little love and attention and I’m toying with the idea of lining its panels with fabric. I’ve found some gorgeous examples (for the vintage lovers out there) from other beautiful blogs and I wanted to share them with you as I think it can be such a versatile, subtle way of changing a piece of furniture. The bonus being it’s a different way of displaying your favourite fabric, too.

What do you think?

Fabric panelled cupboard doors by www.apartmentapothecary.com

Image from the beautiful Cinq Mai blog.

Fabric panelled cupboard doors by www.apartmentapothecary.com

Cinq Mai blog.

Fabric panelled cupboard doors by www.apartmentapothecary.com

Image from the wonderfully unique Dottie Angel blog.

Fabric panelled cupboard doors by www.apartmentapothecary.com

Image from a cute nursery tour on Fawn and Forest.

Fabric panelled cupboard doors by www.apartmentapothecary.com

Image from Dottie Angel’s blog.

Happy Thursday and have a good weekend!

Katy x


Planting indoor bulbs

At this time of year it seems more important than ever to fill my home with flowers and colour. However, buying fresh flowers every week is expensive (Jules bought me flowers every week for the first year of our relationship – wonder why that stopped!). Also, I think some people find arranging flowers, knowing what to put them in and changing the water a bit of a hassle.

Planting bulbs indoors is the answer. They are so easy to plant, need no care other than a few turns so they don’t grow towards the light and the flowers last far longer than freshly cut ones.

I’ve decided to plant some this year in some of my tea cups, jugs, jars and old tins as it means I can have these on display too – bonus. If you want to do the same, you need to use a Bulb Fibre compost that has lots of fibre and charcoal in it as this allows the water to drain otherwise the roots will rot in a container with no holes.

How to grow bulbs indoors by www.apartmentapothecary.com

How to plant indoor bulbs in tea cups by www.apartmentapothecary.com

Here’s a quick run down for you of how I planted each different type of bulb:

Hyacinth – you can plant these bulbs with no compost. If you don’t have a hyacinth vase, use a jam jar. Pop some pebbles to about half way up and place the bulb on top. Fill with water to just below the top of the pebbles so the bulb is just touching the water. The roots will grow and fill the jar so this looks really pretty. Keep the jar topped up with water, never filling it beyond the base of the bulb.

How to grow bulbs indoors by www.apartmentapothecary.com

Crocus – these bulbs need very little compost as they have a really shallow root base. Therefore, they are perfect to be planted in shallow tins, serving dishes or bowls. Plant them so that you can see their shoulders. I’ve used a small enamel dish and a soup terrine for mine.

Daffodils – if you are planting these outside, you would plant them at least 10cm below the surface. However, inside plant them just below the surface. I’ve used a tea cup for mine.

Muscari (grape hyacinths) – these need a deeper container to grow in as they have a larger root structure to the other bulbs so I’ve used a deep cake tin and a jug. Plant them close together and just below the surface of the compost.

How to grow bulbs indoors by www.apartmentapothecary.com

Snow drops – plant them just below the surface of the compost.

Freesias – plant them just below the surface of the compost and don’t crowd them.

Remember to turn them every now and agin to stop them from bending over backwards towards the light, and keep the soil moist but not flooded.

For far more detailed and expert advice have a look at these articles written by Sarah Raven: The Inside Job Part 1, The Inside Job Part 2, The Inside job Part 3.

How to plant indoor bulbs in tea cups by www.apartmentapothecary.com

Happy planting!

Katy x


Re-styling my dressing table

This week I shared some ideas about how to rejuvenate your home for the new year, without needing to spend money or too much time. I decided to put some of my own advice into action, which I hope will help you as it’s much easier, I find, to make changes if you can see what someone else has done. The idea is that we get so used to our homes the way that they are, that it’s very easy not to change anything for years. However, just by swapping a few things around, moving objects and adding some flowers, it can feel as though your whole room has had a makeover. Plus, your space becomes more functional as we can clear out stuff we don’t need, or no longer use, in the process.

I am very embarrassed to show the ‘before’ shot because I hadn’t realised quite how messy my dressing table and the area around it had become because I see it every single day. A really good tip is to take a photo of your room or a corner of your room – if you wouldn’t want to show that picture to anyone else, then perhaps it’s time to make a change. Just saying!

Before…

How to re-style your dressing table by www.apartmentapothecary.com

There is so much ‘stuff’ on my drawers that I really don’t need to use on a daily basis. Also, the lamp is too large, the headbands hanging on the mirror look messy and the fan is just randomly dumped there. I need to get rid of the mirror that’s ‘hiding’ under the drawers and put up the hooks that are waiting patiently to be seen to on the basket. The Lloyd Loom laundry basket needs to live somewhere else as it looks too big and clunky there. I want to re-frame the precious family pictures around the mirror and hang them elsewhere so I need to find something to replace them.

After…

How to re-style your dressing table by www.apartmentapothecary.com

Ta da!

The mirror from underneath the drawers is gone, as are the hooks and the laundry basket has been swapped with the Singer machine my kind neighbour, Kate, recently gave me (love it!). Just these changes make the space look tidier and more stream-lined. I’ve also swapped the lamp that I had in my craft room into here as it is a better size and the colour is perfect. It’s the Little Dane lamp from Loaf, if you’re interested.I’ve cleared all the clutter from the table top, which makes life easier as more space has been created. If you’re worried about getting rid of stuff, keep it in a box for a week – if you don’t need it in that time, chances are you may not need it at all.

I’ve also framed some vintage educational wall charts from a second hand book that I bought on Amazon for £9 (it’s called The Art of Instruction), which was my only expense. I just used 50p clip frames so, all in all, it cost very little indeed.

How to re-style your dressing table by www.apartmentapothecary.com

Clearing the top of clutter will make my dressing table so much more functional.

How to re-style your dressing table by www.apartmentapothecary.com

Adding fresh flowers does wonders.

How to re-style your dressing table by www.apartmentapothecary.com

I’ve added a vintage Burleigh ware bowl to the dressing table for any loose ‘bits’ like hairbands, grips, make-up etc.

The one thing I would say is that if you are planning to do as I did and swap things around in your home, like the lamp and laundry basket, do make sure that you know where you are going to put them before you move them. Otherwise, you will just end up messing up another corner of your home.

Happy styling!

Katy x


Rejuvenating your home

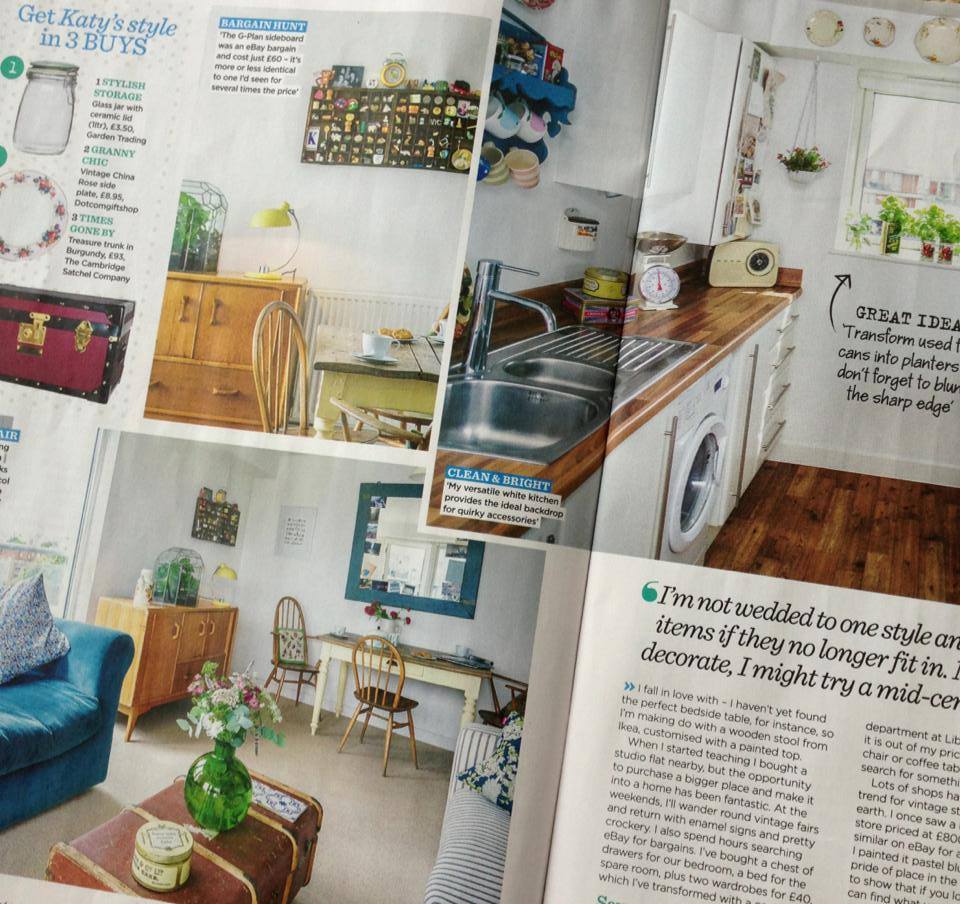
Ergh. This is how I’ve been feeling for the last week or so. I did way too much over Christmas and new year and then straight back to work so I feel totally exhausted, which is not what I hoped for at the start of a new year when I’m supposed to be starting afresh. I’m looking forward to the weekend when I can get back on track and catch up with myself a bit.

I don’t know about you, but one of the things I always like to do at the start of a new year (are you sick of resolutions talk yet?) is to try and de-clutter a bit and find some quick and inexpensive ways to rejuvenate my home. I recently saw photographs of a house in Stoke Newington, that is used for photo shoots (hence the absence of any ‘stuff’), and it made me crave a more stream-lined approach at home and to change things around. It got me thinking about some easily achievable things we can all do, that can take minutes and most require no money, to give our homes a fresh new start for the year. I find that even changing the smallest thing in a room can make all the difference and bring a room back to life…

1) Style a set of shelves differently.

Swap things around, find bits from around the home to replace objects, add a lamp or a plant.

2) Change the cushions on your sofa.

This can instantly change the look in your sitting room and, if you can make them yourself, doesn’t cost too much.

3) Reupholster your dining chairs.

I learnt how to do this last year and it is so much easier than you think!

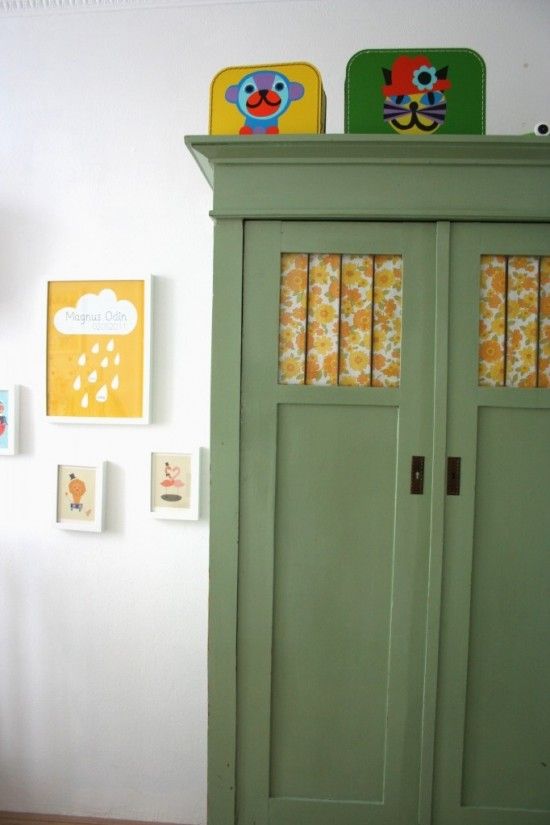
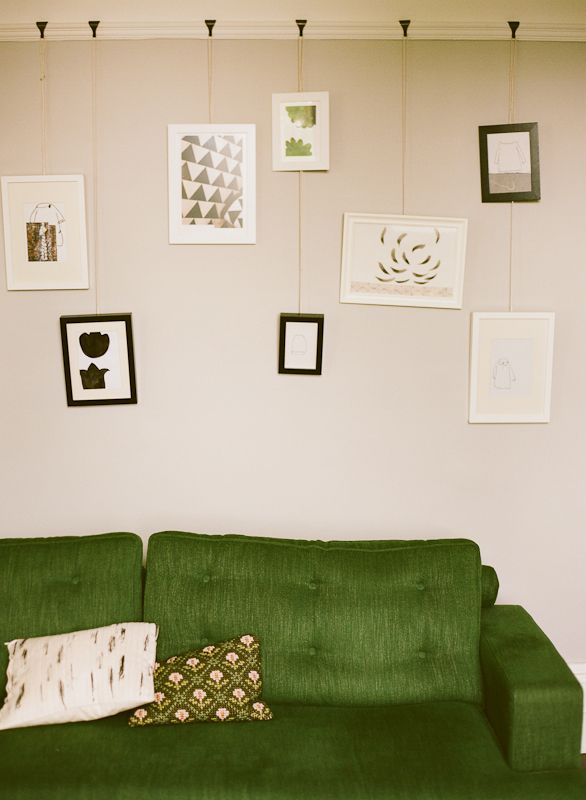
4) Change the pictures on your walls.

Either swap them with others from around the house or display them in a different formation.

5) Print a pattern onto a plain curtain, blind, cushion or lampshade.

Use a lino cut or even a potato to customise plain textiles in your home. This could change the whole feel of a room.

6) Clear up your noticeboard.

Take everything off, have a good throwaway and start again.

7) Style your bedside table or dressing table differently.

Either de-clutter or find objects from around the house to replace the ones that have been sitting there for years.

8) Do a furniture makeover.

You could paint a piece of furniture, sand it back to wood, cover it in fabric, line it with wallpaper.

9) Buy new bedlinen in the January sales.

This instantly lifts any bedroom and is key to a bedroom makeover.

10) Plant some indoor bulbs.

Use pretty containers or tea cups to plant bulbs so that there is some much needed colour in the house.

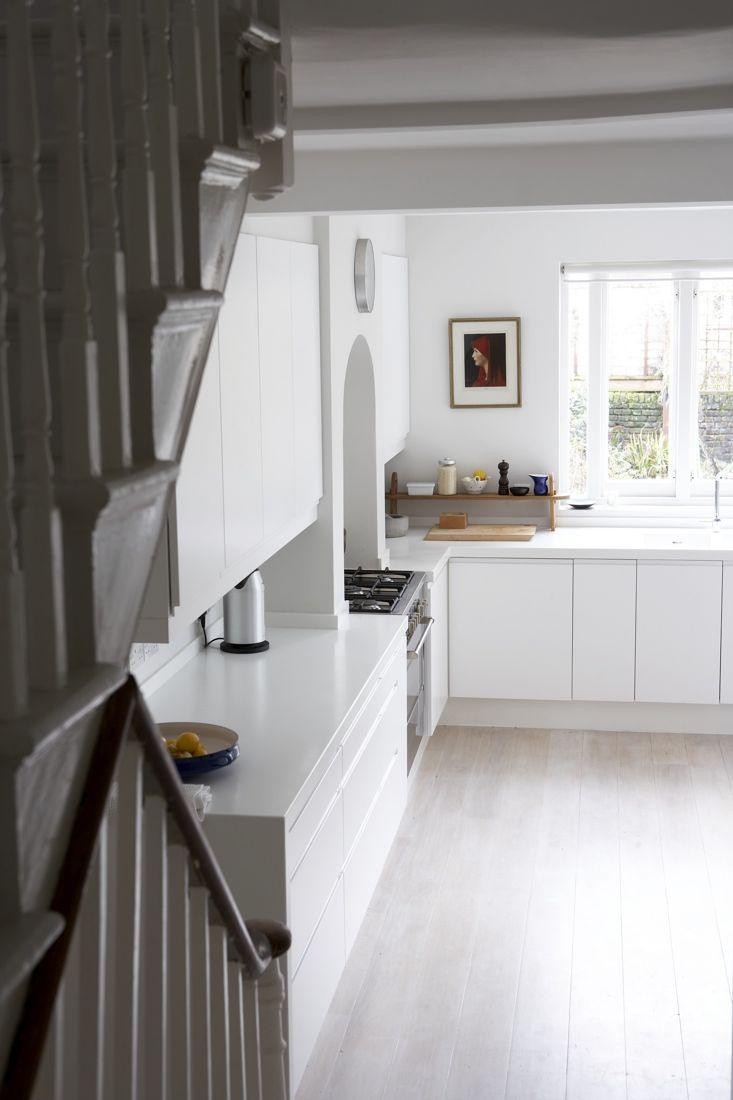
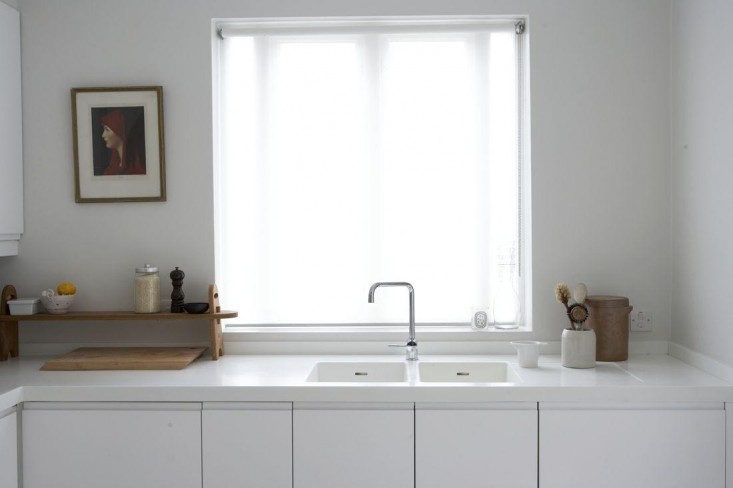
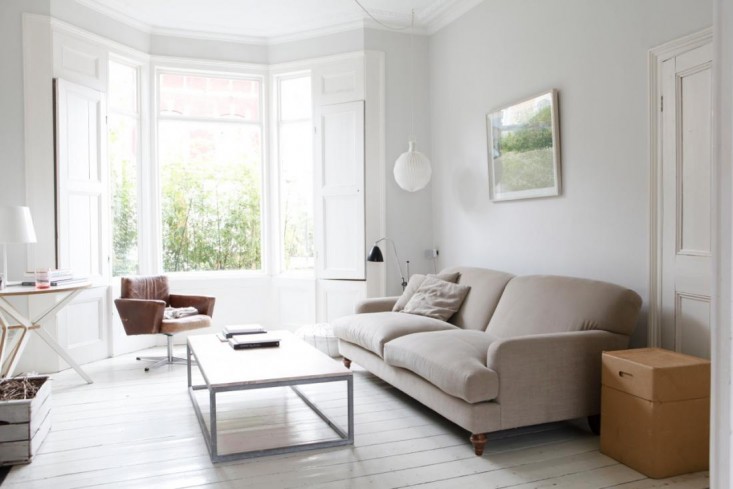
Do any of these ideas appeal to you? Have a look at these photographs, courtesy of JJ Locations, that inspired me to want to change a few things around in my constant quest for a light, organised, de-cluttered home (although, obviously not to the extent  of this minimalist ‘locations’ house!)…

London Victorian terraced minimalist home www.apartmentapothecary.com

London Victorian terraced minimalist home www.apartmentapothecary.com

London Victorian terraced minimalist home www.apartmentapothecary.com

London Victorian terraced minimalist home www.apartmentapothecary.com

London Victorian terraced minimalist home www.apartmentapothecary.com

London Victorian terraced minimalist home www.apartmentapothecary.com

London Victorian terraced minimalist home www.apartmentapothecary.com

London Victorian terraced minimalist home www.apartmentapothecary.com

London Victorian terraced minimalist home www.apartmentapothecary.com

London Victorian terraced minimalist home www.apartmentapothecary.com

I’ll be back to show you how I get on restyling my very ‘real’ and messy  dressing table!

Katy x


2013: The beginning of my blog

I began my blog at the end of February 2013. At the time I was craving an escape from real life; a way to live out my dreams of being immersed in beautiful interiors day and night and having the time and freedom to explore my creative side. The blog became my new much needed hobby (I have never had one) and this outlet for my passion for design was totally consuming. I would come home from work, sit at the computer and before I knew it four hours had passed me by. I was hooked.

I built up a bank of posts during 2012 but didn’t have the guts to publish any of it because it wasn’t ‘perfect’ and it didn’t look as good as the professional blogs that teams of people contribute to. I wanted the perfect theme, the perfect photographs, the perfect content. That was until one evening a friend came round and told me I was being ridiculous and it didn’t matter what anyone else thought: the fact that I had loved putting the posts together was the important part.

When I finally built up the courage to publish the blog I had absolutely no idea what to expect. Yes, the initial rush of enthusiasm from my friends and family was lovely and I was deeply flattered and yes, when people I didn’t know started to make contact, sharing and commenting I couldn’t quite believe it. But, the reason I have kept at it and developed my blog is not what others think but because I have a new sense of challenge that I had lost in other areas of my life.

I originally thought I wanted to start a blog so I could collect and share my interior design ideas. However, it has become so much more than that for me. I’ve found something that I love doing just for sake of doing it. I’m not driven by money, promotion, deadlines or working towards an ultimate goal – I work on my blog for about eight hours of the week just because it makes me happy. I’ve never experienced that before and this feeling has made me see my life very differently as I’ve realised, at the age of 33, that it is possible to want to achieve something because of the means, not just the end, or even in spite of the end.

I think it is this realisation that has enabled me to throw caution to the wind and dare to expect that I can achieve some of the amazing things I have done in the last ten months connected to my blog. My 2013 highlights have been:

1) Working with my dear friend and photographer Katharine Peachey whose beautiful film photographs have added to my blog beyond measure.

Vintage cottage home tour. Photography by www.peacheyphotography.co.uk

Katharine’s wonderful vintage cottage.

2) Doing two guest blogs for Liberty.

Liberty guest blog

Liberty advent calendar bunting.

3) Interviewing designers Lisa Levis and Double Merrick.

Lisa Levis home tour by www.apartmentapothecary.com

Home of Lisa Levis.

Double Merrick home tour by www.apartmentapothecary.com

Home of Merrick Angle.

4) Being nominated as Blog of the Month by Sew Magazine.

Sew magazine Blog of the Month www.apartmentapothecary.com

5) Having my flat photographed for an interiors magazine, Style at Home (more on this in my next post).

style at home

6) Taking craft classes and courses at the Amazings, Sew Over It and Crafts Bee.

Liberty cot tidy by www.apartmentapothecary.com

My Liberty cot tidy has been my most popular post this year.

7) Doing a tutorial for craft magazine, Homemade With Love.

Homemade With Love craft tutorial by www.apartmentapothecary.com

8) Learning to sew.

9) Discovering so many talented designers, crafters and bloggers through the Twitter, Pinterest and Instagram communities.

10) Can I add getting our puppy as number 10 even though it’s got nothing to do with blogging?! He has been such a joy this year.

Golden retriever puppy

I’m very excited about the coming year and seeing how my blog develops and changes over time. There are a few very exciting things on the horizon to look forward to: My first blogging conference, Blogtacular, another craft class to learn how to screen print (such a thoughtful Christmas present from my bro-in-law), a project with The New Craft Society and I’m hopefully teaming up with Katharine Peachey again to contribute a home tour to 91 Magazine – eeep!

I really hope you’ve enjoyed my blog over the last year – I can’t wait to see what 2014 has in store. Happy new year to you all!

Katy x