You know when you want to recreate this…

The Arts and Crafts Kitchen by deVOL.
…but you start out with this…
-
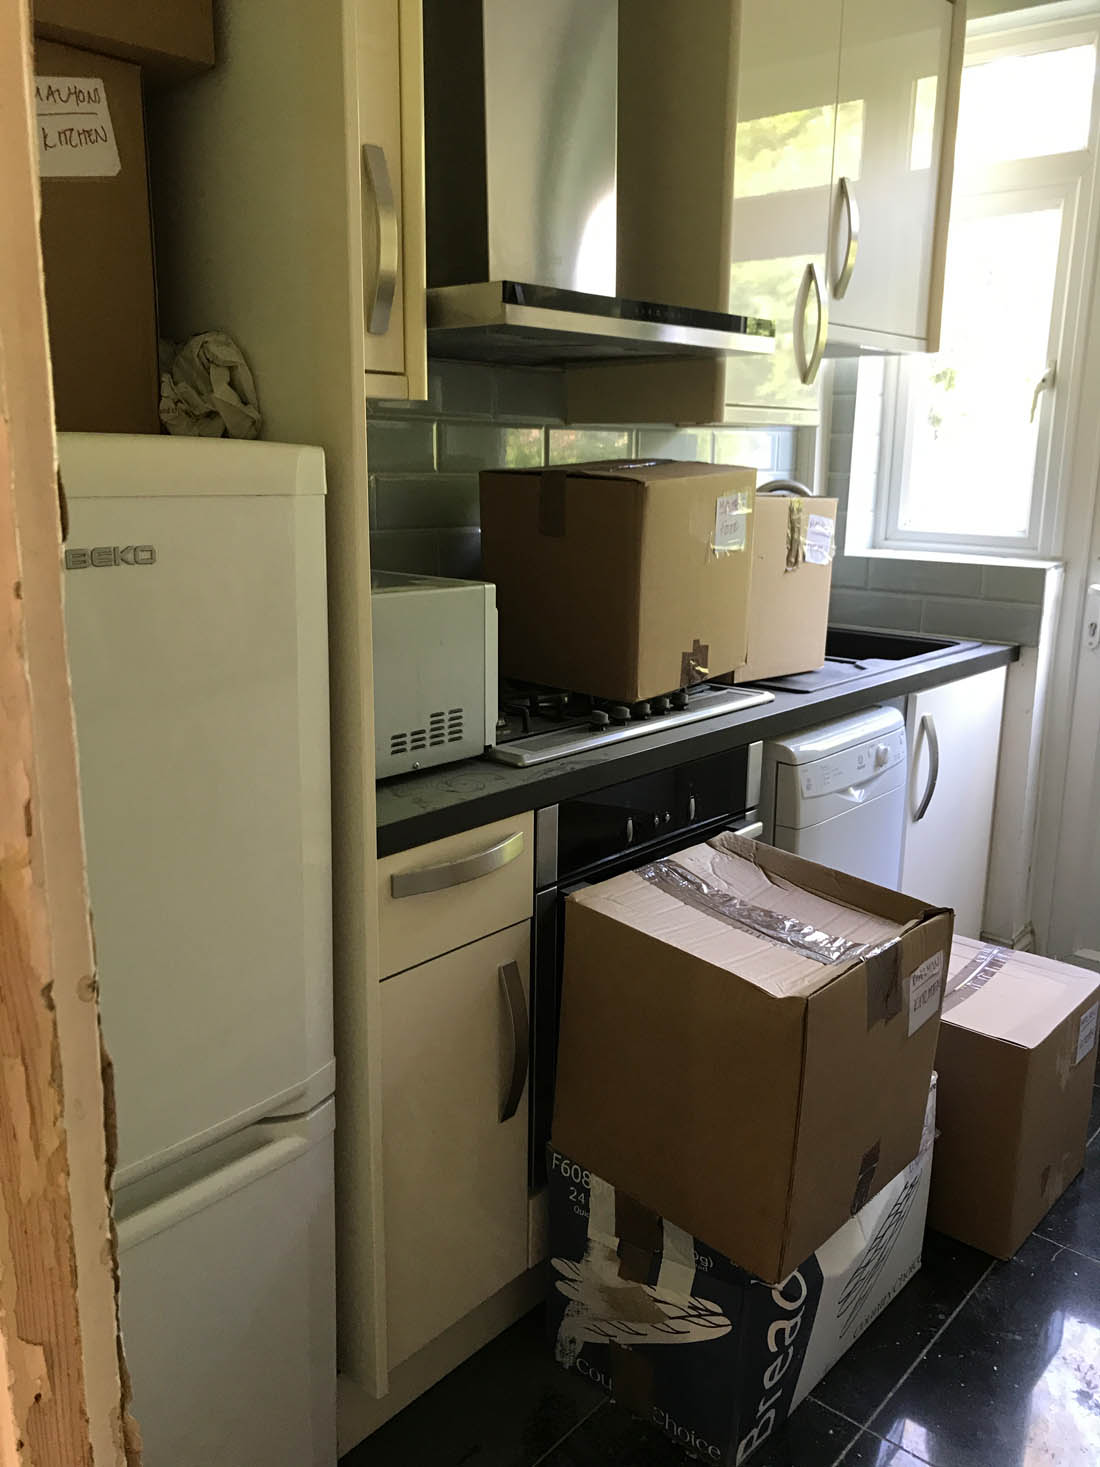
- On the left hand side of the tiny kitchen was a fridge freezer, the hob and the sink and absolutely no worktop space. Very, very cramped is an understatement.
-

- On the right hand side of the kitchen there was a very shallow worktop and base and wall units. They have already been ripped out in this photo in preparation for the wall to come down.
Not very realistic but you’ve got to try, right? Even if you only have about £1000 to spend. Don’t laugh!
So, let me fill you in on what we planned to do with the kitchen as I haven’t spoken about it much, mainly because it was always going to be an after thought as our budget was never going to stretch to a new kitchen and we were well prepared to have a makeshift kitchen until we could afford to extend into the garden and do it properly. Our only stipulation was that the wall between the kitchen and the reception rooms had to go from the start (it wasn’t a supporting wall so needed no steel)! There was no way I could look after Mimi being stuck in a tiny kitchen and not being able to see what was happening next door and it would make cooking dinner in the evenings a one person affair, which I’m not in favour of. Also, and very importantly, I just knew that the dining room would never be used if it were not connected to the kitchen.
This is what we were left with when the wall came down…

The space on the left was the original kitchen and once the wall came down (where the bare brick begins) we were left with a lovely open space.
We were still willing at this stage to keep the original cabinets and appliances from the left hand side of the kitchen but everything had to be taken out to fit new plumbing from the bathroom upstairs and so we were left with this…

At this point our builder recommended that we buy some new cabinets as the old ones were on their last legs and we needed a new worktop anyway as originally there was a fridge freezer on the far left of the kitchen and we needed to get rid of that to create more cupboard space below and worktop space above. We agreed that we could afford the bare minimum of cabinets and so our builder measured it all up for us and ordered exactly what we needed from Howdens, which is trade only.He also came up with the great idea of an island that would come out from the wall to house an under counter fridge and freezer and create some actual worktop space. None of this is ideal as there is so little cupboard space and I would never choose an undercounter fridge but I’m absolutely delighted at the idea of an open plan kitchen so I’m not complaining one bit.
To save money Jules is fitting the new cabinets and here are some update pics he has sent me over the last couple of days…

We are keeping the existing oven and hood and leaving those where they were originally positioned to avoid the cost of moving them. We’ve bought three cabinets with shaker door fronts from Howdens to fit on either side of the oven and the new worktop was gifted to us by Mano Mano. It is not what I would choose for my ‘forever kitchen’ as it is laminate but it’s a great solution if you are on a tight budget as it costs just £90 for a 3m worktop and if you have to opt for laminate a white one is the very best option, in my opinion. I’m pleasantly surprised at just how good it looks.
Jules managed to fit this side of the kitchen over the weekend (he’s cutting the hole for the sink, which will go on the right hand side, today). The door fronts we chose are Shaker style (also from Howdens) and I have bought very, very cheap handles from here that cost about 70p each. We ordered the unfinished door fronts that need painting and we’ve decided to go for Railings by Farrow & Ball as I hope that will make it feel a bit more interesting.

-

- Jules then hung them in front of the cupboard doors so we could get a feel for what it would look like. My only concern is the white dishwasher but the island will cover this so I’m willing to compromise on it.

Jules started painting the cupboard doors this morning.
On the walls we will have open shelves on the left hand side of the cooker hood and I want to source an antique pine cupboard on the right hand side to tie in with the floor and make the space feel a bit more eclectic than your bog standard fitted kitchen (plus provide much needed storage!!).
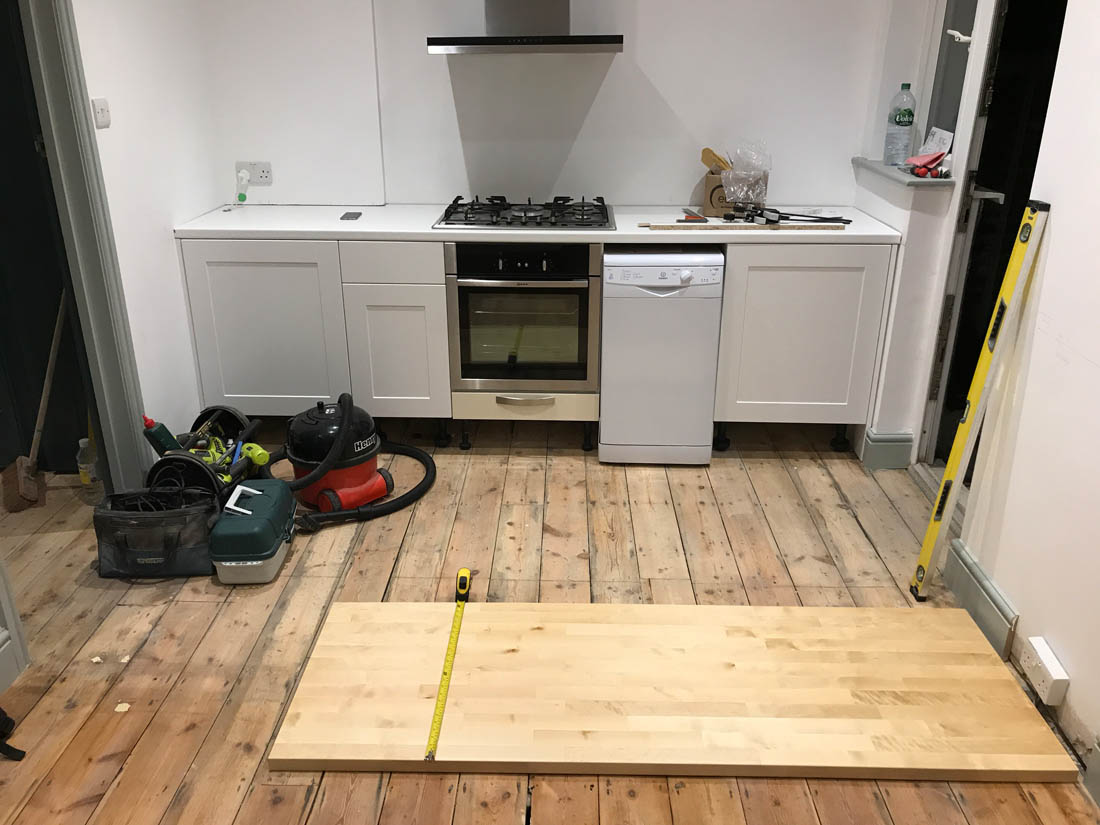
Jules has done a great job fitting this side of the kitchen over the weekend and has started on the island (that you can see laid out on the floor) that will house an undercounter fridge, freezer and integrated bin.
This was the last shot Jules sent me this afternoon (and I hope it will be finished by the time he comes home this evening!). The wooden worktop is birch from Ikea that cost only £100 and he still needs to cut it to length in this pic below…

All in all we have spent £890 on the cabinets and door fronts from Howdens (which is trade only so you have to have your builder order them for you), £100 on the wooden worktop from Ikea, £93 on a new sink from B&Q and £67 on the paint for the cupboard doors from Farrow&Ball (the white laminate worktop was gifted to us by Mano Mano and costs £90). We still have to decide on tiles as well as spending l bit on MDF and brackets to make open shelves and I hope to find a cheap antique wall cupboard but all in all I think we’ve done pretty well to spend so little. I look forward to showing you when it is all finished!
Katy x
Looks amazing. Can I ask where you got your cabinet door fronts from?
Author
The cabinet doors are from Howdens – they are Greenwich Shaker style x
What type of paint did you use from f&b? Did you seal it in some way?
Author
Hi Jill. We used Modern Eggshell, which is what F&B recommend for kitchen cupboards. The door fronts are primed ready for painting so we painted straight onto them using a small roller and watered down the paint slightly as that helped get a smooth finish. Once first coat was completely dry we did a light sand and then did two more thin coats of paint. No sealant – hoping the paint is hard wearing enough but time will tell ??
Great idea to take the wall down, what a difference, looks amazing. Love the cabinets in F&B Railings.
This is one of the best kitchen posts I’ve read in ages. It seems so full of practical advice and thoughtful decisions, as well as recognising how wasteful and expensive fancy new kitchens often are. I have no doubt it will look absolutely fantastic, and I really admire how you have integrated existing appliances into the set-up rather than sending them to landfill, and did paint testers to check that you would like the final look.
You’re both doing such an amazing job – thanks for sharing the journey X
I love railings. We painted our old original front door in railings and it has transformed it. We painted the inside of the door in the same colour x
“I think we’ve done pretty well to spend so little.”
I love your modesty.
You have worked magic on a shoestring.
Really useful and interesting, thank you! Not much info out there about how to do up a kitchen on a budget so this was great.
I’m totally impressed by your progress!
You might be able to cover the dishwasher with contact paper or (if it is metal) a magnetic stainless steel looking sheet. I’ve seen those on amazon…
Looks incredible! Great work!
This is a really inspirational and really useful post. Well done, the finished version looks amazing too.