Weeks three and four: Our house renovation

I actually can’t believe that our builders have only been working on the house for four weeks as so much has been done already and it kind of feels like they are on the home straight – I mean, the decorating has even started. Not wanting to jinx anything, obviously…

The main progress over the last couple of weeks has been installing the steel between the receptions rooms, replacing the window lintels in the bedrooms and the plaster boarding and plastering throughout the upstairs and downstairs. A lot of upstairs has been painted so it all looks very different now with the bare brick gone.

The steel is now in so we officially have an open plan living/dining/kitchen space. These images show either side of the reception rooms. Jules took these pics in the evening and as it is a south east facing house we get the evening light through the front of the house.

This past week the downstairs has also been plastered so the steel and old doorway into what was the back reception room have now been covered up so it looks like a proper room again rather than a building site…

The fireplace surround has been installed (we will add tiles – I haven’t chosen them yet) and I think it works pretty well in the space and adds the character of the period that I want. I am really trying to avoid the ‘new build’ feeling.

Upstairs the plastering has also been done and they’ve done a brilliant job of it – it shines it is so smooth! I am always tempted when I see fresh plaster to leave it as I love the warm tone of it so much.

However, last week the painting began upstairs and I can see how much bigger the space looks and feels with white walls. The skirting, architraves and picture rails are also going on as we speak and the original doors have been sent off to be dipped ready for painting.

I’m honestly quite gobsmacked at how much has been achieved in just four weeks. The next big job is the bathroom so I’ll keep you posted on that and Jules has taken the week off work to sand and finish the floorboards. He’d better do a good job of it!

Katy x

Why choose a 1930s house and where to find inspiration to maximise its potential

I grew up in a large Victorian house and then we moved to a Georgian townhouse when I was a teenager so I feel very comfortable in period homes. In the past when I thought about what type of house I would like to buy I always had in my mind a Victorian terraced house. However, I am now a 1930s convert. Admittedly, I don’t think I would have ever looked at a 1930s house if budget had not been one of the main driving forces behind our house search so it feels like a happy accident that what we could afford is actually, in my opinion, going to be a better family home for us than a Victorian house would have been. Even in its full pebble dash glory 😉

So, what is it about a 1930s home that has converted me? And how did I figure out that I could make it work for us?

1. Purpose built

Compared to Victorian terraces, 1930s houses are purpose built for one family so the layout works really well. No downstairs bathrooms, no skinny hallways, no long narrow kitchen extensions that don’t make the most of the garden, no dark rooms with a lack of windows. The rooms are square and well proportioned and everything is where it should be.

2. Easy to extend

The shape and layout of a 1930s house make them ideal for extensions at the back of the house and into the loft. Coupled with the fact that during this era houses had bigger gardens than earlier houses, largely because they were built further away from the centre of towns and cities, creating the suburbs, means that extending won’t mean you end up with no garden.

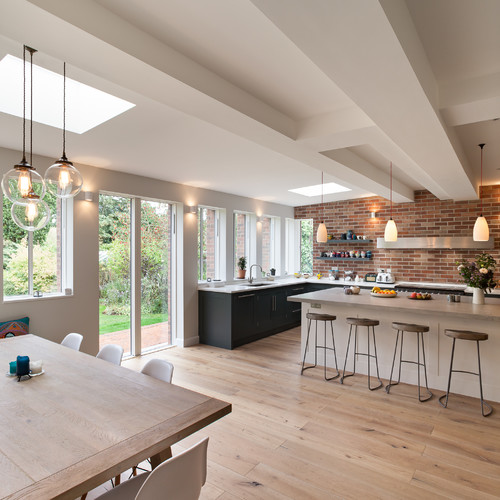
3. Back of house opens up onto garden

My pet hate about certain houses is the fact that you can’t see or access the garden conveniently. I really dislike sitting in a room at the back of a house and having no sense that there is a garden. I think that if you can’t access your garden freely you won’t use your garden, especially if you have kids and can’t see what they are doing from the house. I am SO excited about the fact that our new house is completely open to the garden right across the back of the house. The idea of that makes me really happy and until we can afford to extend Jules is going to build a deck that goes straight out from the house, which effectively will give us more living space.

4. Knock down walls

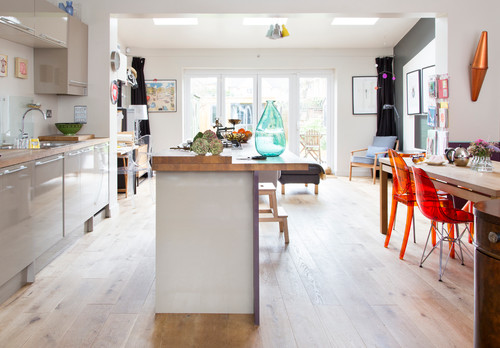
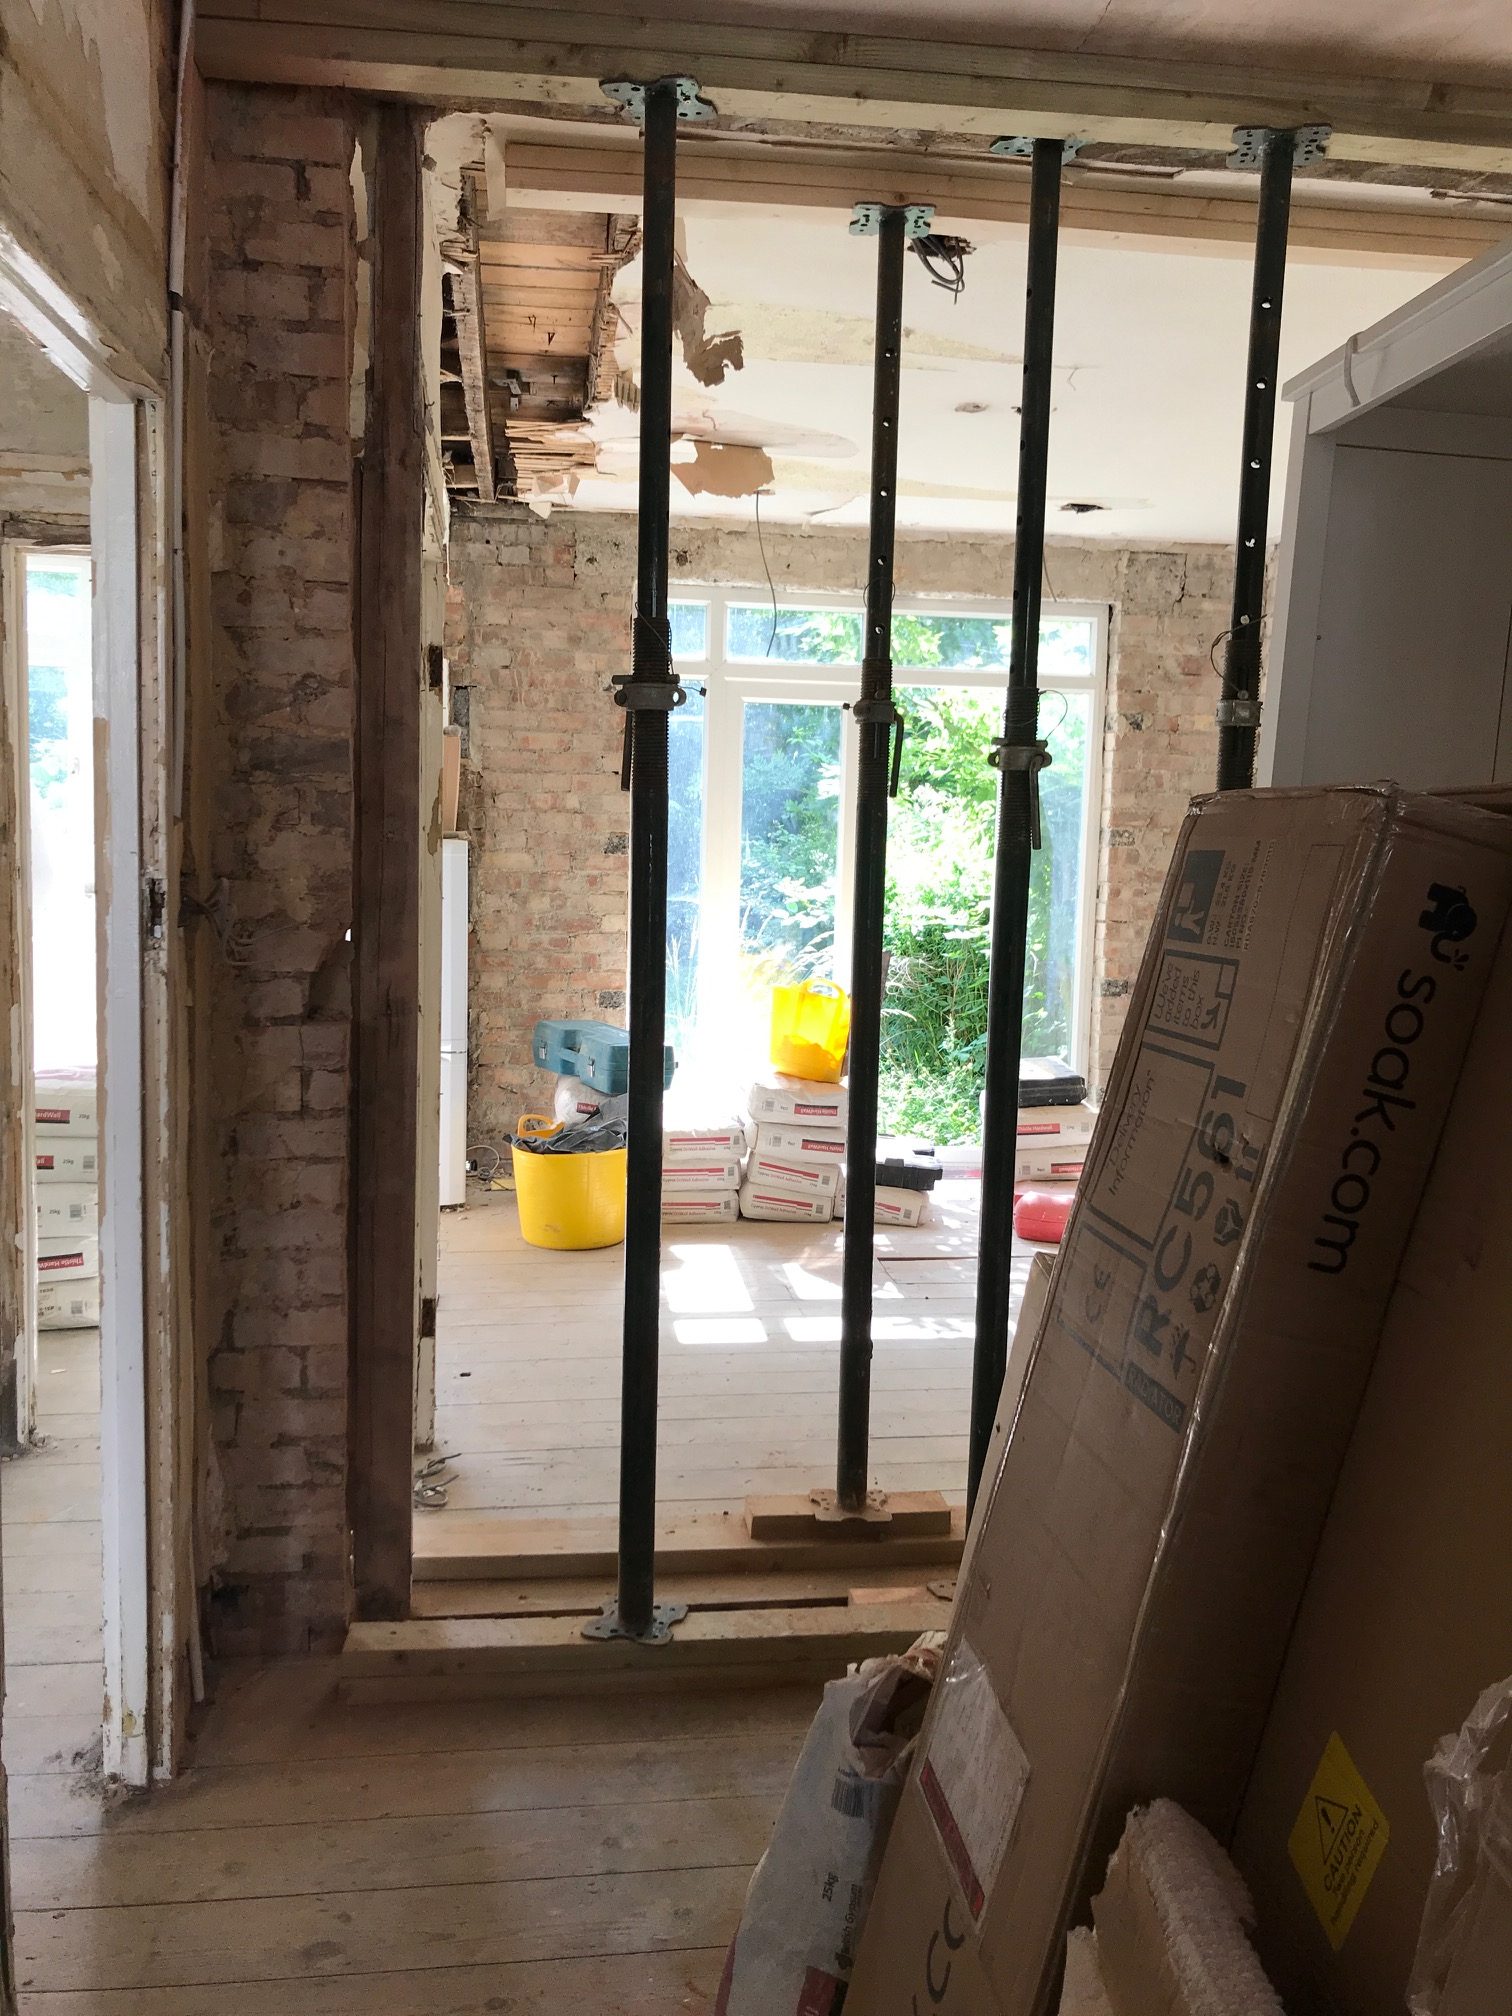
It is very easy to remove walls in a 30s house to create open plan living, if that is your thing, as the layout is so square. This makes even the tiniest house suitable for a family as you can create space.

5. Period features

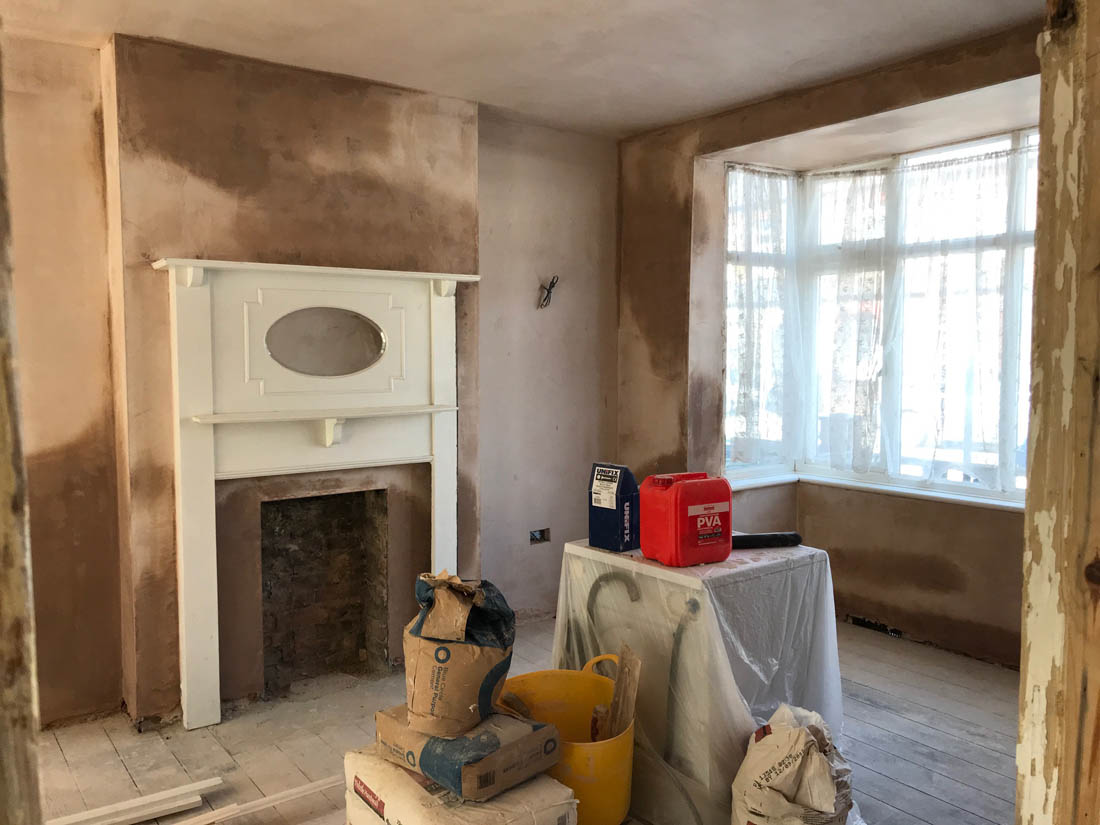
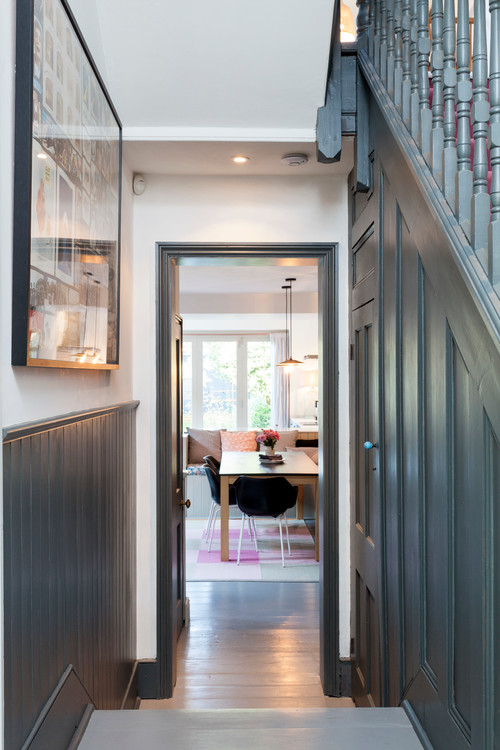
I really love that there are still period features in 30s house that make it feel like a Victorian terrace. Picture rails, architraves, doors, banisters, bay windows, fireplaces and tiled hearths all make it feel cosy and homely to me.

6. Garden size

As I have already mentioned the garden size of a 30s house compared to earlier houses is generally a lot bigger as they were built on the outskirts of towns and cities. This is always a welcome surprise in London. A lot of these houses are semi detached or detached with side access, which is also a benefit (especially for us with a very muddy dog so we can take him straight round to the garden instead of traipsing mud through the house and I’m thinking that when Mimi has a bike and stuff like that this will be useful too).

7. Good condition

Generally speaking because 1930s houses are younger they are in better condition than older houses and fewer unpleasant surprises are lurking under wallpaper and floorboards.

Realising the potential and finding inspiration

Now, obviously all of the points I have made here are generalisations as some older properties are completely wondrous and tick every box going and some 1930s houses are horrid but if you are house hunting it’s worth just having a think about these things. I was recently asked how I figured out that I could make a 1930s house into a home that would suit us and where I found inspiration for our plans for the house. Therefore, I have made a list of what I did to help convince myself that my pebble dash house could be a dream come true…

8. Play the Rightmove game

If you find a house of a period that you are not used to and want to explore what you can do to it to make it suit you and your family get on Rightmove and have a look at neighbouring houses. Select the ‘Nearby Sold Prices’ option and nose around the street to see whether you can extend, what the house looks like all done up, whether you can change the layout and so on. This is invaluable info. I also looked at the satellite images to get an idea of how many houses in the street had extended outwards and upwards.

9. Knock on doors

It takes a bit of guts but knock on neighbours’ doors if you want to see the potential of a house you are looking at. Alternatively, have a good nose through neighbours’ windows (I totally did this and got a good idea of how the space would look open plan).

10. Visit friends

If you have friends that live in a house of the period you are considering go and visit them and get a good feeling for the house and space. My bezza moved into a 1930s house just up the road from us about two months before we bought our house so it was a brilliant opportunity to figure out how the house would work.

11. Pinterest and Houzz

Do use the internet for inspiration and find houses that are similar to the one you are looking at as this can be an invaluable source of inspiration for decor. I found articles like this one helpful when I was looking.

Be open to different styles and types of houses if you are searching as you never know what may work for you.

Katy x

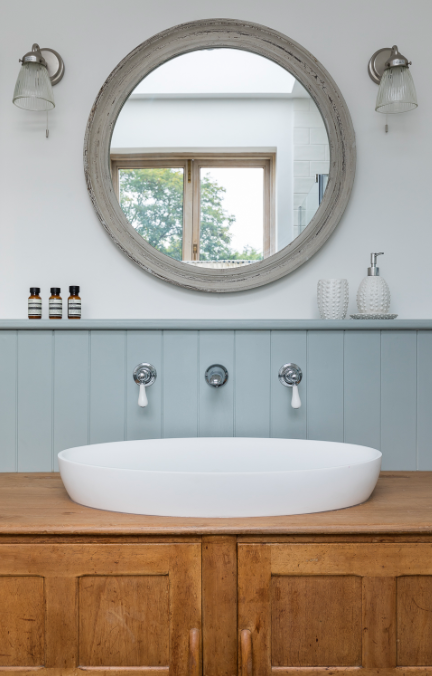
P.S. Let’s all be clear that our new house is about a tenth of the size of the houses above and won’t even have a proper kitchen to begin with 😉


Week two: Our house renovations

Before I start my update for the week I want to let you know who our contractor is as I have had lots of questions and queries. We were recommended James who runs JA Whitney Building Contractors by the lovely Becki who lives nearby and whose husband is a structural engineer and has worked with James. We were looking for a contractor who would coordinate all of the different trades and plan the schedule of works so that we only had one point of contact and no extra hassle or stress in dealing with several different tradespeople. Maybe a bit further down the line I can write a whole post about how it all works out but so far it has been so easy and simple. James visited the site several times before he began, produced a detailed quote breaking down each job and its cost, a detailed weekly schedule of works so that we know what is happening and when, a weekly invoice for the works completed the week before and all we have had to do is choose and buy the radiators, paint, bathroom suite and tiles – he buys all the necessary materials and they are included in the quote. Jules meets James every Monday morning before work to go through how the previous week went and any details that need to be discussed for the upcoming week. James’s partner, Sian, is on hand via email to do all the admin behind the project – invoices, building controls and that sort of thing – and answer any questions. The team have been great so far so I’m keeping my fingers crossed that that continues!

We’re well into week three of the renovations now but week two saw the biggest difference that will be really noticeable for some time as the main walls were removed downstairs. We now have a completely open plan downstairs layout with a separate hallway leading upstairs. It’s very small but removing the wall between the kitchen and the dining room and the wall between the dining room and the from reception is the only layout that I felt would work for us. The steels have not gone in yet where the supporting wall has been removed and we have quite a bit of furniture and stuff waiting to be fitted in the bathroom piled up in the front reception so it’s not super easy to get an idea of the space but hopefully these snaps will give you an idea…

This photo shows the whole width of the house, which is now open at the back of the house and opens up into the garden (or jungle as it is at the moment). In a couple of years when we have saved up enough we will eventually remove this whole back wall and extend into the garden but until then I’m pleased with house much difference the walls being removed has made.

When we can afford to extend into the garden we will make more changes to the layout of the downstairs, like add a loo under the stairs and push the kitchen into the extension, but here is the floor plan as the property was when we bought it just to remind you…

We have kept the hallway wall and removed the wall between the two receptions and the kitchen so that whole space is now open plan. We will also block up the doorway to the back reception but keep the two other doors so there are two points of access to the space.

This is how the room looks from the hallway now with the two doorways that will remain – so much better being able to see out into the garden and having all the extra light…

This is where the remaining kitchen is located and as I have said before we are making a big compromise by not fitting a new kitchen and making do with a teeny one until we can extend as there’s just no way we were going to prioritise funds there when we know we will rip it out in a couple of years to extend…

The remaining kitchen is behind the big sheets of plastic – really not much to see!

Here’s a closer look at what is left…

Our kitchen – ha! We have plans to do a DIY job on making this liveable.

We have ordered a new inexpensive white laminate worktop from ManoMano because the black has got to go! The space is 2.7m so we will take the worktop to the end of the wall. My mum has an old ceramic sink in her garden and if we can clean it up well enough we will put that in too. I say ‘we’ but I actually mean Jules. We’ll figure out an inexpensive way of replacing the cabinet doors, the tiles have already been removed and I think we may put my String Shelving up either side of the cooker hood for now. There is a separate larder in the hallway just next to the kitchen door and James, our contractor, suggested we place an under counter fridge and freezer parallel with this wall with a wooden worktop – probably one of those cheap Ikea ones. I think that’s a really good idea as it will give us much needed worktop space as well as giving us somewhere to discreetly hide away fridge/freezer as the space is too small for a big one. I’ll keep you updated on this separate project for us!

So here is how the rest of the room looks…

This is looking from the kitchen area into the dining room and you can see where the wall between the two receptions has been removed.

This is looking in to the front reception from the french doors in the dining area. Hopefully once all that stuff has been moved it will be easier to visualise the space.

Looking from the front reception down towards the garden.

The plasterboard has started to go up upstairs too…

The front bedroom which will be our room.

Mimi’s room. I bought this fireplace insert and just seeing that fitted makes it look like a proper room again.

And finally the bathroom.

I’ve got loads more to show you about the bathroom as this is where we are spending a fair bit as we know it will always stay as it is. That will be my next post!

Katy x

Creating the perfect canvas in our new house

We will use three colours from Farrow and Ball throughout the house and sand and oil the original floorboards to add warmth to the downstairs living space. We will carpet the upstairs using a natural jute carpet and use jute rugs downstairs for continuity. Painted woodwork will highlight the original 1930s doors, banisters and architraves throughout the house. Images from Blomma London.

Taking on this house is a long term project to create a lovely home over time – we definitely can’t afford to make it perfect from the start. In this first round of works our main focus is to make it liveable for a start and then to create a blank canvas on which we can build and add to in the future – fresh walls, floors and a layout that will work for us is the aim. Any ‘luxuries’, as I like to call them, such as the wood burning stove that I was talking about in my last post, a new front door to replace the UPVC one and cabinetry work for example has got to wait. Therefore, all I am really thinking about this point is creating a canvas that will last and that we won’t get bored of.

The big thing for me about the house is creating a sense of space as it is very small. I have never, ever been into big, bold colours and I am definitely not into the current trend for dark interiors even though I can appreciate it in other peoples homes. For me, it is really important to have as much light and space as possible as this is what makes me feel calm and centred. A white uncluttered space is my priority dotted with interesting furniture and textiles.

However, to make the space feel as big as possible, whilst also adding a cosy feel, I want to add some colour to create a sense of cohesion so each room flows to another, almost as if each room is an extension of the one before it. For some, this is the absolute opposite of their design philosophy; they want each room to be completely different in colour, tone and style. But for this house I don’t think that would work. Therefore, I plan for the woodwork throughout the house (skirting, architraves, doors) to be painted in Farrow and Ball’s Light Blue, which is a colour I absolutely love and have used before here. The walls will be All White to give me the all important light I want and the woodwork and below the dado rail in the hallway will be the gorgeous Inchyra Blue. Although this is a dark colour the fact that above the dado rail and the ceilings will be All White will keep it bright. Also, I really love the idea of going from a dark colour in the hallway and opening up onto lighter colours in the living space. This is similar to the effect I would like to achieve in our hallway:

I also really love the paint effect in this house that uses the same colour throughout on all the woodwork (wishful thinking that our house was this size!):

Image from Living Etc by Paul Massey – do click through and take a look at the whole house.

I don’t plan to recreate the room below but I really like the soft, relaxed vibe of this room and that’s the feeling I would like to recreate throughout the new house. I want it to be bright, light, comfy, cosy and welcoming with a mixture of textiles and interesting furniture and objects.

Another project that I have found really inspiring is a 1930s house designed by Doris Lee. I particularly like the bathrooms and hallway.

I haven’t really planned the furniture around the house too much yet as I would quite like to move in and let that happen a bit more organically but I hope I will have achieved a lovely canvas by that point.

Katy x

Week one: our house renovations

We excitedly rushed down to the new house yesterday morning to see the progress that has been made this week as our contractor started on Monday (you can see how it looked before we bought it here and since we stripped out the plaster here). We plan to visit every Saturday to see how the project is coming along, check that we are keeping up to date with the building schedule (ten weeks and counting) and that we are happy with the work that has been done before we pay the weekly invoice. We then meet our contractor every Monday morning on site to run through how the last week has gone and what decisions need to be made.

You can always see the most drastic change at the start of a project like this as it takes no time to knock down walls and the like. During week one the remaining plaster, coving, skirting and architraves have been removed, the wall between the loo and bathroom has been knocked out, the fireplaces removed, half of the kitchen has been stripped out ready for the wall to be knocked down next week and the loft completely stripped out as there were three redundant water tanks up there. The other major job that has been done is the re-wiring. This is one of those jobs that we had to plan really carefully as it will influence the design and decor a huge amount. For example, deciding where pendant lights go dictates where the dining table will be placed and wall lights in the alcoves downstairs dictate whether or not shelves go in them etc. Also, I would like pendants hanging either side of our bed over bedside tables ( I have chosen these new Anglepoise ceramic pendants) so I have had to decide where the bed will go before being able to see it in the room.

Here are a few pics that I took yesterday…

The small kitchen will have the right hand wall knocked down next week so the cupboards and work top have been removed as has the tiled floor as I would like to extend the floor boards into this space. I have some DIY plans to make the left hand side of the kitchen more ‘me’ and then we will have a temporary kitchen island where the wall was until we have saved enough to do an extension out into the garden, which will house a new kitchen.

The two doorways into the separate loo and bathroom have gone and a new one is being built, which automatically gives the bathroom far more space.

Knocking the wall out between the loo and bathroom has really helped us visualise what this room will be like (I will blog about the details of this room soon).

The loft has been stripped of the redundant water tanks that were up there and we will have a loft ladder fitted and Jules will lay some OSP across the floor joists so that we can use the valuable space for storage. After living in flats with zero storage for the last twelve years I am SO excited about this prospect!

We had to do a clear plan of the power sockets and lighting for the first week of the build in order to rewire the house. This is actually quite tricky as it’s so hard to know what type of lighting and how much you will need until you have lived somewhere so fingers crossed we have got it right! Also, it directly impacts the layout of your furniture and design decisions. This image shows our bedroom and the bed will go in the middle of this wall with two pendants hanging either side over bedside tables.

The fireplaces have been knocked out – sorry to anyone who liked the originals!! We will plaster over the one in the dining area as we need all the space we can get there and then I have bought two small original cast iron fireplaces to be fitted into the bedrooms (I’ll explain more about this in another post).

Love it or hate it?! This is an original fireplace surround that I bought from eBay this week to go in the living area where we plan to have a wood burning stove. We can’t afford to buy the stove or have it fitted yet but I didn’t want to have it plastered over as I knew if that happened we would never get round to doing it.

I will post again in a couple of days with an idea of how I visualise the decor for the house – hopefully you won’t get bored of all this renovation chat anytime soon!

Katy x