1930s hallway

(AD – this blog post contains PR products*)

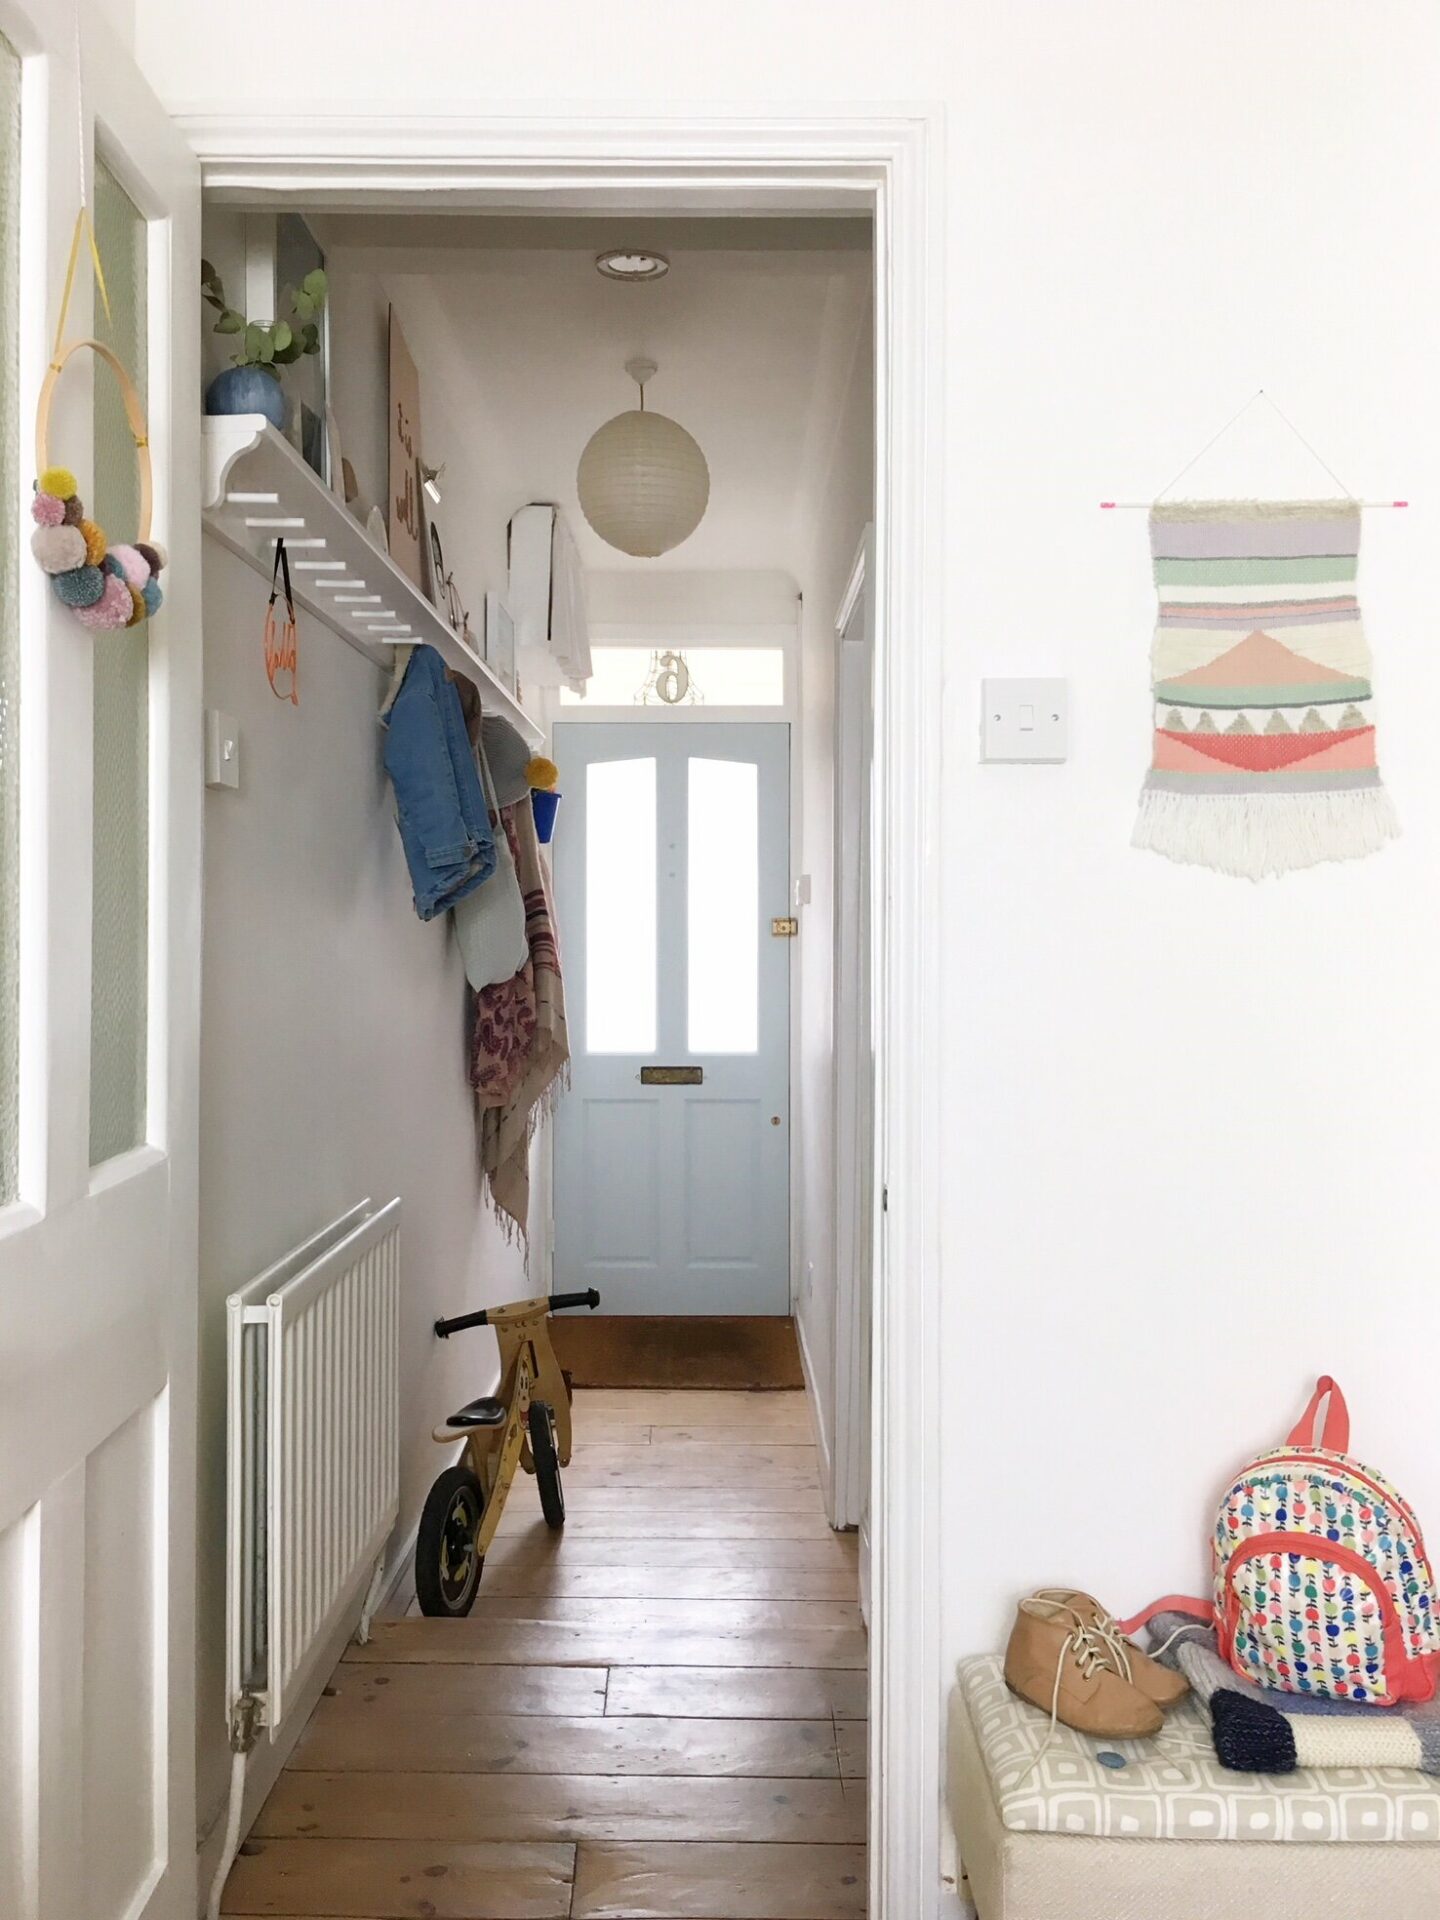
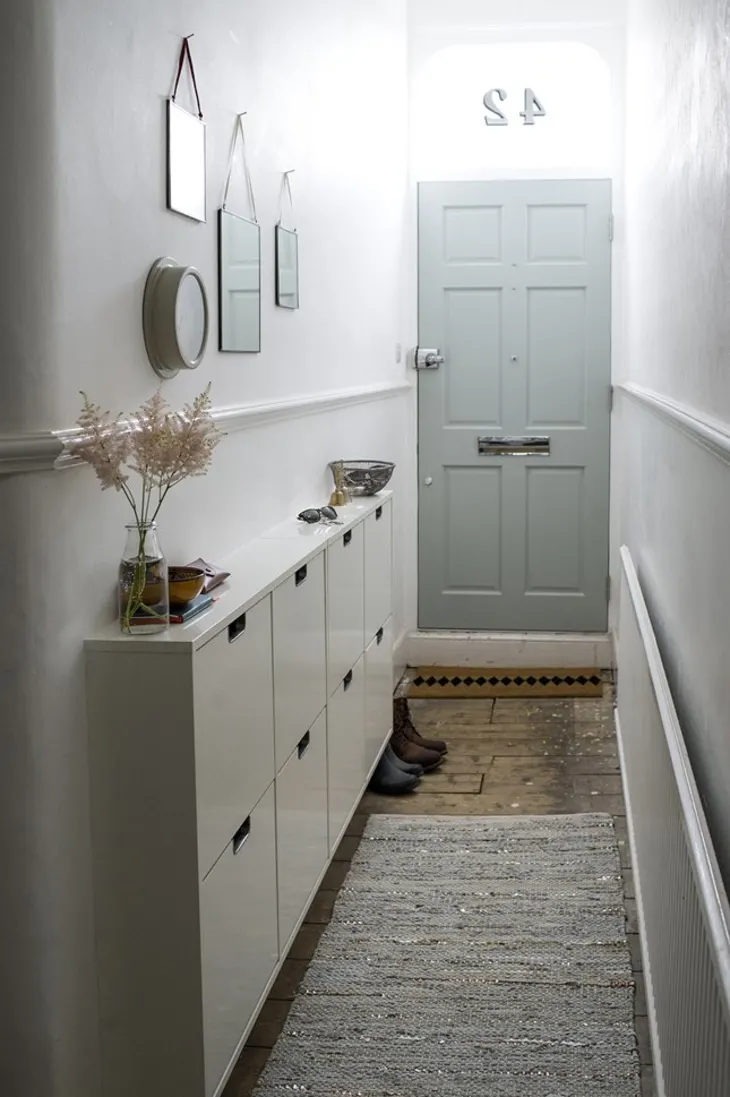
Our hallway was never finished after our initial renovation three years ago as we ran out of funds. It’s been a case of waiting patiently not only to make the space look nicer but to add the much, much needed underfloor heating as our hallway is FREEZING due to draughty floorboards and the external wall on to our side access. We can now finally warmly (literally!) welcome people into our home and coming home ourselves to a warm space is a game changer. Let me chat you through what changes we have made.

Victorian black and white quarry tiles | Walls and Floors* (PR product)

Flooring

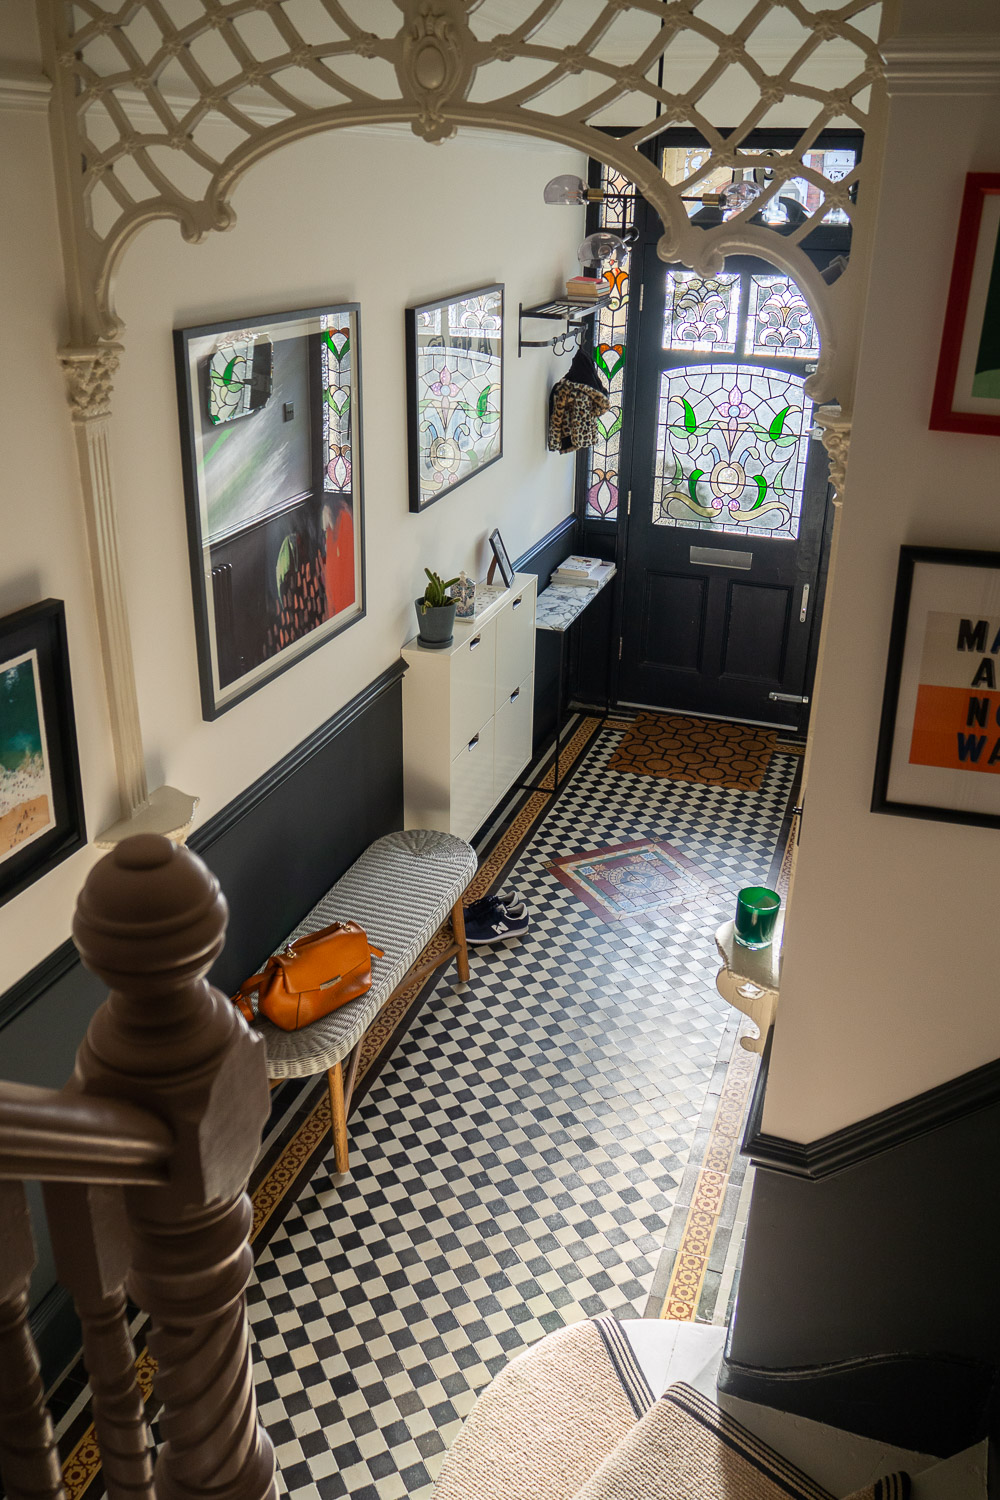
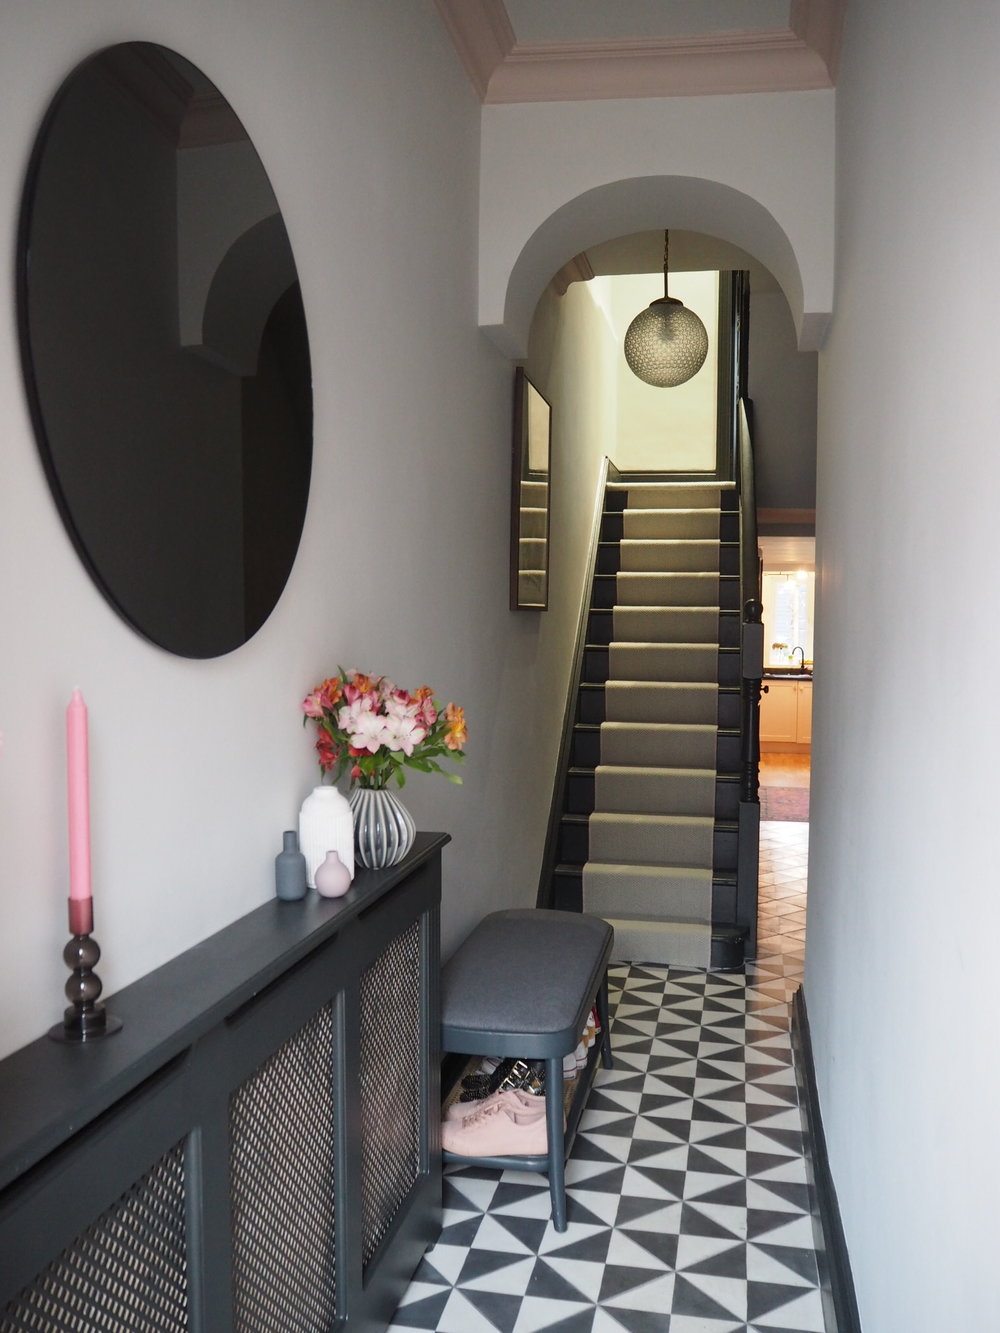
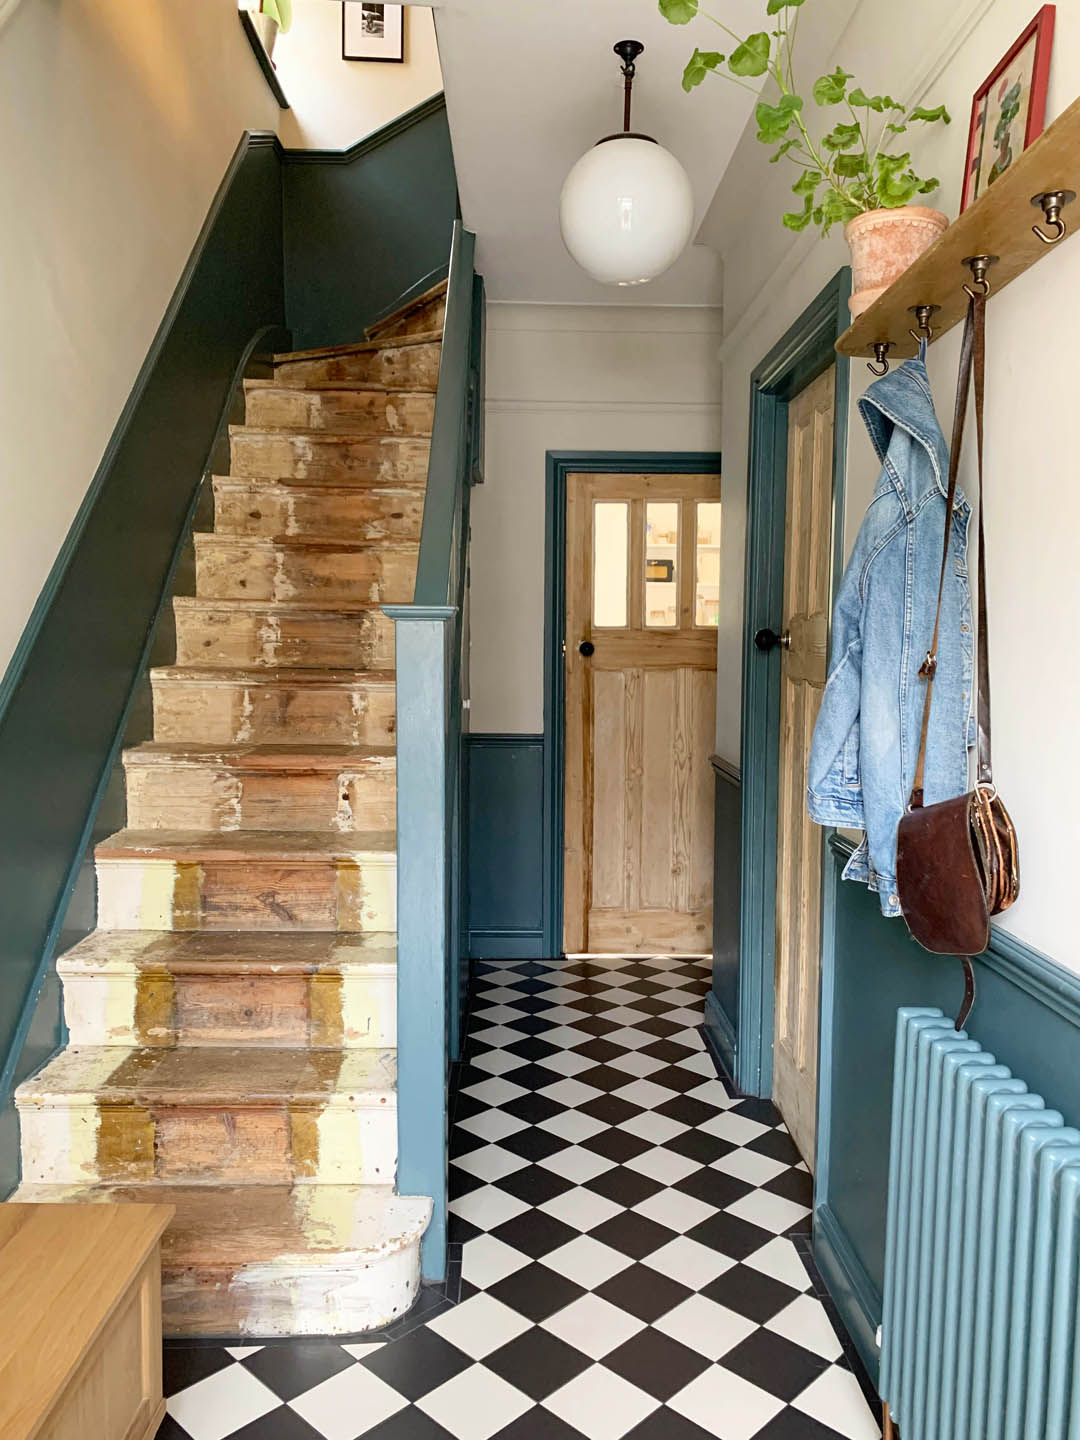
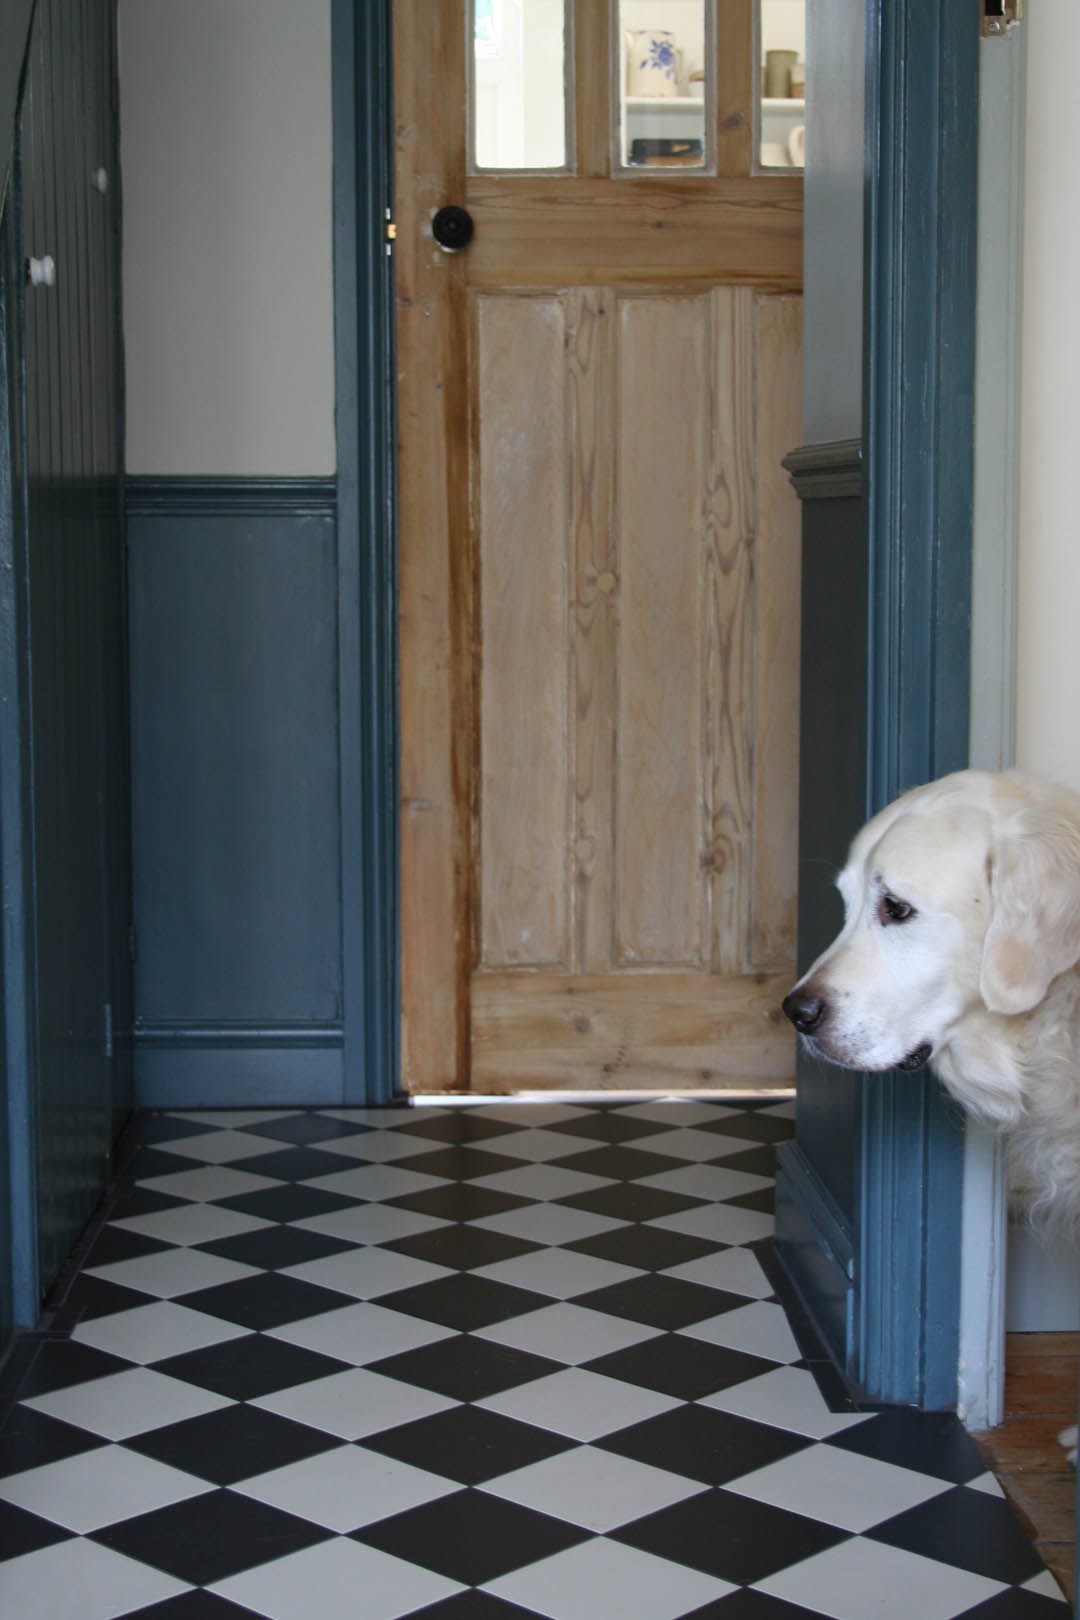
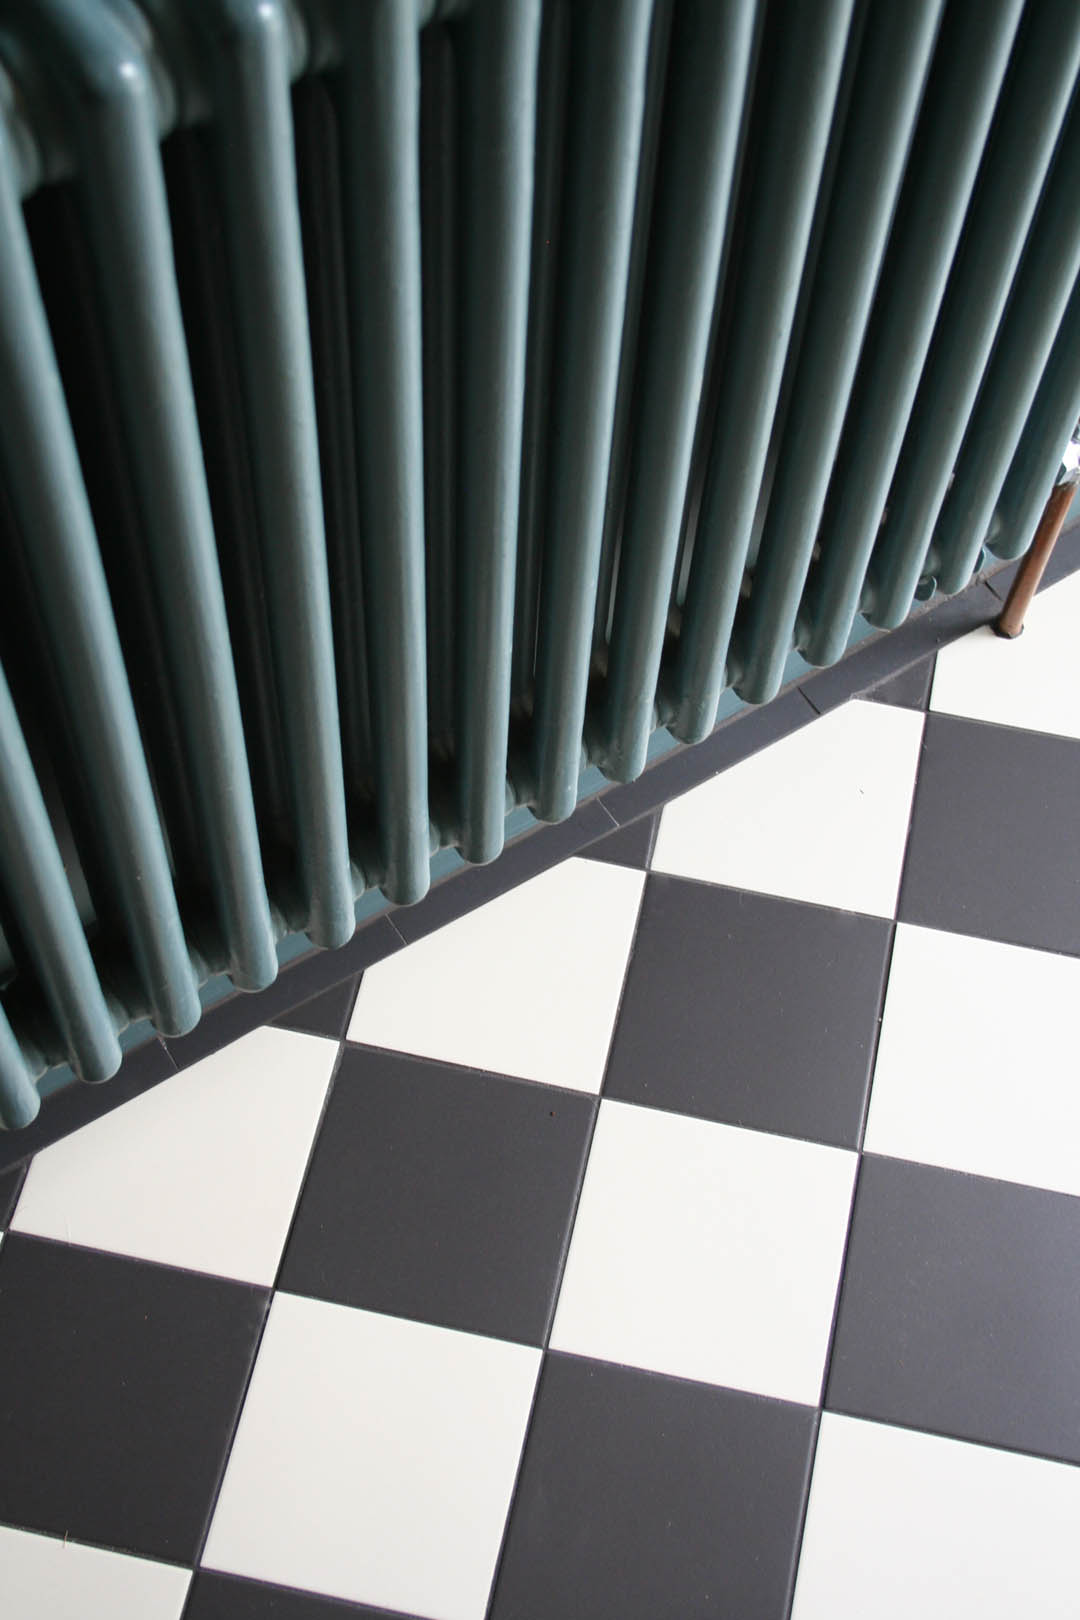
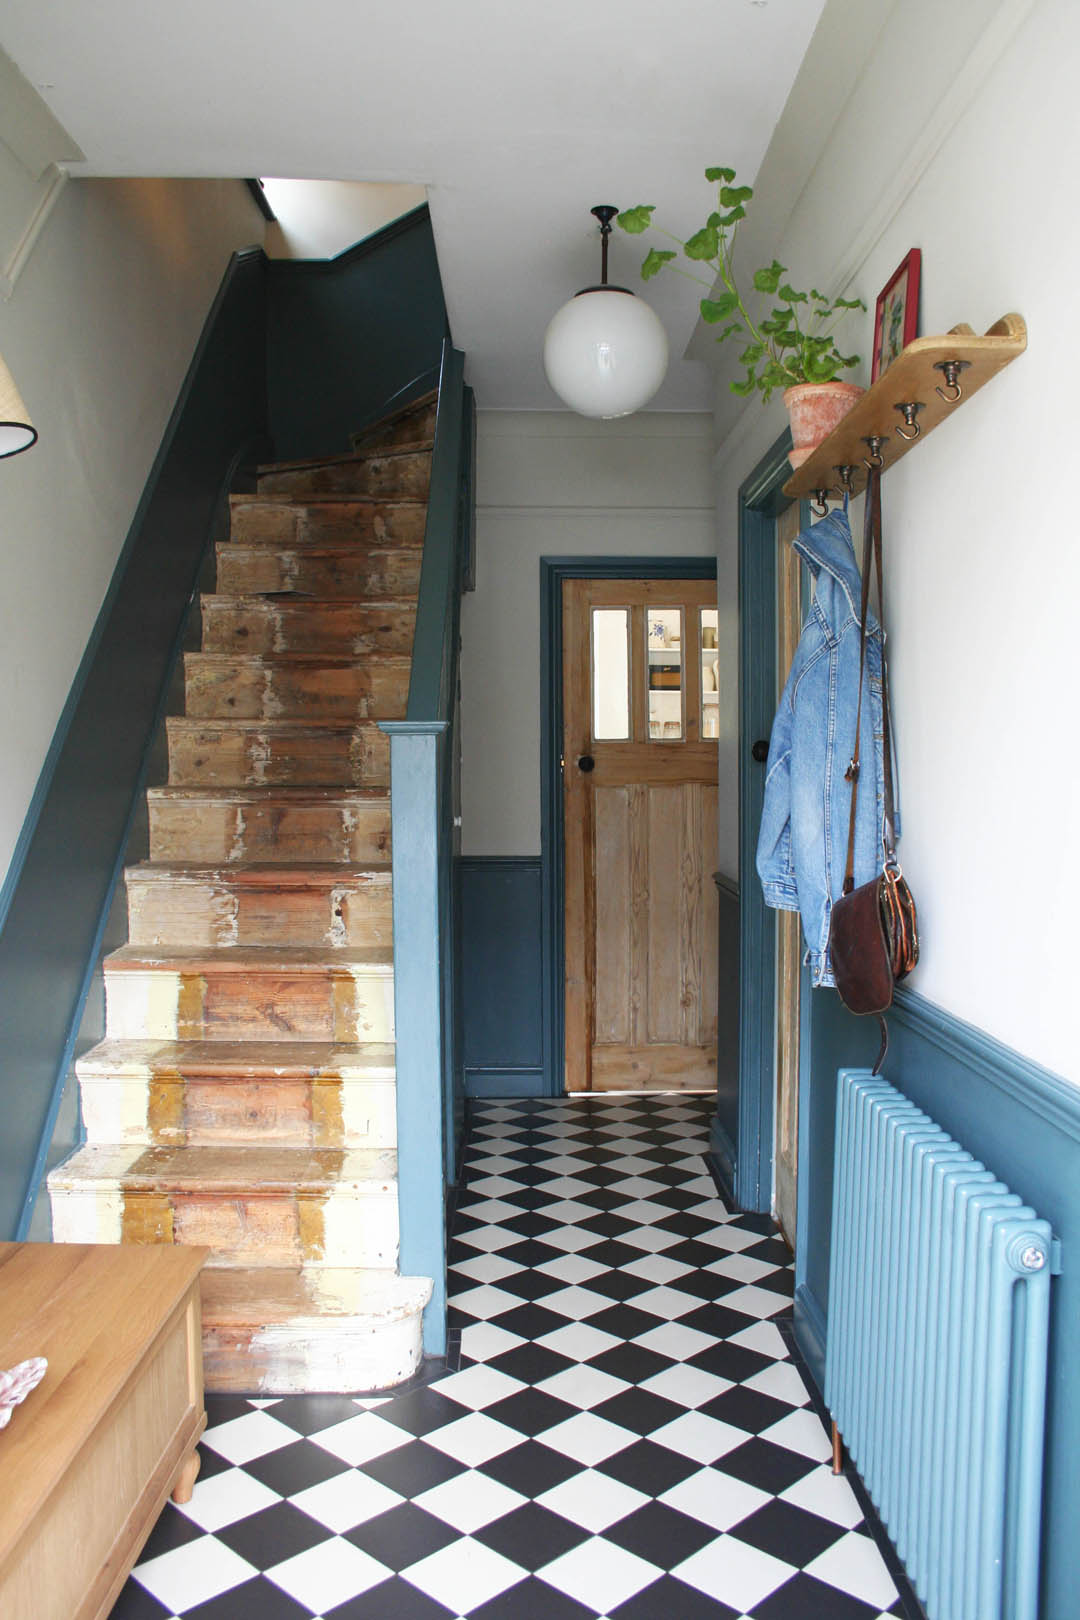
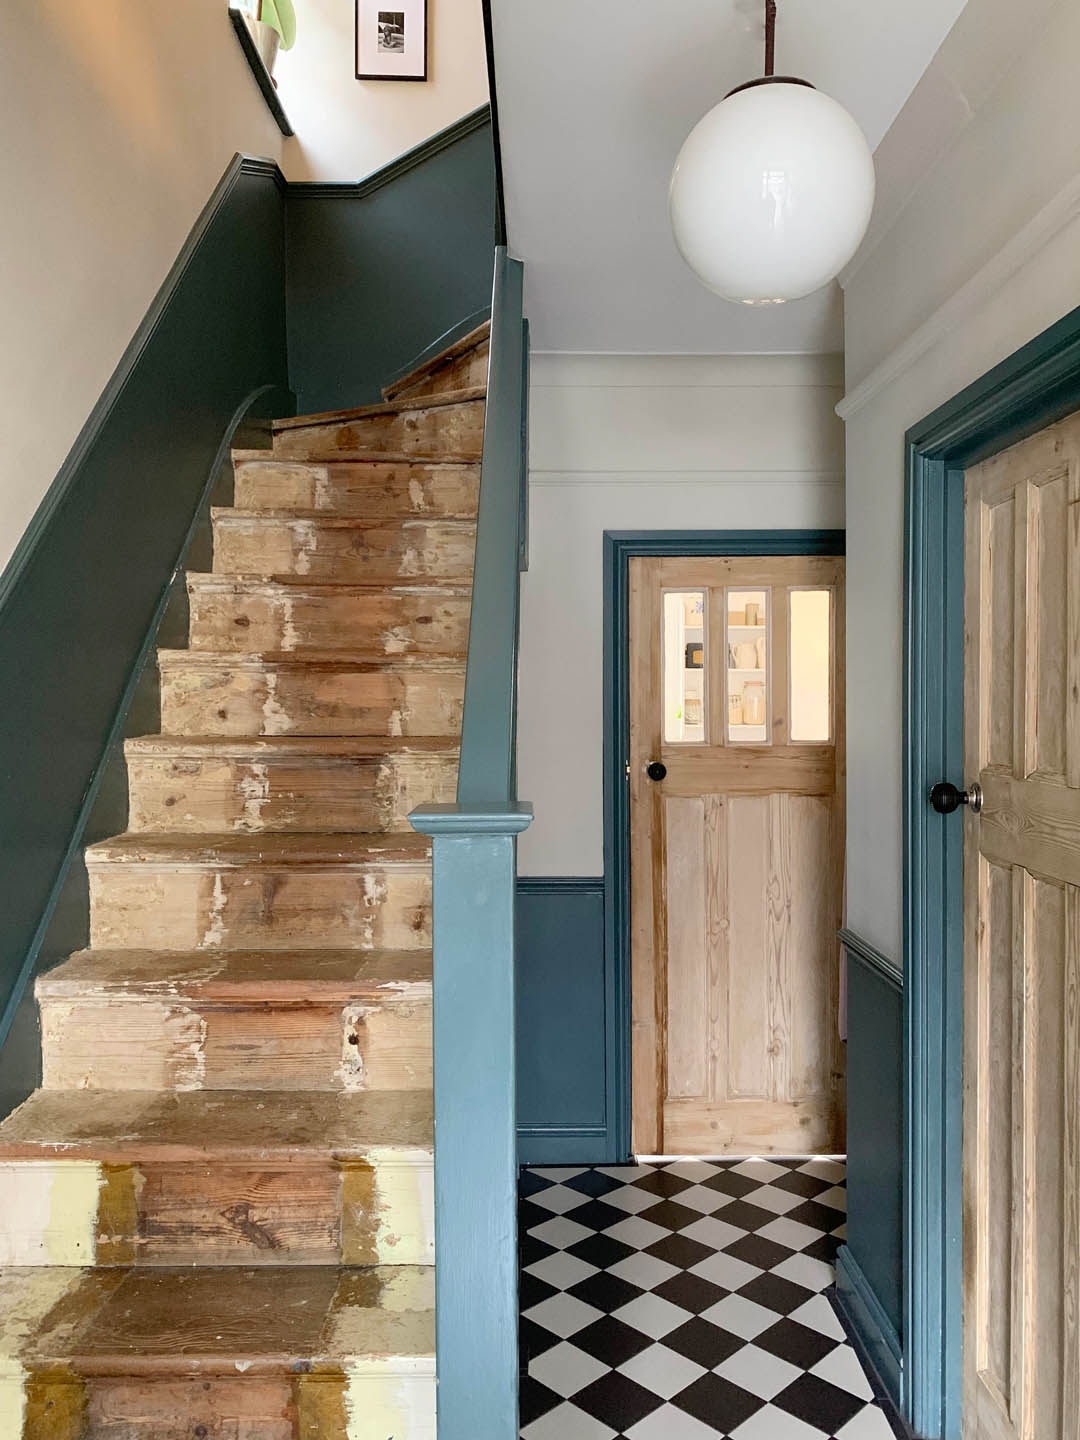
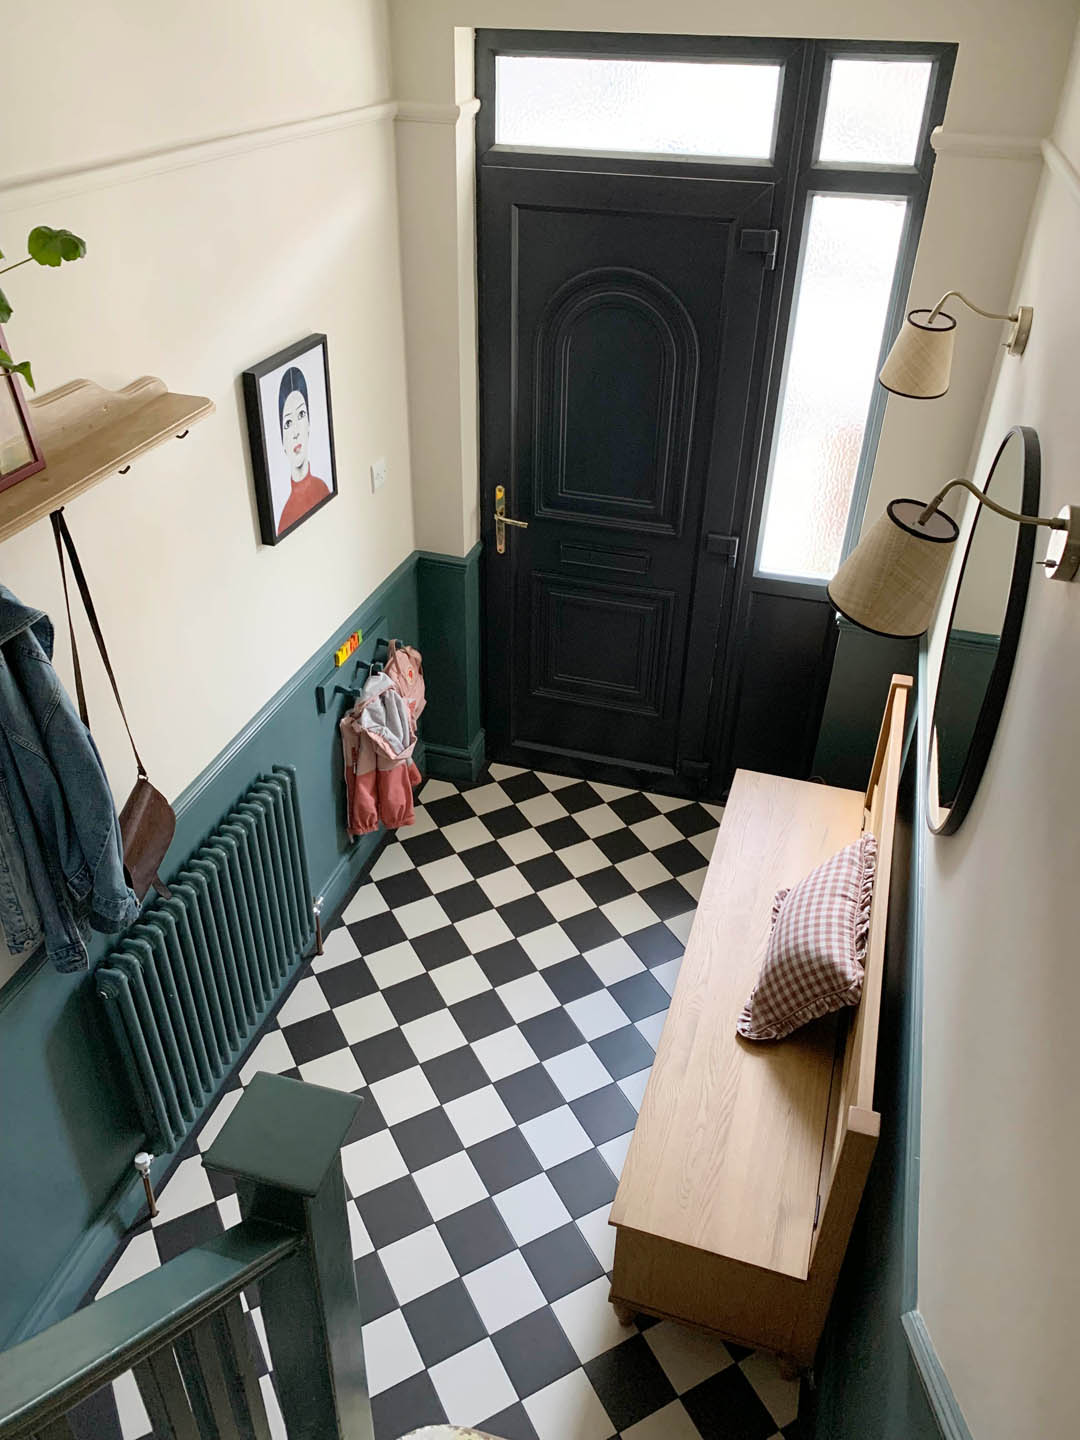
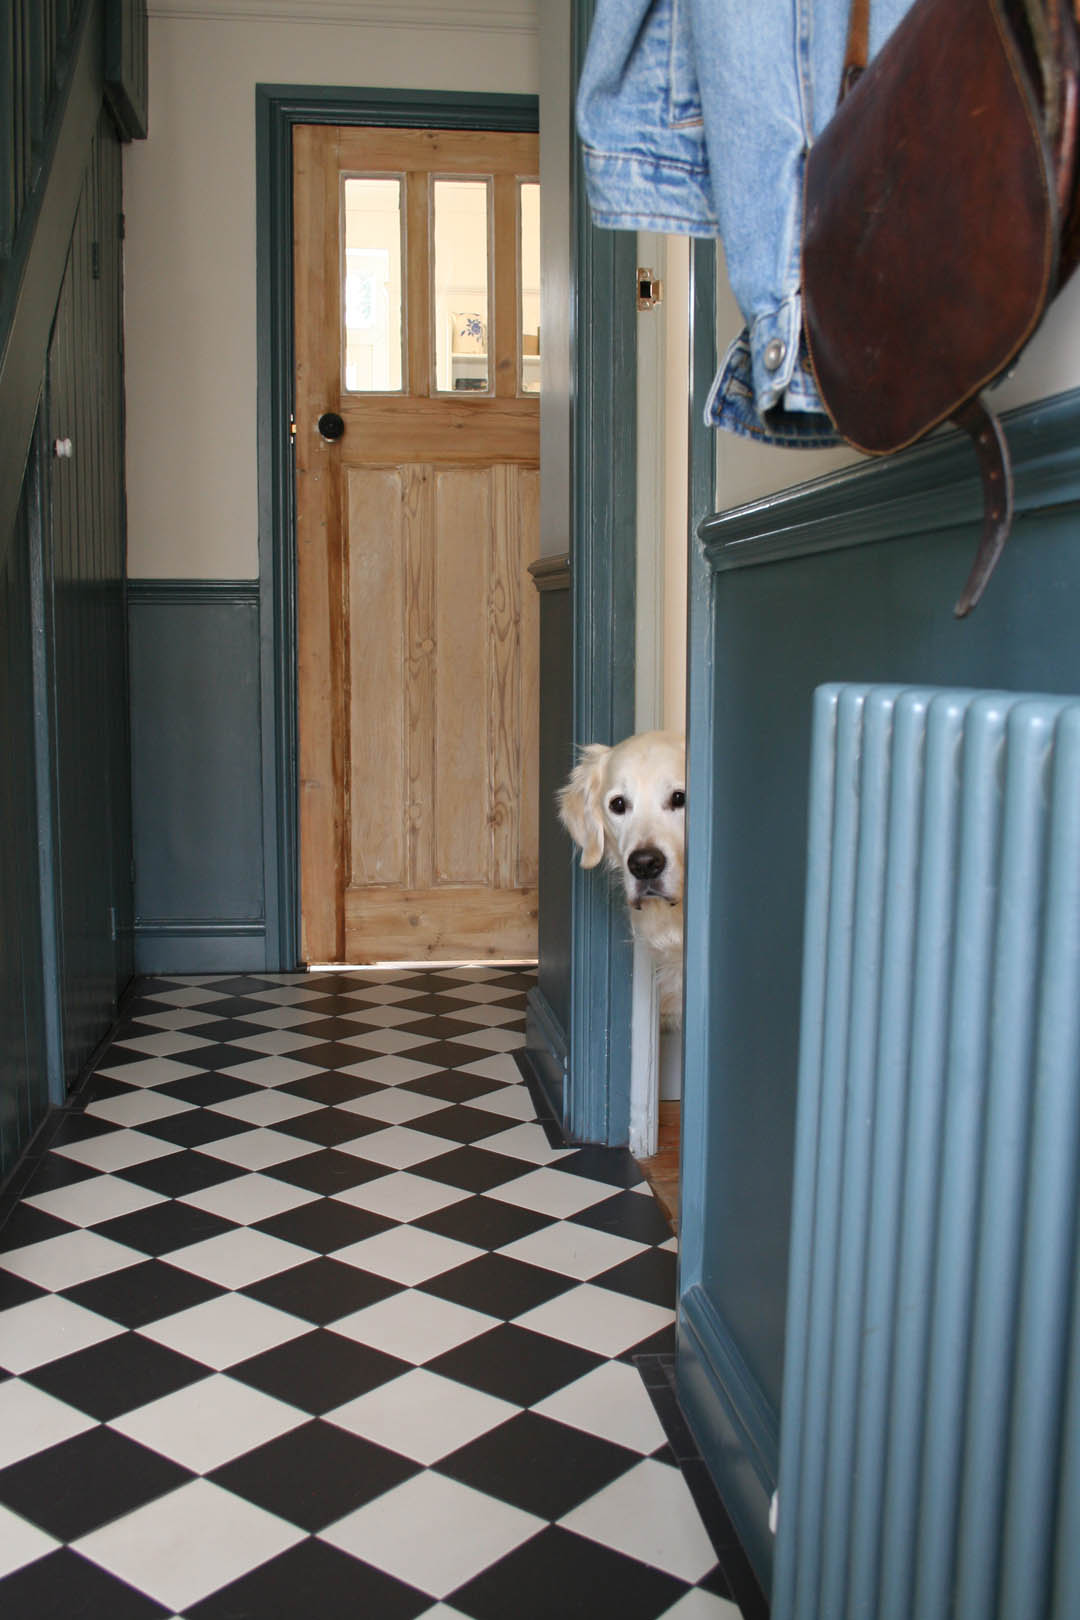
First and foremost on the priority list was to install underfloor heating. This meant we would have to cover up the original boards, which was just something I had to accept as I would have loved to keep the boards and have a lovely kilim rug BUT practically speaking this was just not an option. Underfloor heating and tiles were the answer to make the hallway significantly warmer and easily cleanable (having Otto in mind, as ever). I’m very happy with our tile choice – Black and White Victorian Quarry tiles from Walls and Floors* (PR product). Considering thirties properties were not traditionally tiled I didn’t want to choose anything too intricate or Victorian and I really didn’t want anything too contemporary as it’s just not my thing. I feel the black and white quarry tiles are classic and importantly they certainly won’t date. They will also enable me to change the decor in the future (I envisage a plaster coloured hallway in a few years!). They are so easy to clean and the black grout means they won’t end up looking mucky like some encaustic tiles and lighter grout can do. Importantly for me, the Victorian White Quarry Tile is not brilliant white but rather an off white that almost directly matches the Shaded White paint on the walls. This makes a huge difference as the white tiles don’t feel as stark as bright white ones can so I’m very pleased about that. The other bonus of these tiles is that they stretch out the space and make it feel so much bigger as well as reflecting the light so it really has a different feel to the old wood that absorbed all the light. They’re perfect.

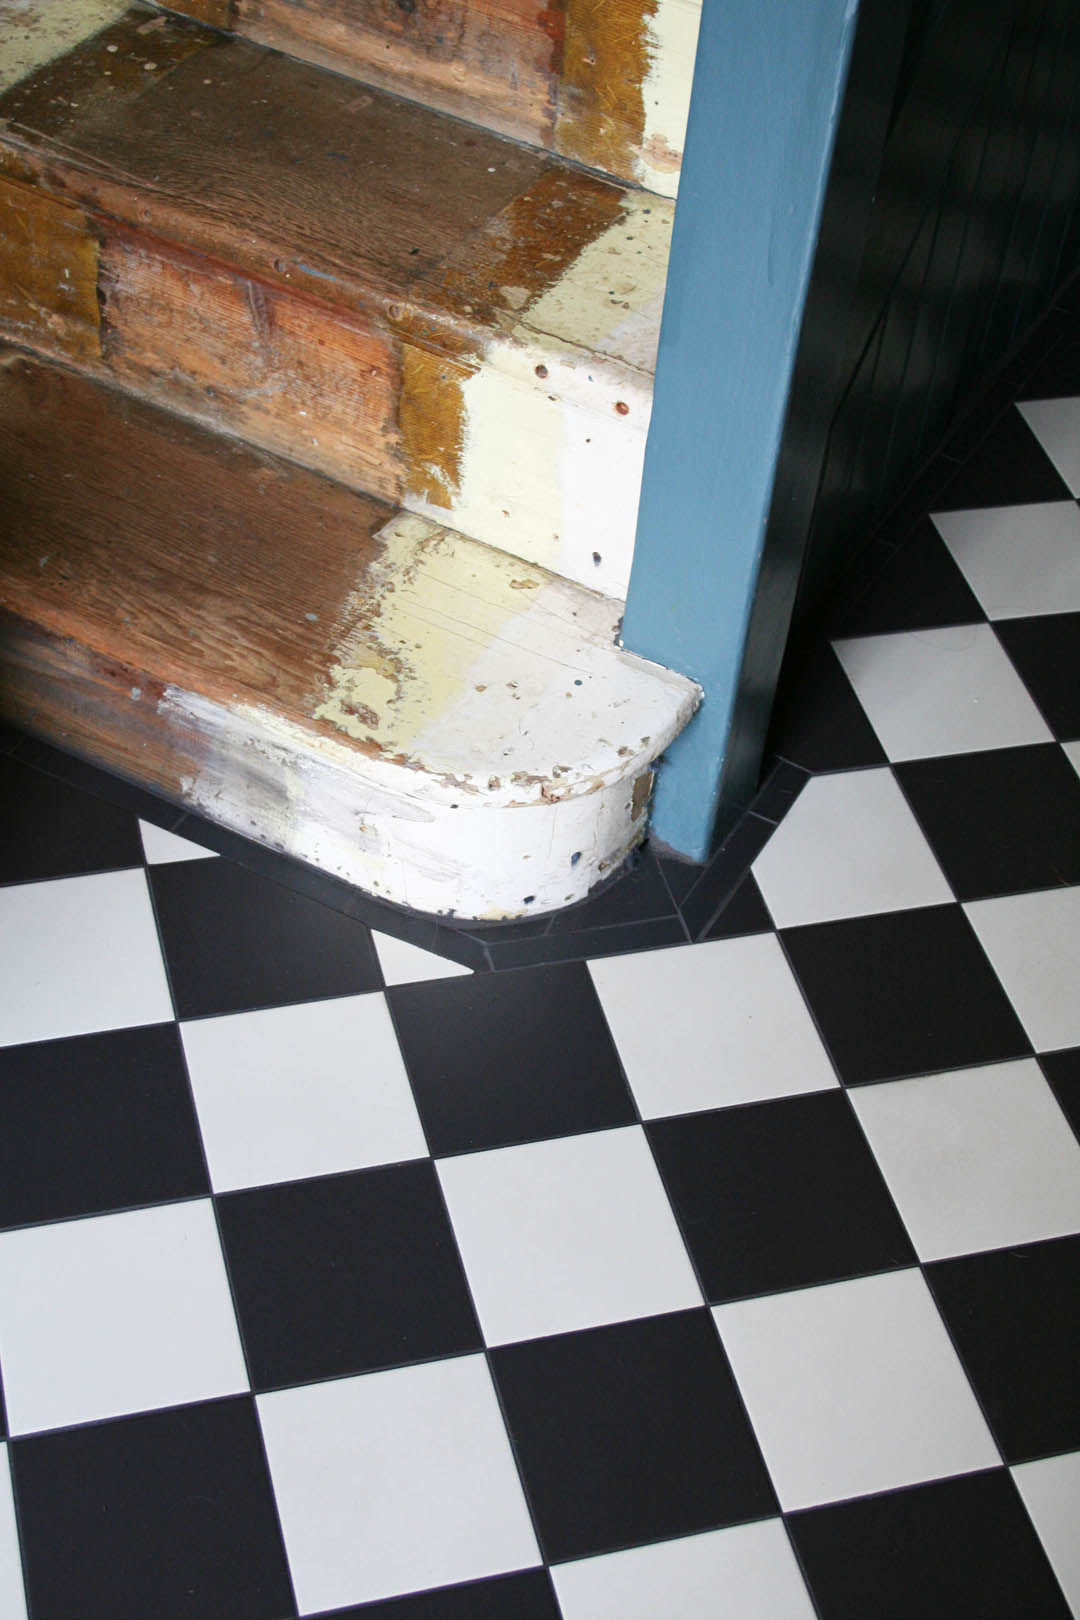
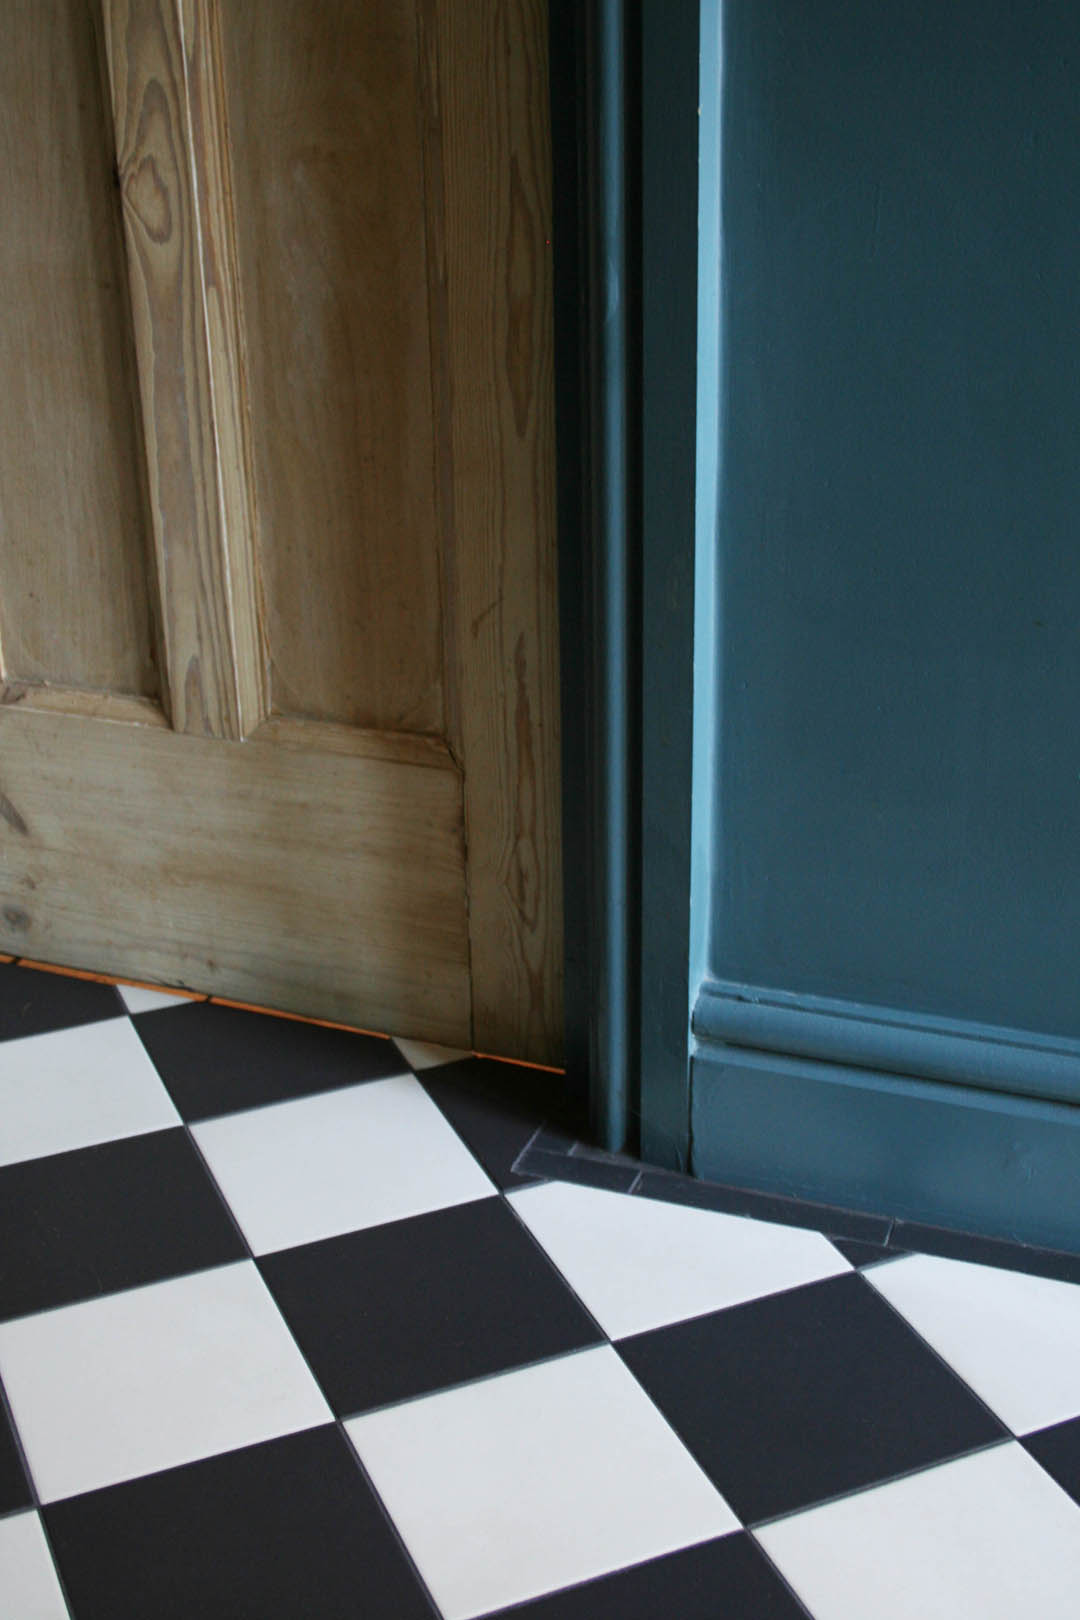
Our tiler was very impressed with the quality of the tiles and how easily they cut , which makes the fact that they were the least expensive tiles that I sampled even better! Our tiler did a brilliant job as I asked for the tiles to be laid in a diamond formation as I think that makes them look more traditional but it makes laying them much more difficult. I chose to buy a small border tile to go around the perimeter of the space to add a traditional touch but border tiles are very expensive so even though I wanted a thicker border comprised of two or three tiles there was no way we could afford that. The border tiles I bought were black individual rectangle tiles 150x25mm and they are exactly the same texture and colour as the black square tiles we have used in the main area. The black Mapai grout is brilliant as our walls aren’t straight and there were quite a few kinks to work around so where there were gaps the black grout fills in so well.

We did discuss with our builder the option of removing all the skirting (that we had put on new three years ago) and removing all the original boards but in the end we opted to keep the boards and use a more expensive UFH system called Schluter. This did mean that we have ended up with less skirting as the level of the floor is higher but it really isn’t noticeable. It also meant far less labour for the builder so the whole job ended up being £1700.

Three weeks in and the combo of UFH and tiles is dreamy. I still can’t quite believe I’m able to walk around in socks in comfort and Mimi lies on the floor every morning whilst I faff around trying to get us both out of the door. Otto is also a massive fan and has been really enjoying his new napping spot. We’re all very, very pleased!

Storage and seating

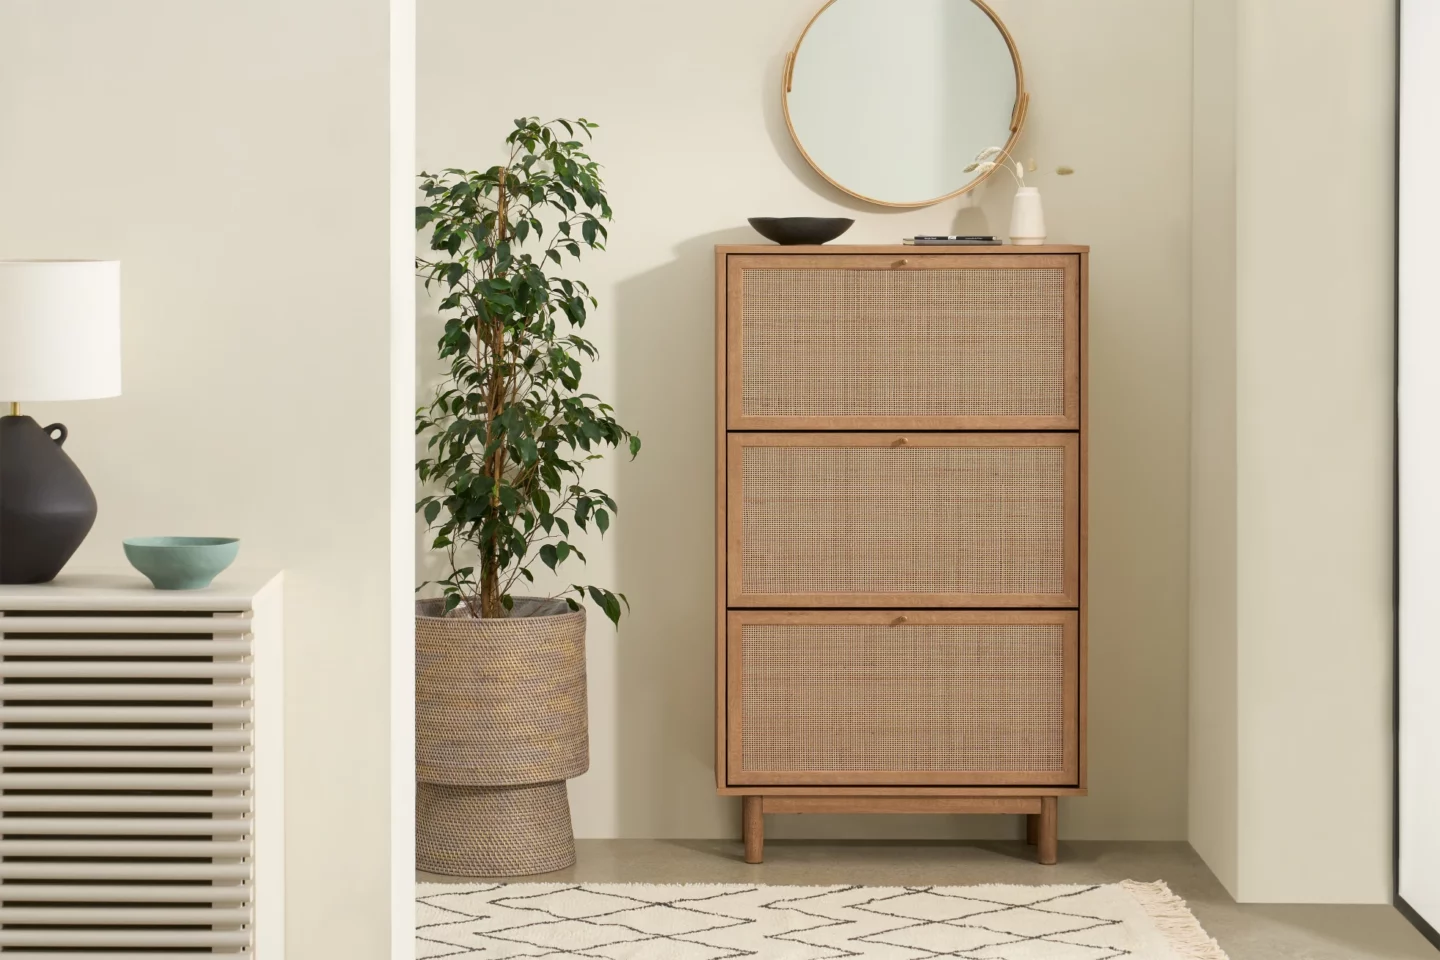
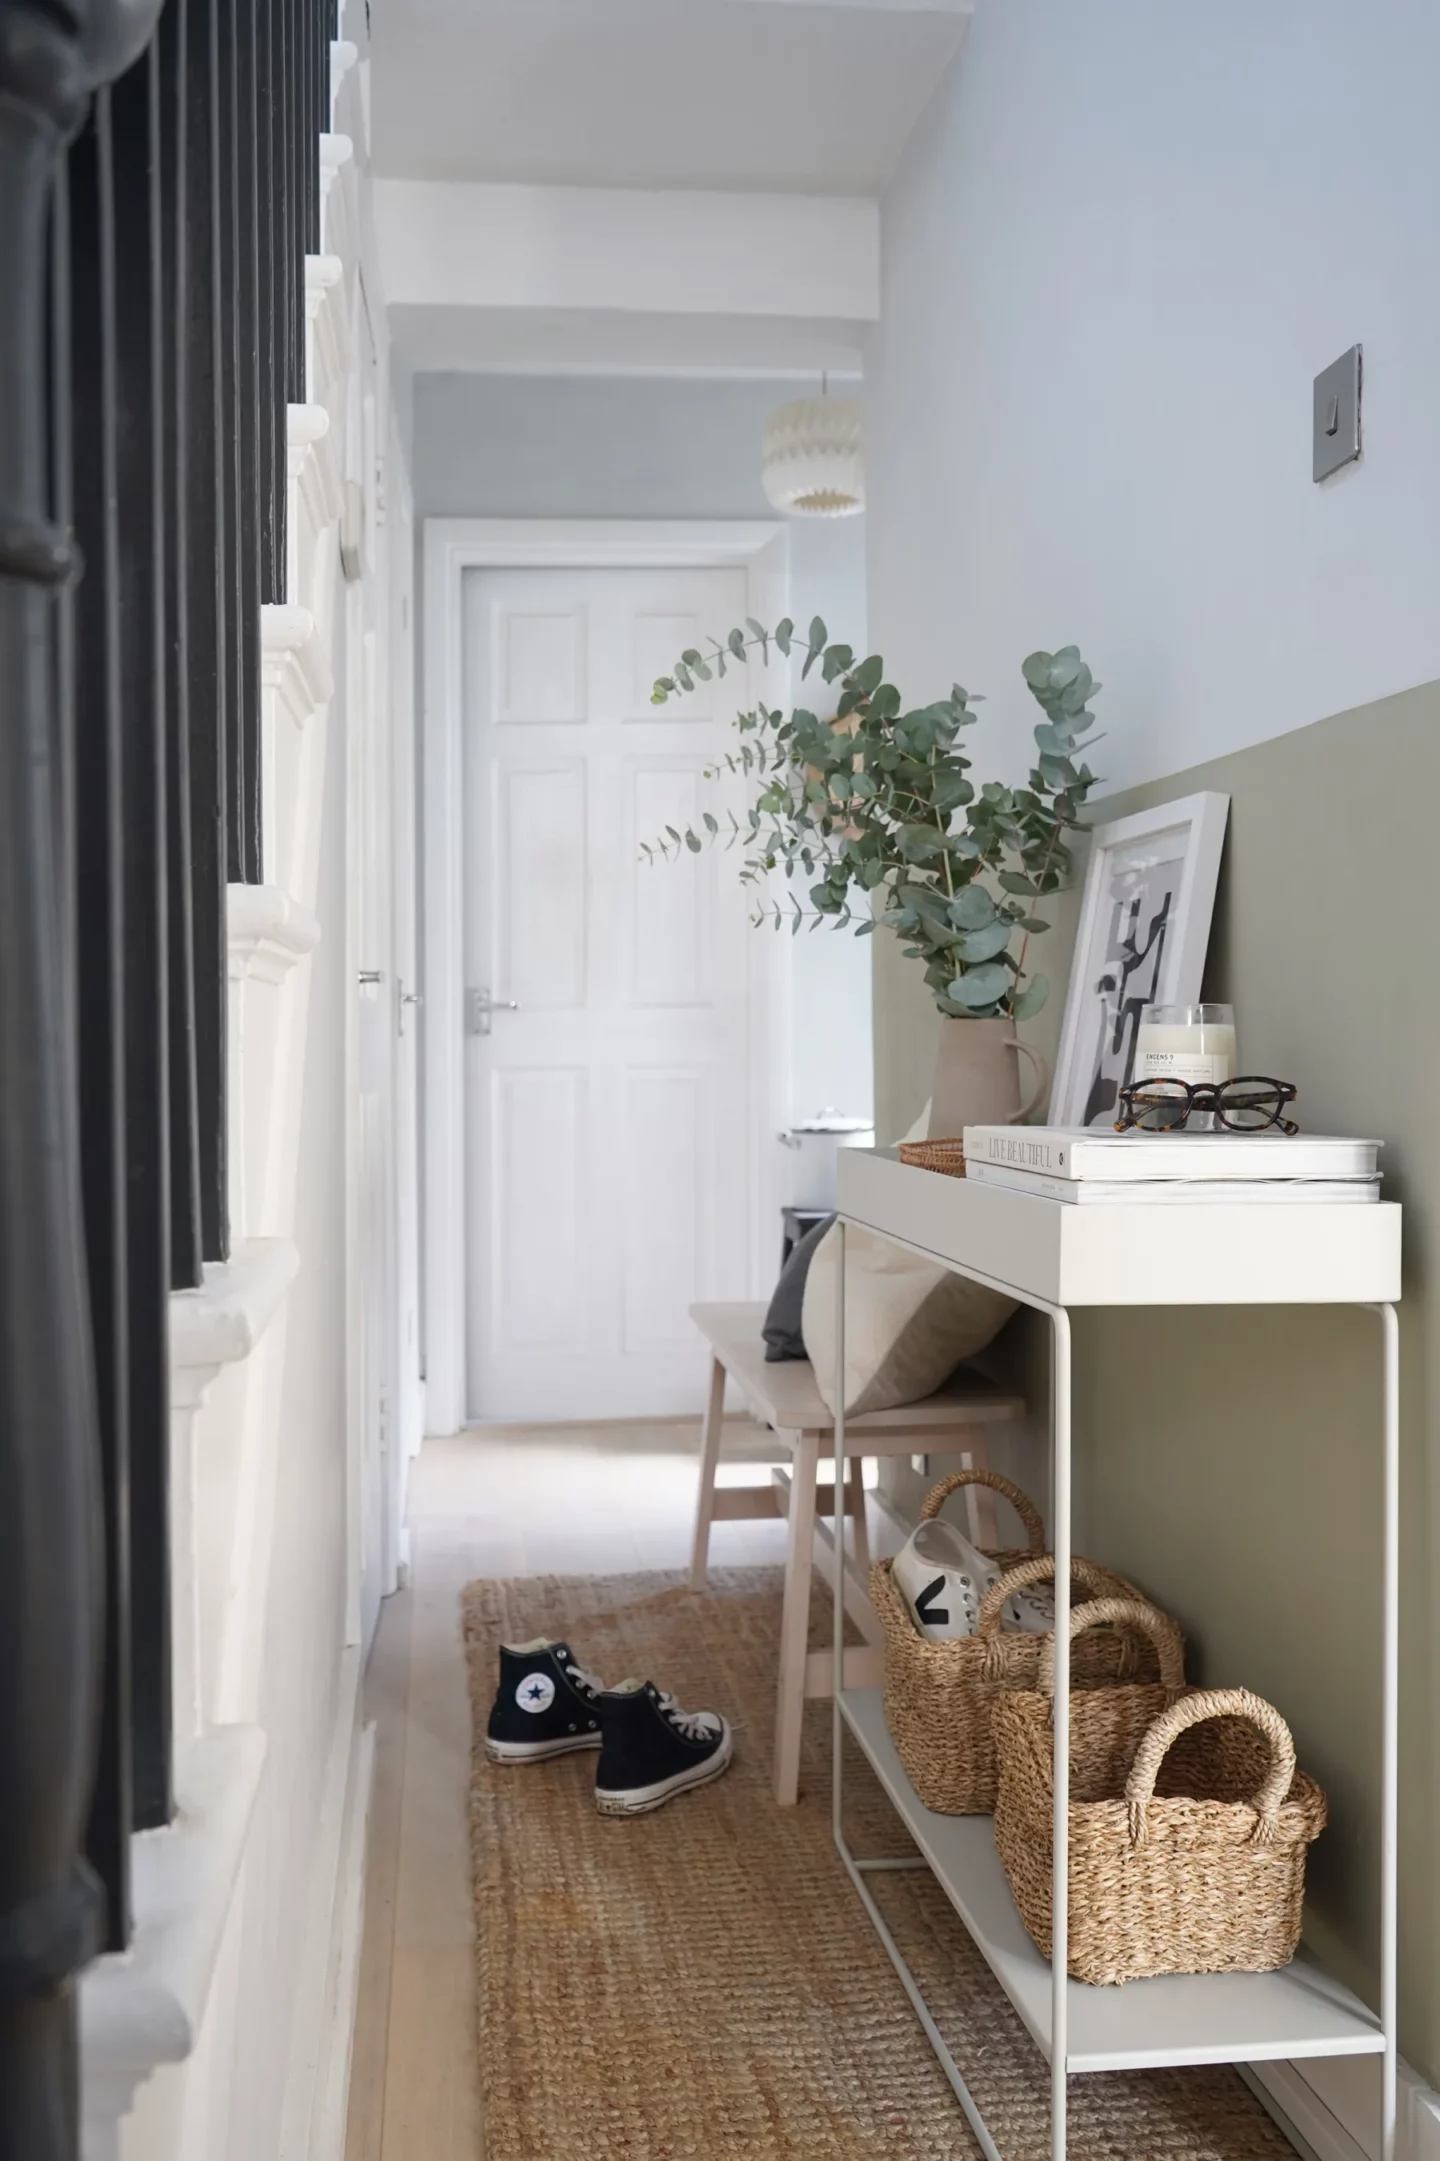
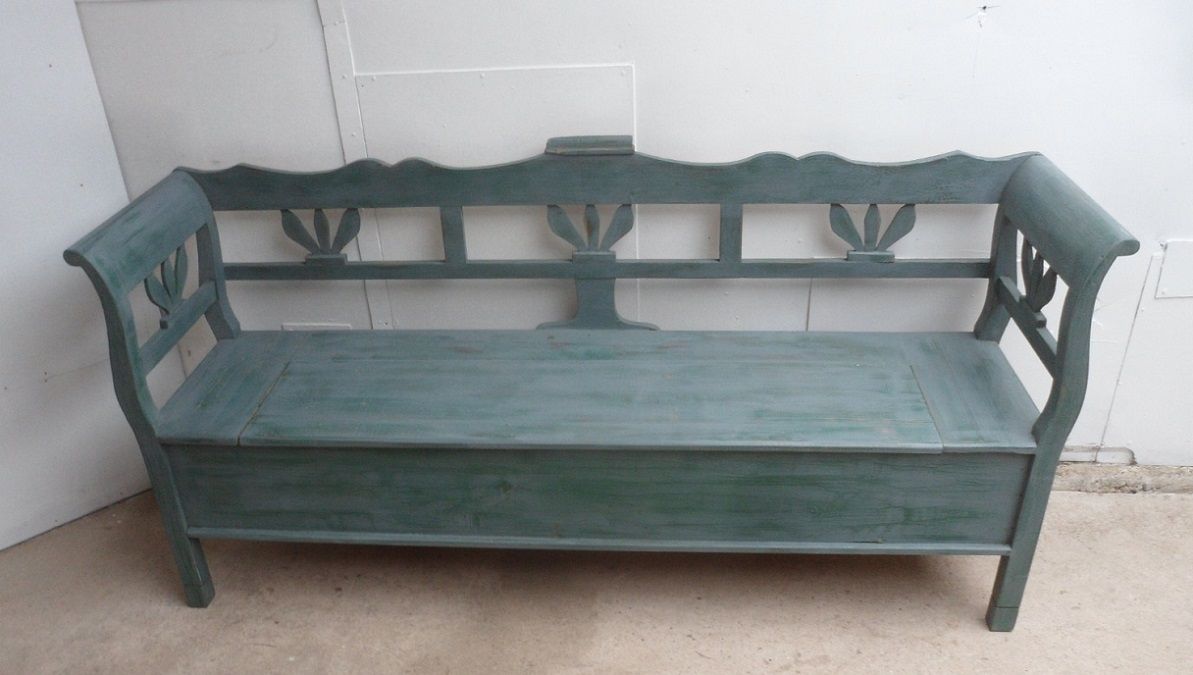
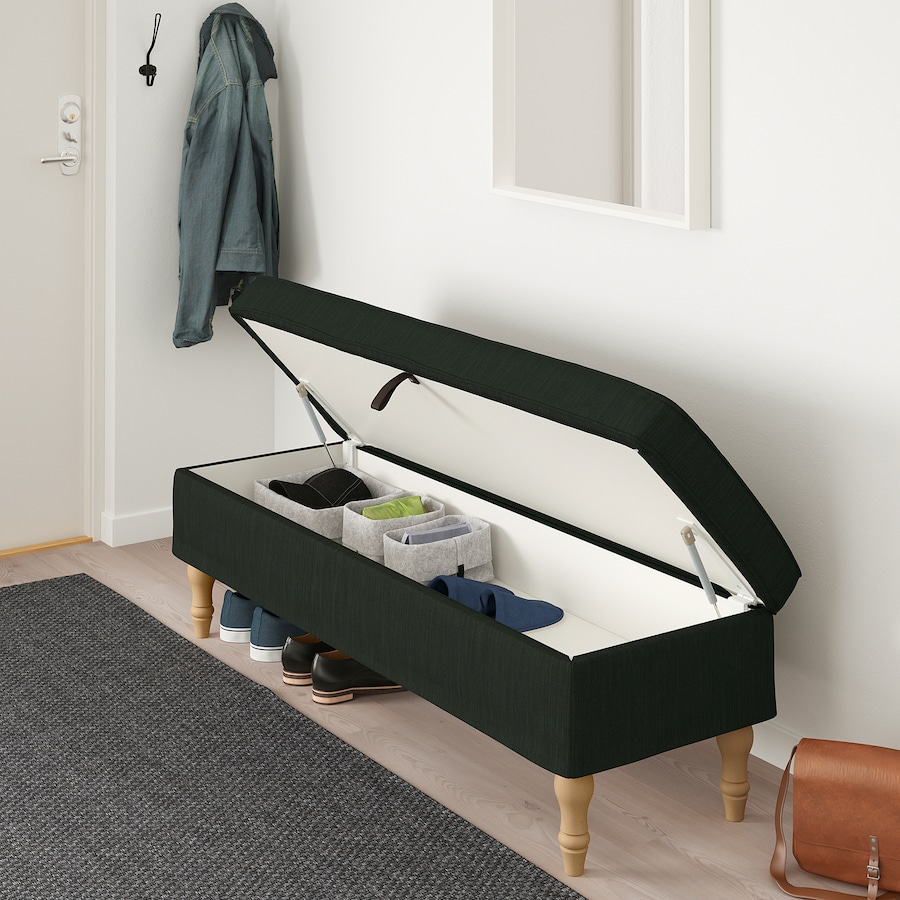
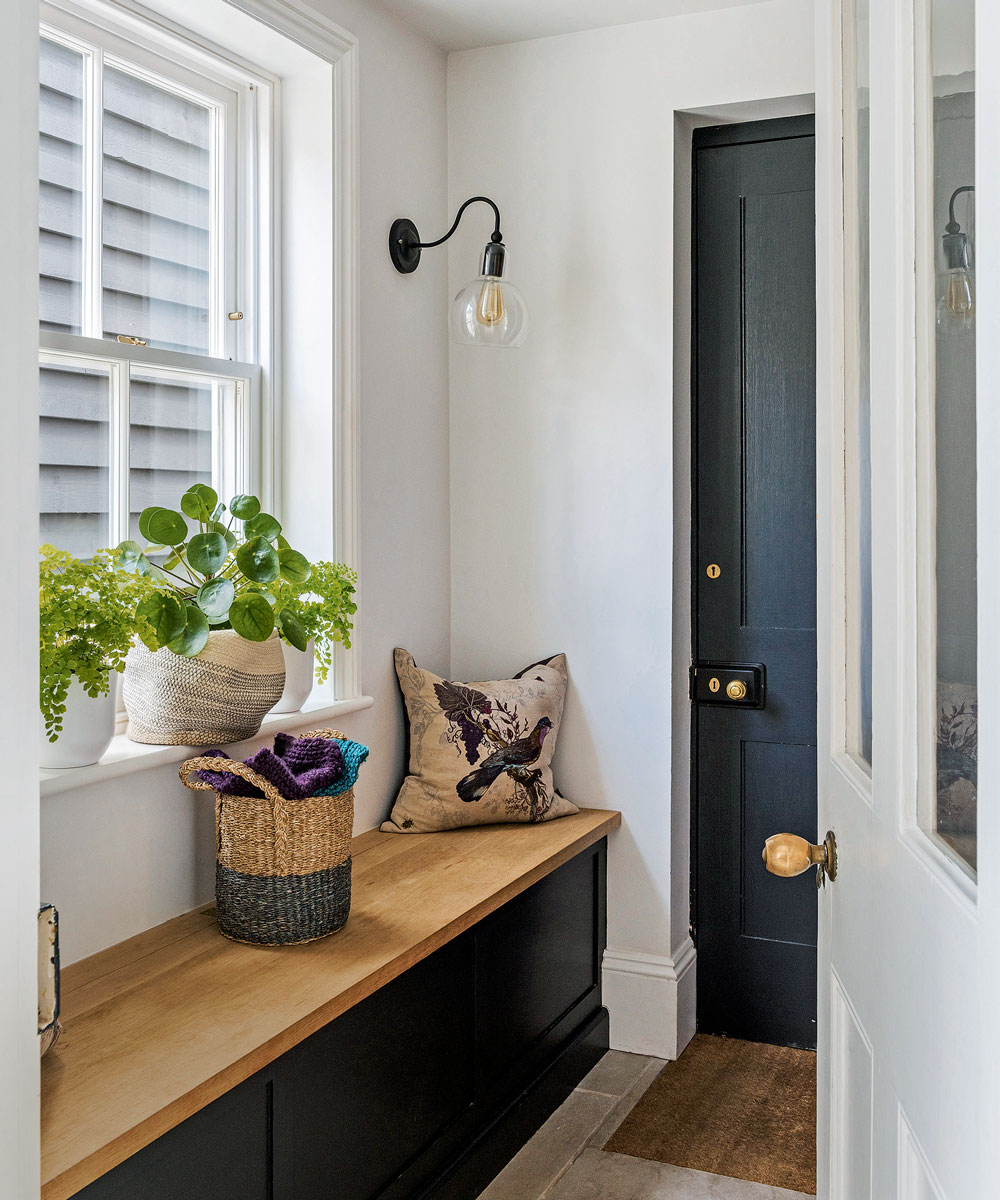
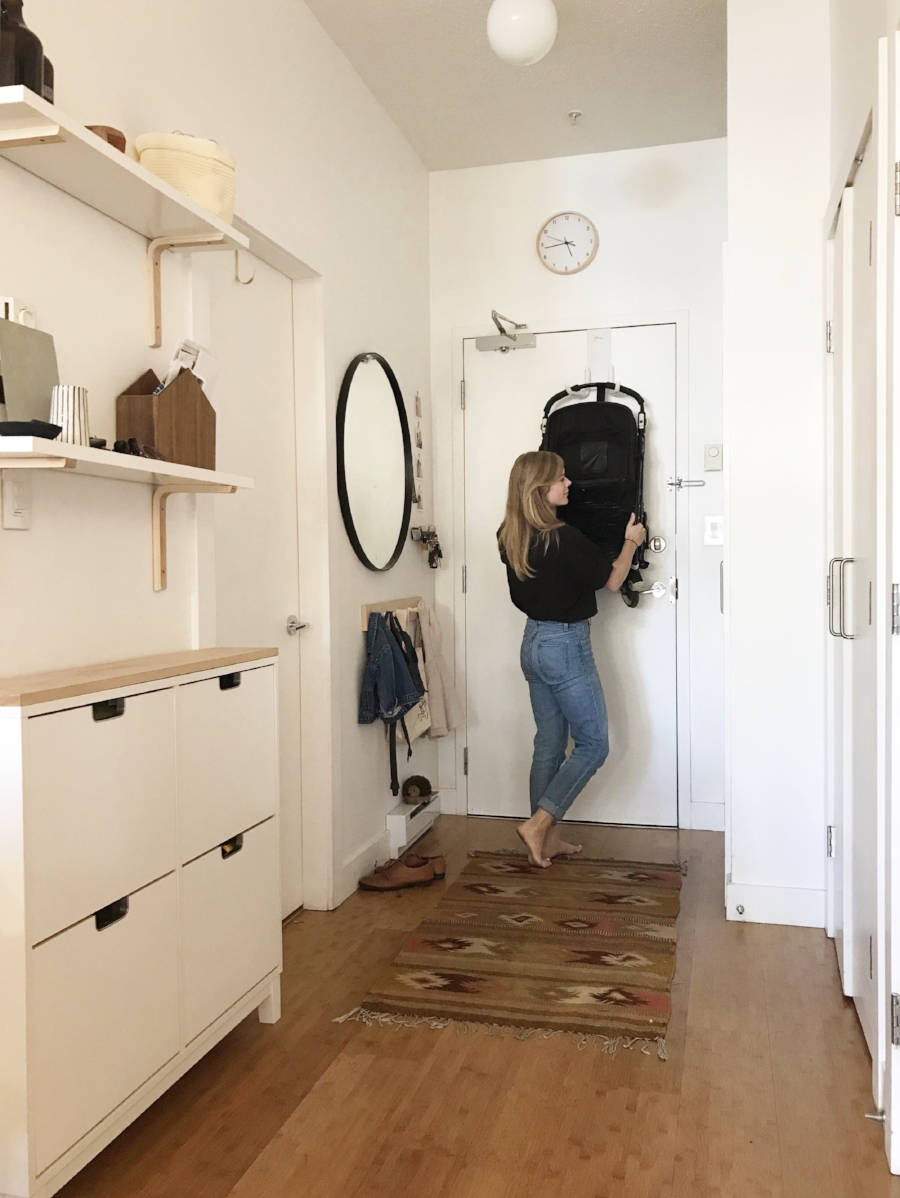
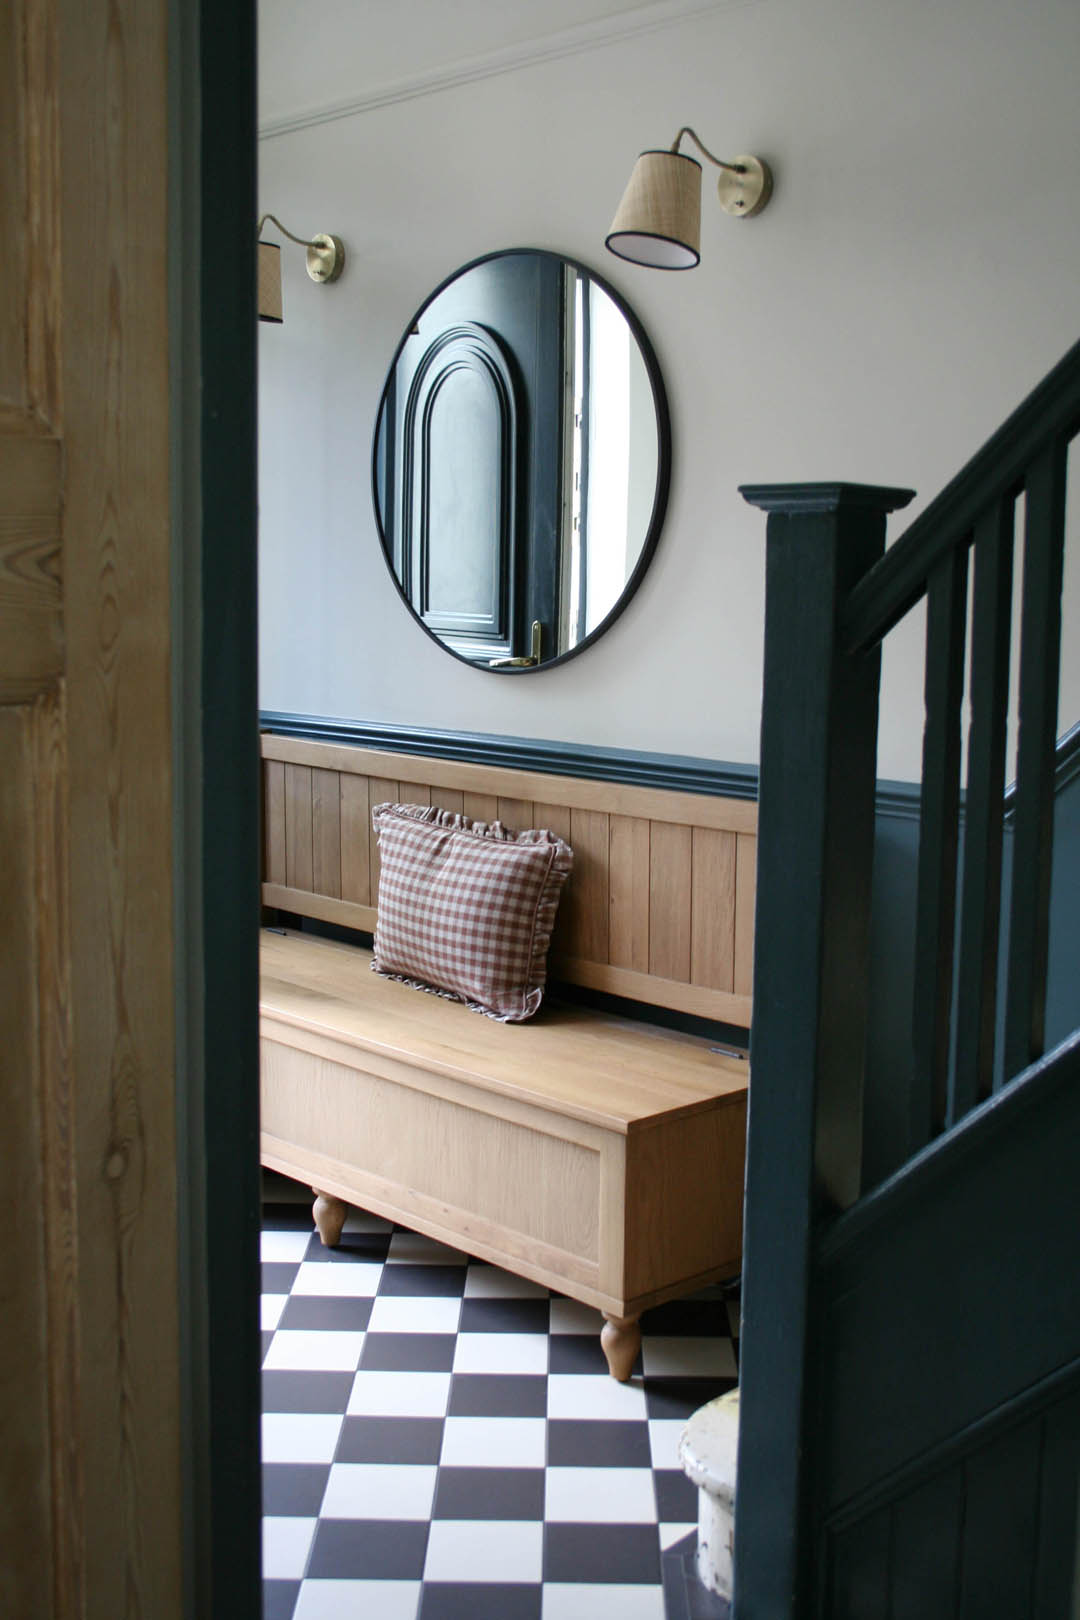
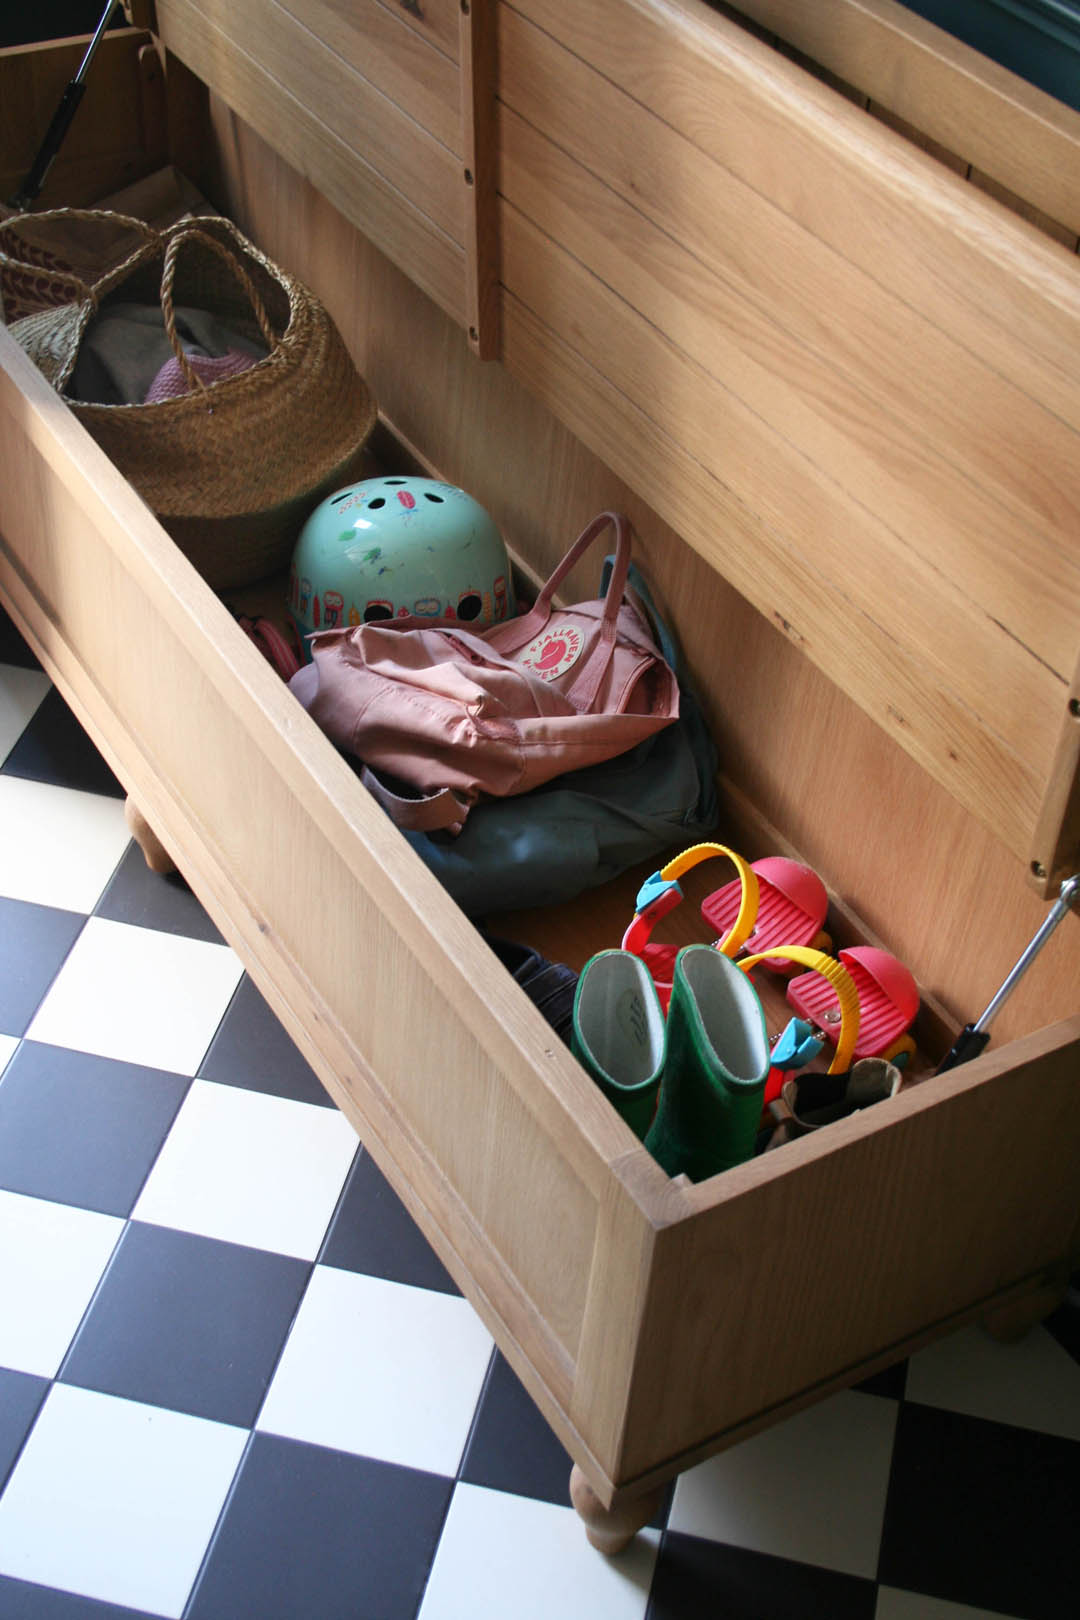
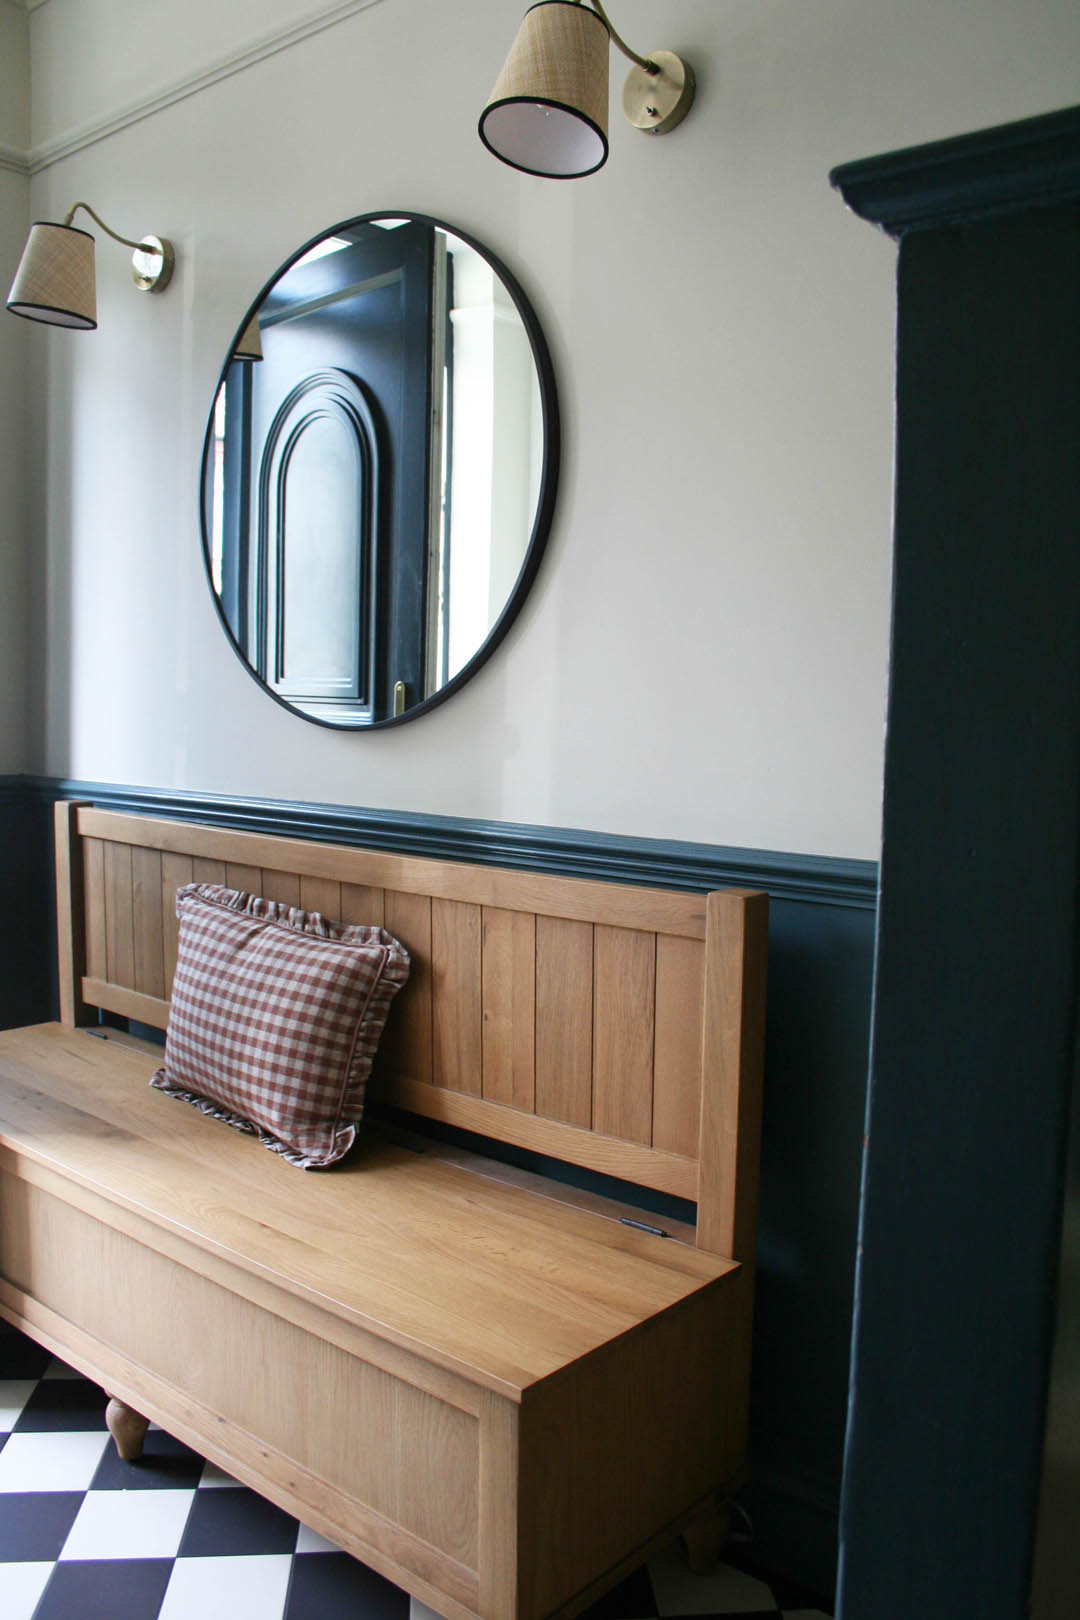
The next big change I wanted to make was to remove the ‘temporary’ console storage table I bought secondhand three years ago for £15. It always looked so untidy as the storage was open and we always ended up going into the sitting room to change our shoes as there was no where to sit. Therefore, I was very sure that I wanted a storage seat and I did have a good look at antique options, specifically Hungarian settles, but generally they are either too big or too small for our space. They also have very high arms, which can make a space feel more cramped, and often the storage seat isn’t fully acessible. I did find one but the seller let me down so I was thrilled to come across this Elkstone Oak Monks Bench from The Cotswold Company* (PR product). Not only is it the perfect length but it has no arms, which makes it feel far less imposing and we can perch on the end if necessary. Also, the entire seat lifts up so there is SO MUCH storage as well as a soft closing function. We can now store woollens, bike helmets, excess shoes, shopping totes and all those other bits and bobs that are unsightly but need a home in a hallway. We are going to try and find some dividers to make the storage more organised. We can just tuck every day shoes under the bottom of the bench too as it stands on legs. It’s completely ideal.

Hallway storage bench | The Cotswold Company* (PR product)

The Cotswold Company have a huge amount of hallway furniture and accessories and I have to say it was up there with one of the best furniture orders/deliveries I have experienced. Not only was the bench ‘in stock’ so no huge lead times but it arrived about two days after the order was placed and the delivery company was brilliant; great communication, changed the allocated day for me with no issues and they were super careful when they made the actual delivery. The packaging was great and there wasn’t a single quality issue, which if you order furniture regularly you’ll know is extremely rare. Anyhoo, having a seat in the hallway makes everyday life much easier and we’ve found when guests come they are much more likely to leave coats and bags on there rather than bringing them into the sitting room, which is something that drives me a bit mad (just me?!).

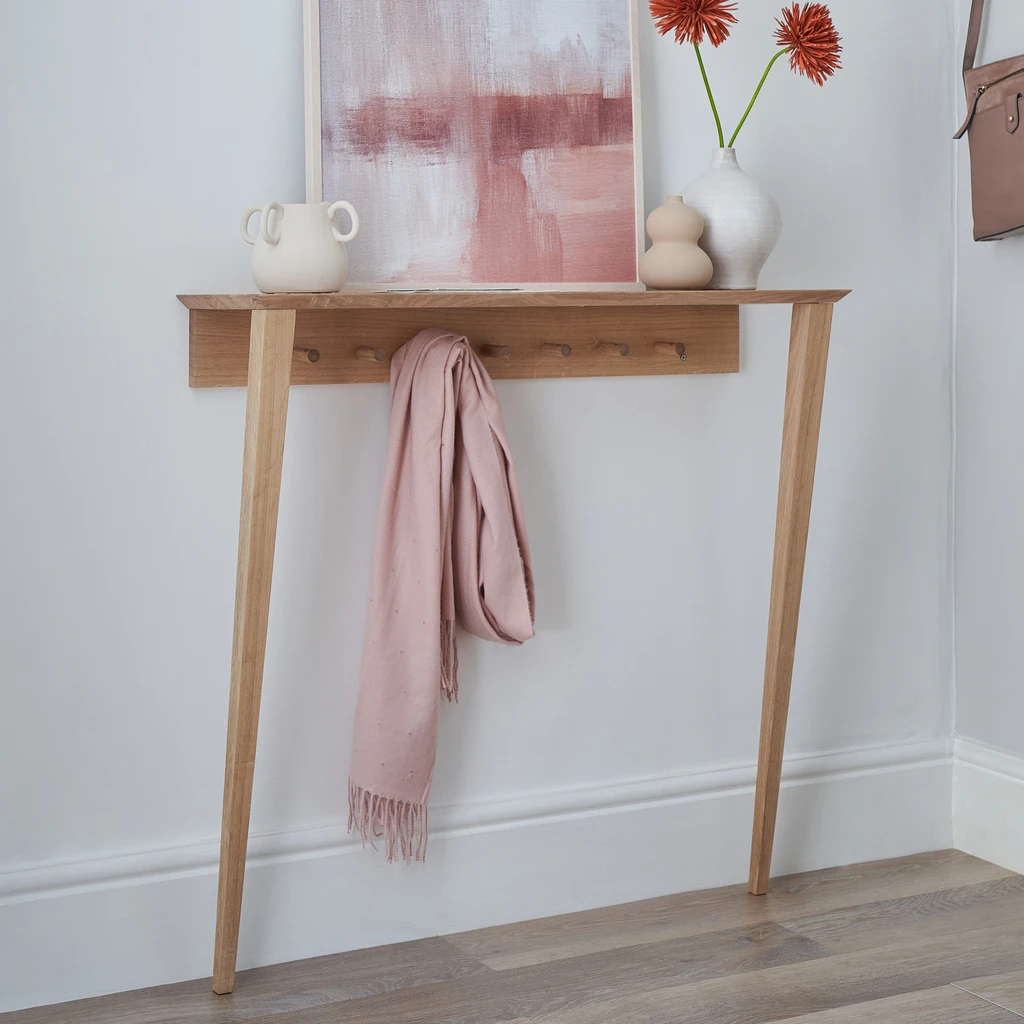
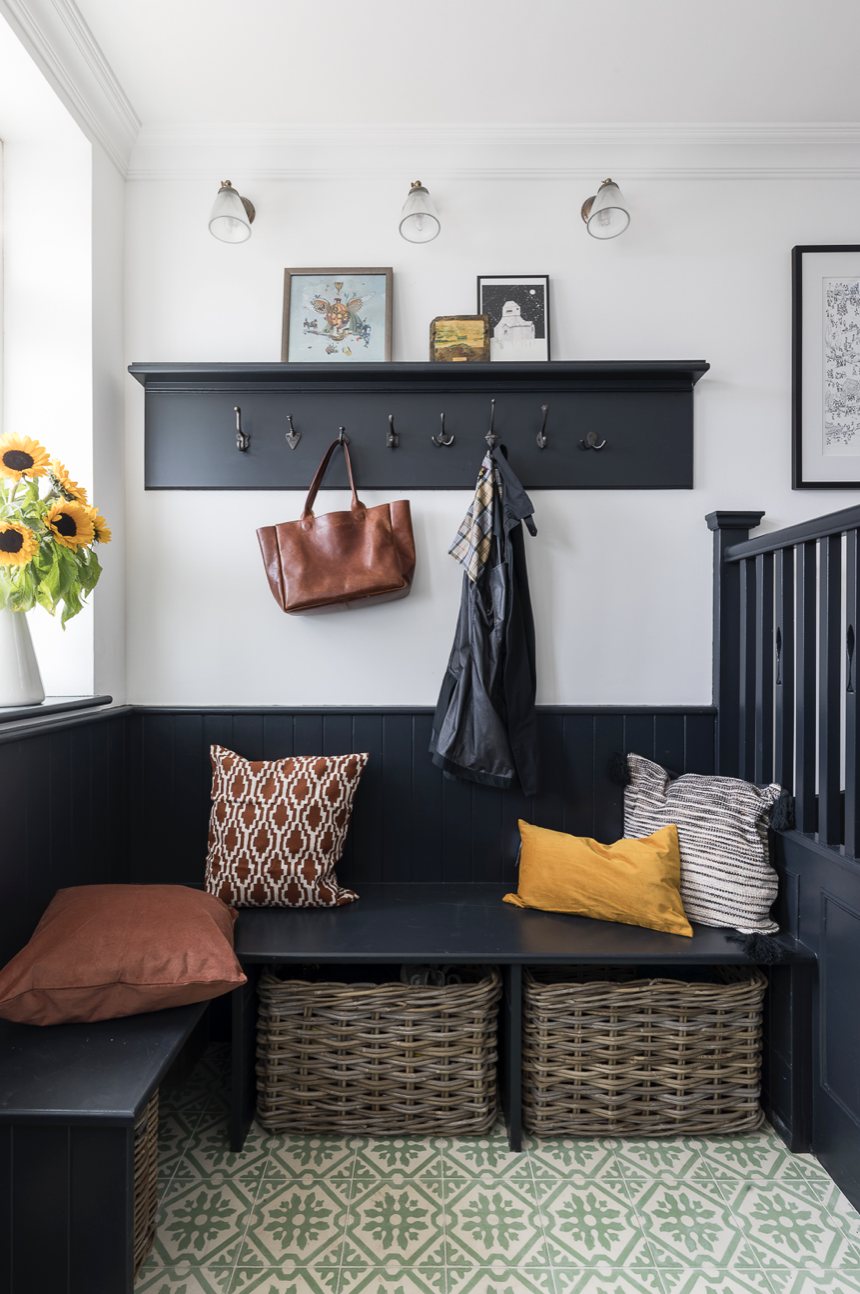
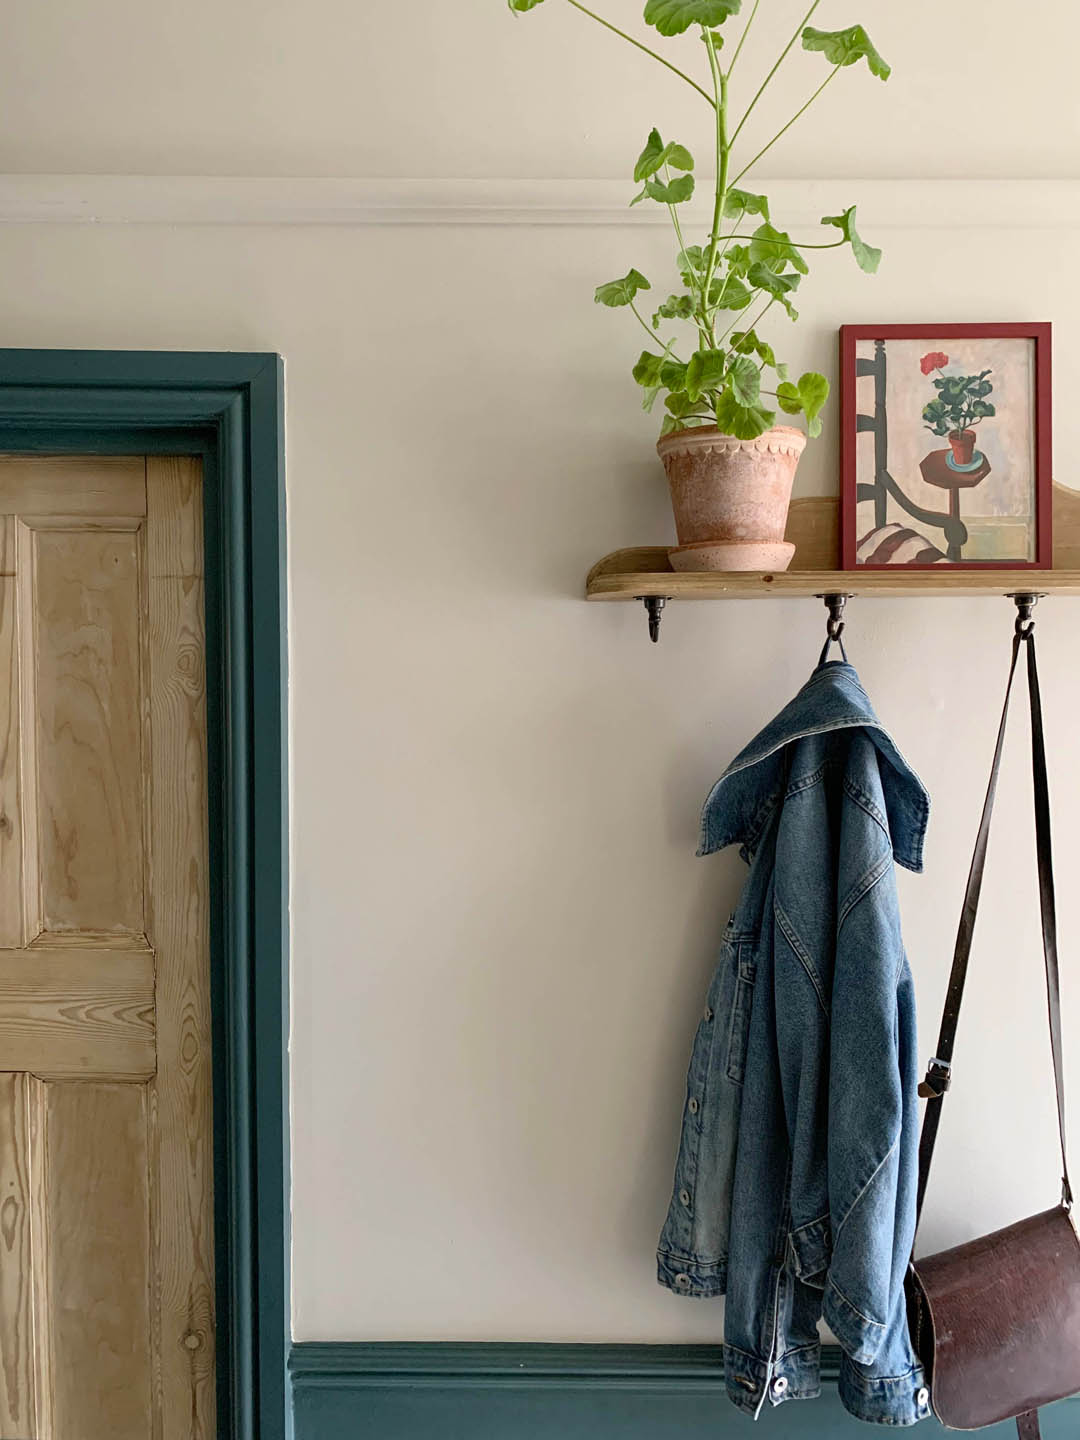
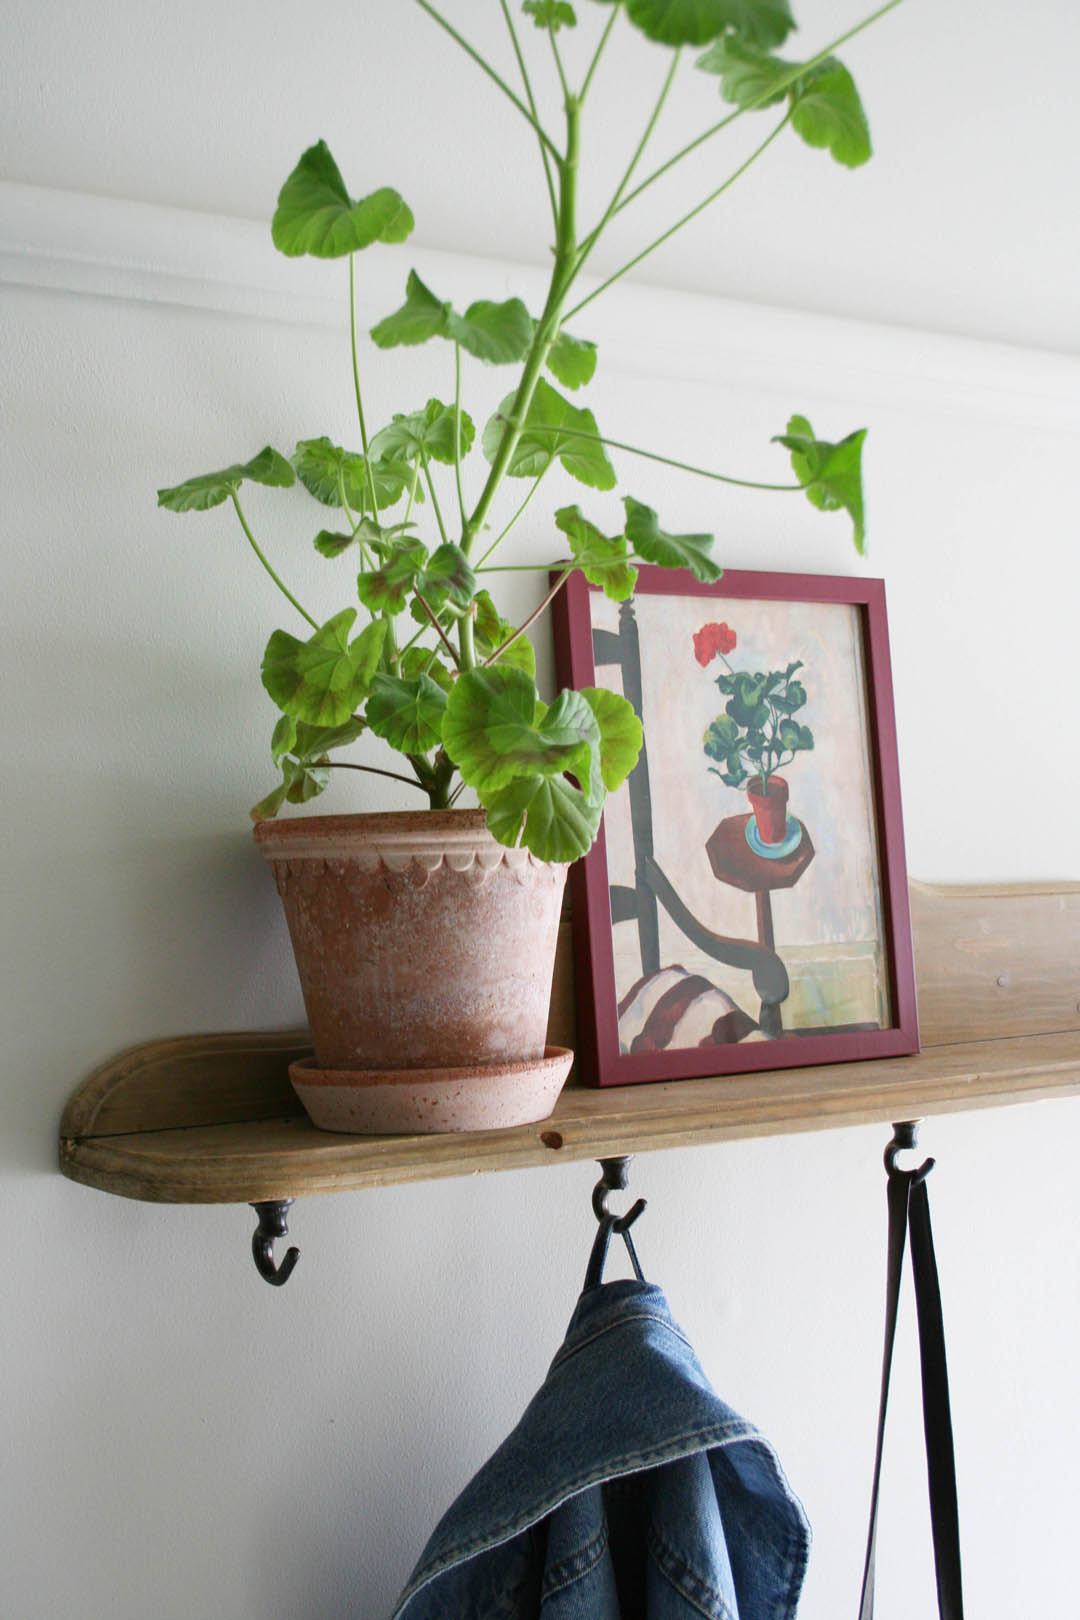
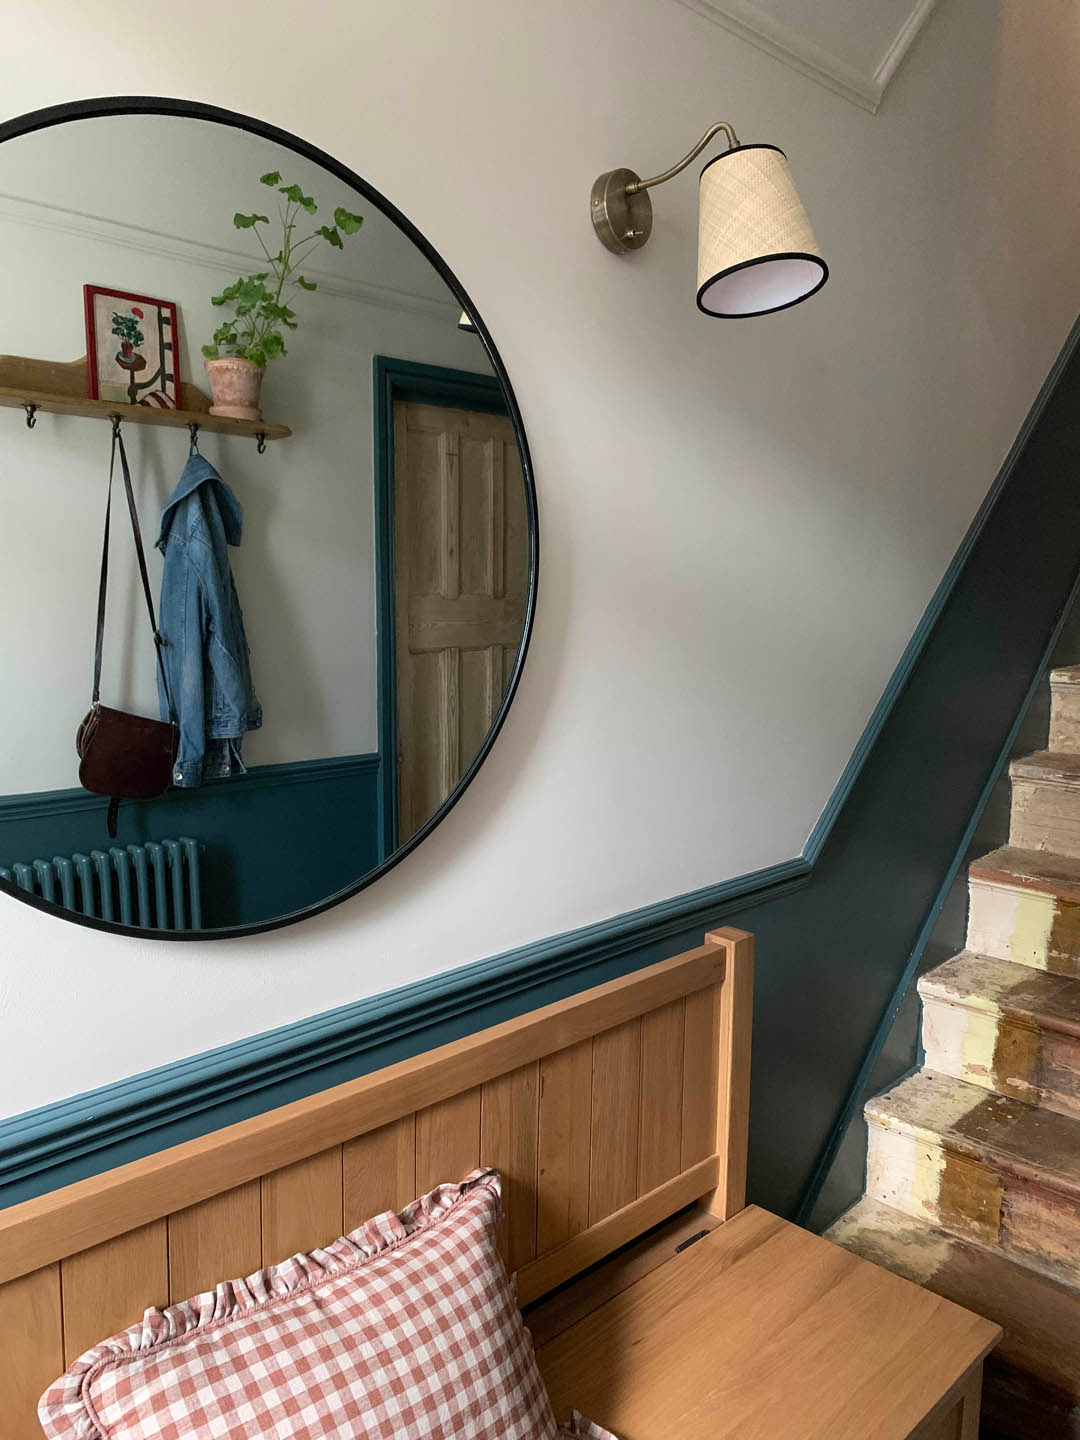
The other storage we added was a little street find shelf that we had mounted as a shelf below a mirror but I realised that if we turned it upside down we could add some hooks and use it as a peg rail and the shelf above is very handy for glasses etc.

Wall colour

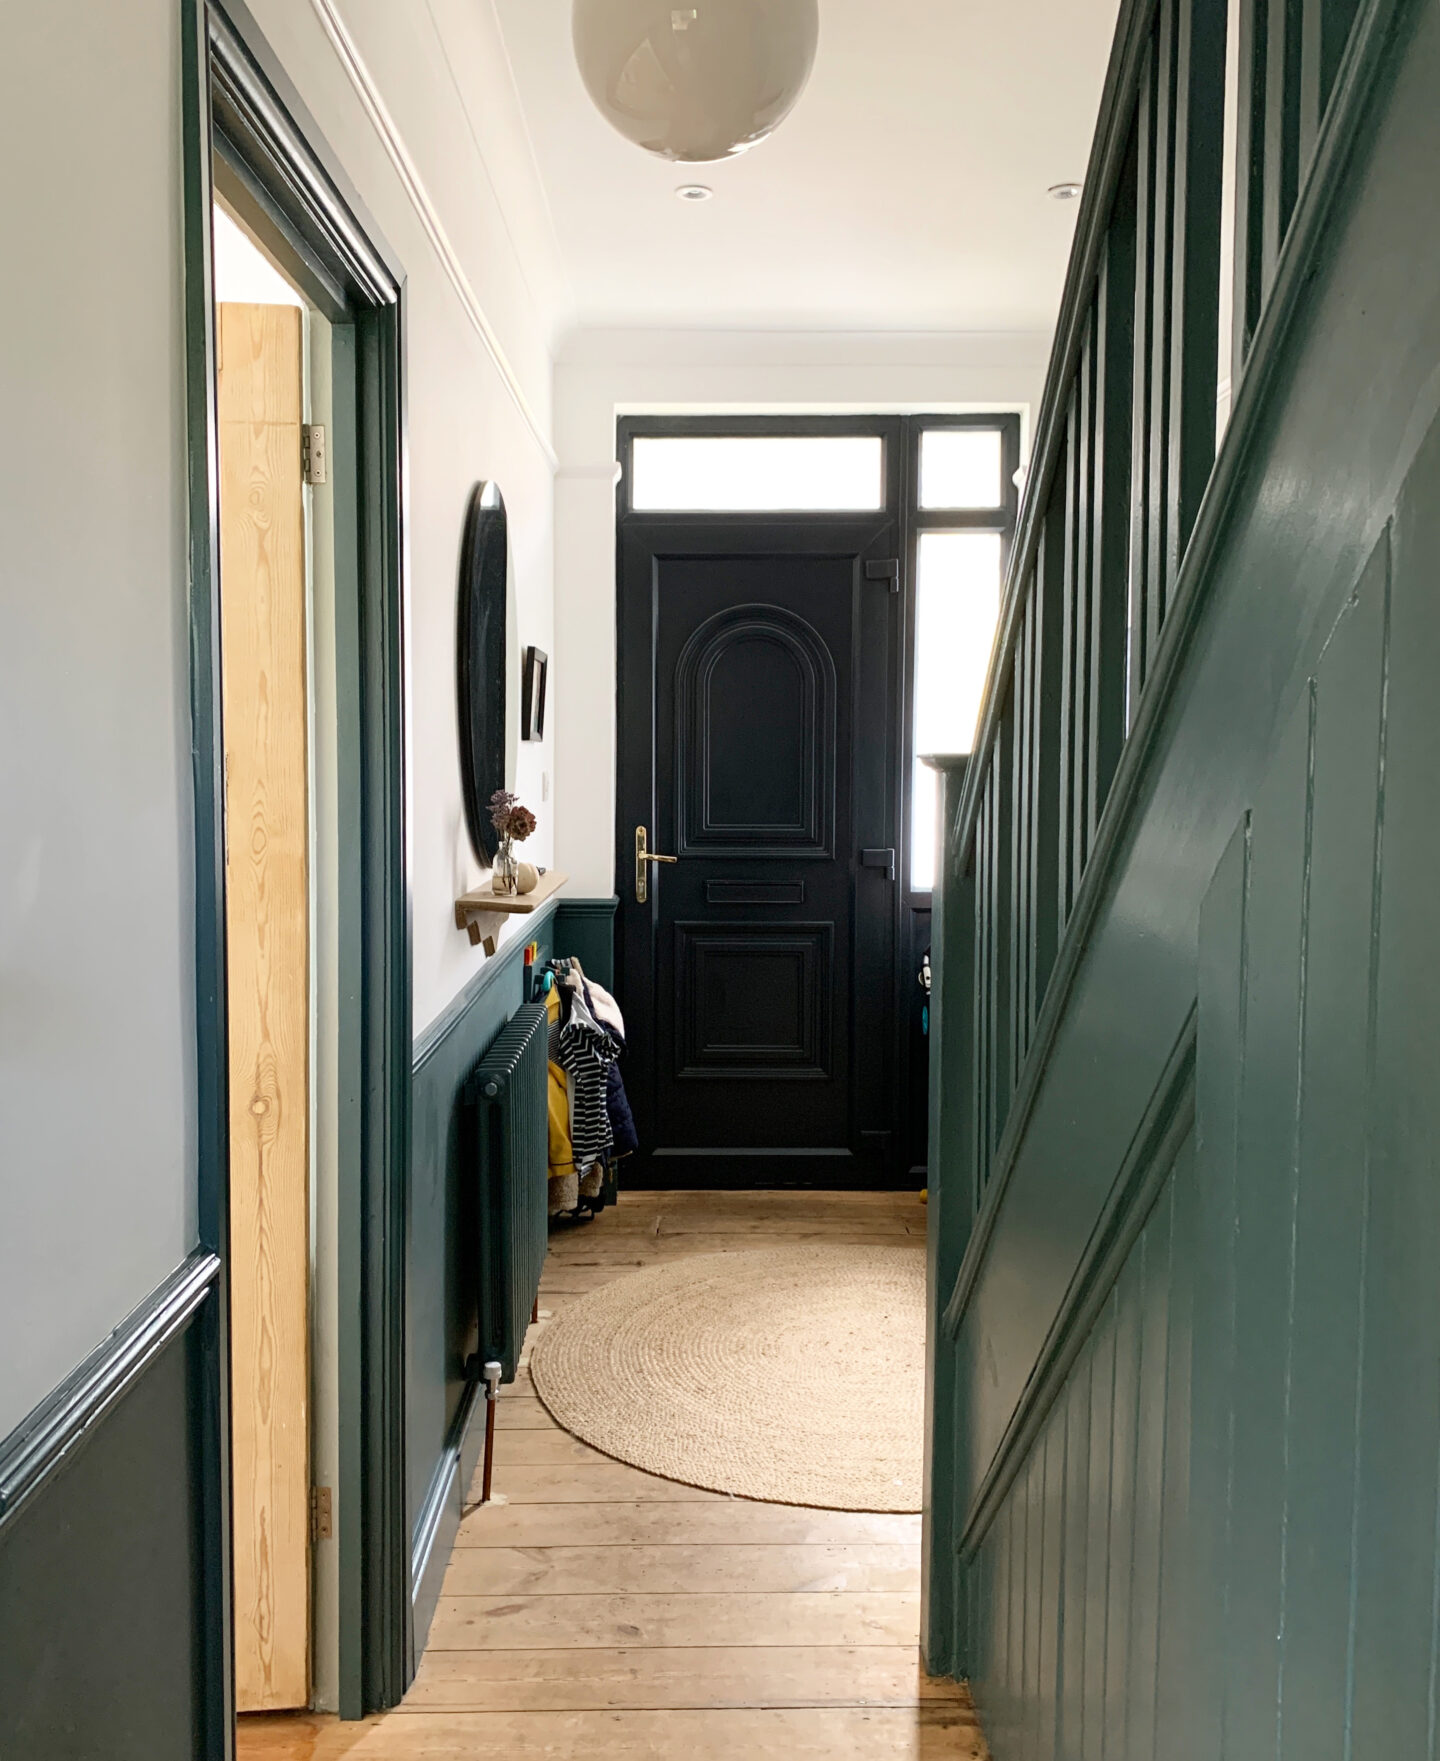
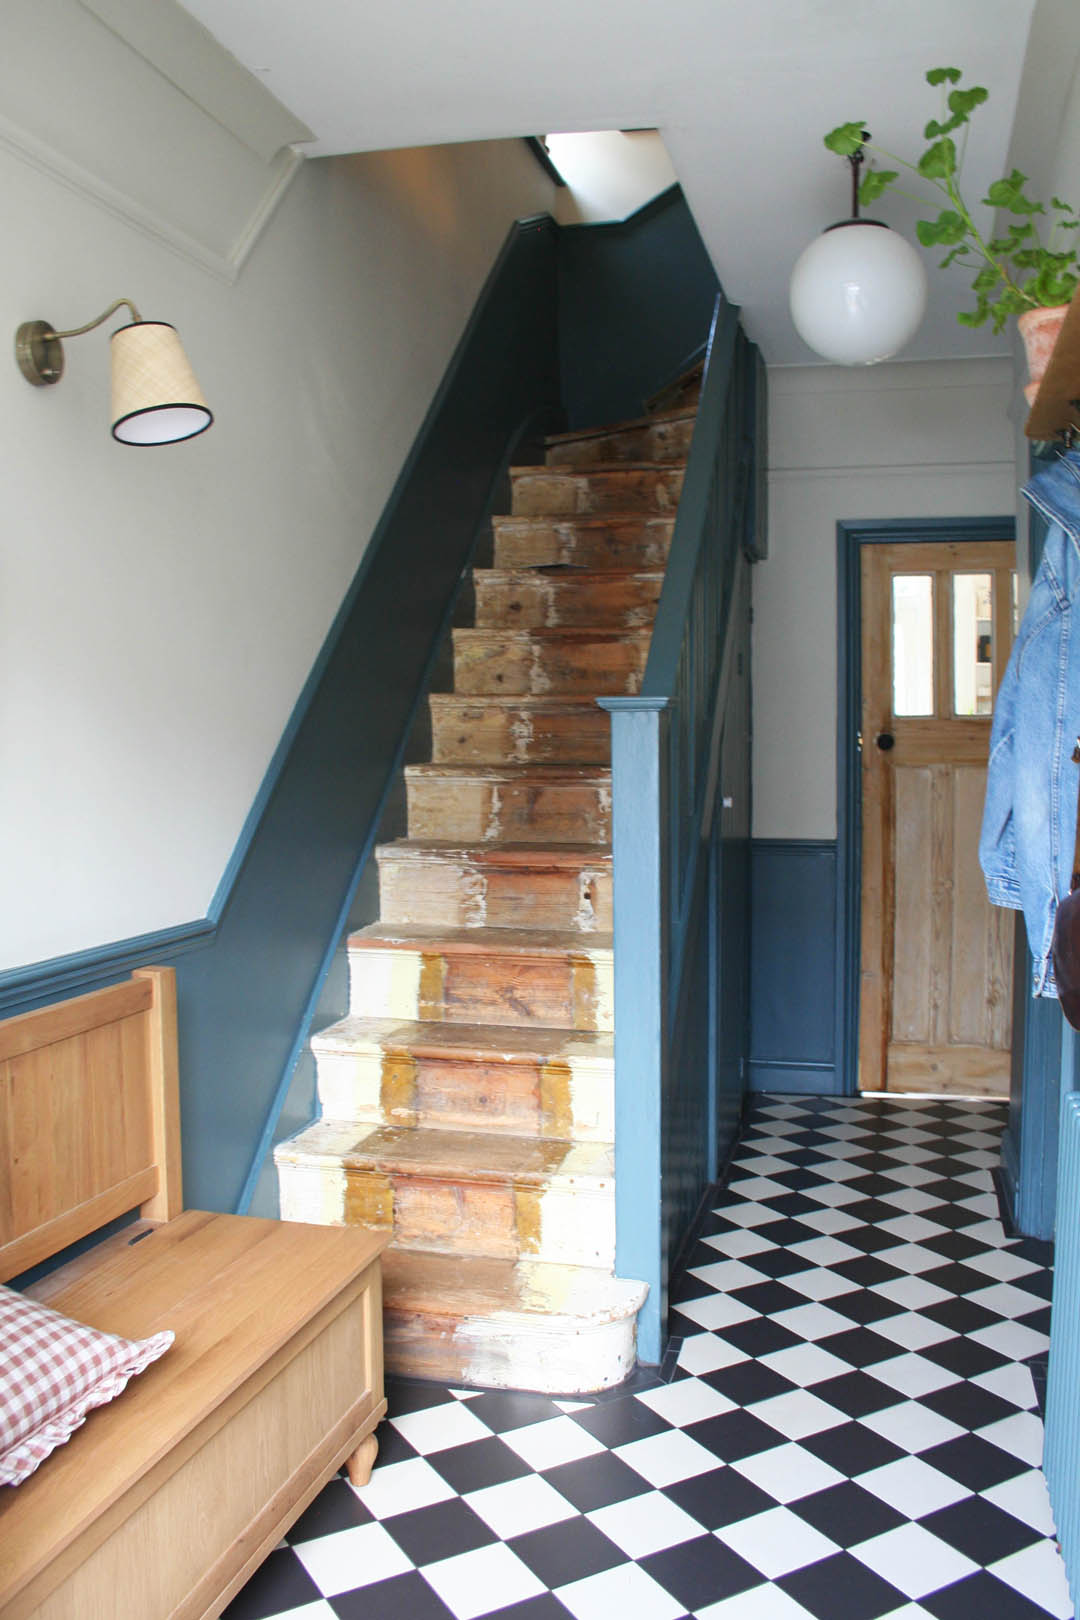
The woodwork has stayed exactly the same and was painted Inchyra Blue three years ago. I still really love it. However, one big budget saver we made was agreeing to have all walls in the house painted brilliant white. I knew I would change them slowly as we got to know the house and I’ve actually really enjoyed the process of taking my time. I painted the walls myself before the tiles were laid and chose Shaded White to complement the Inchyra Blue (both Farrow & Ball)and bare wood of the doors. It brings so much more warmth to the space. I haven’t painted the ceiling yet (the brilliant white really sticks out like a sore thumb to me) but maybe after Christmas! I decided to paint up to the cornice as that makes the ceiling feel higher and as it’s not a nice cornice it doesn’t emphasise it more than needs be.

Lighting

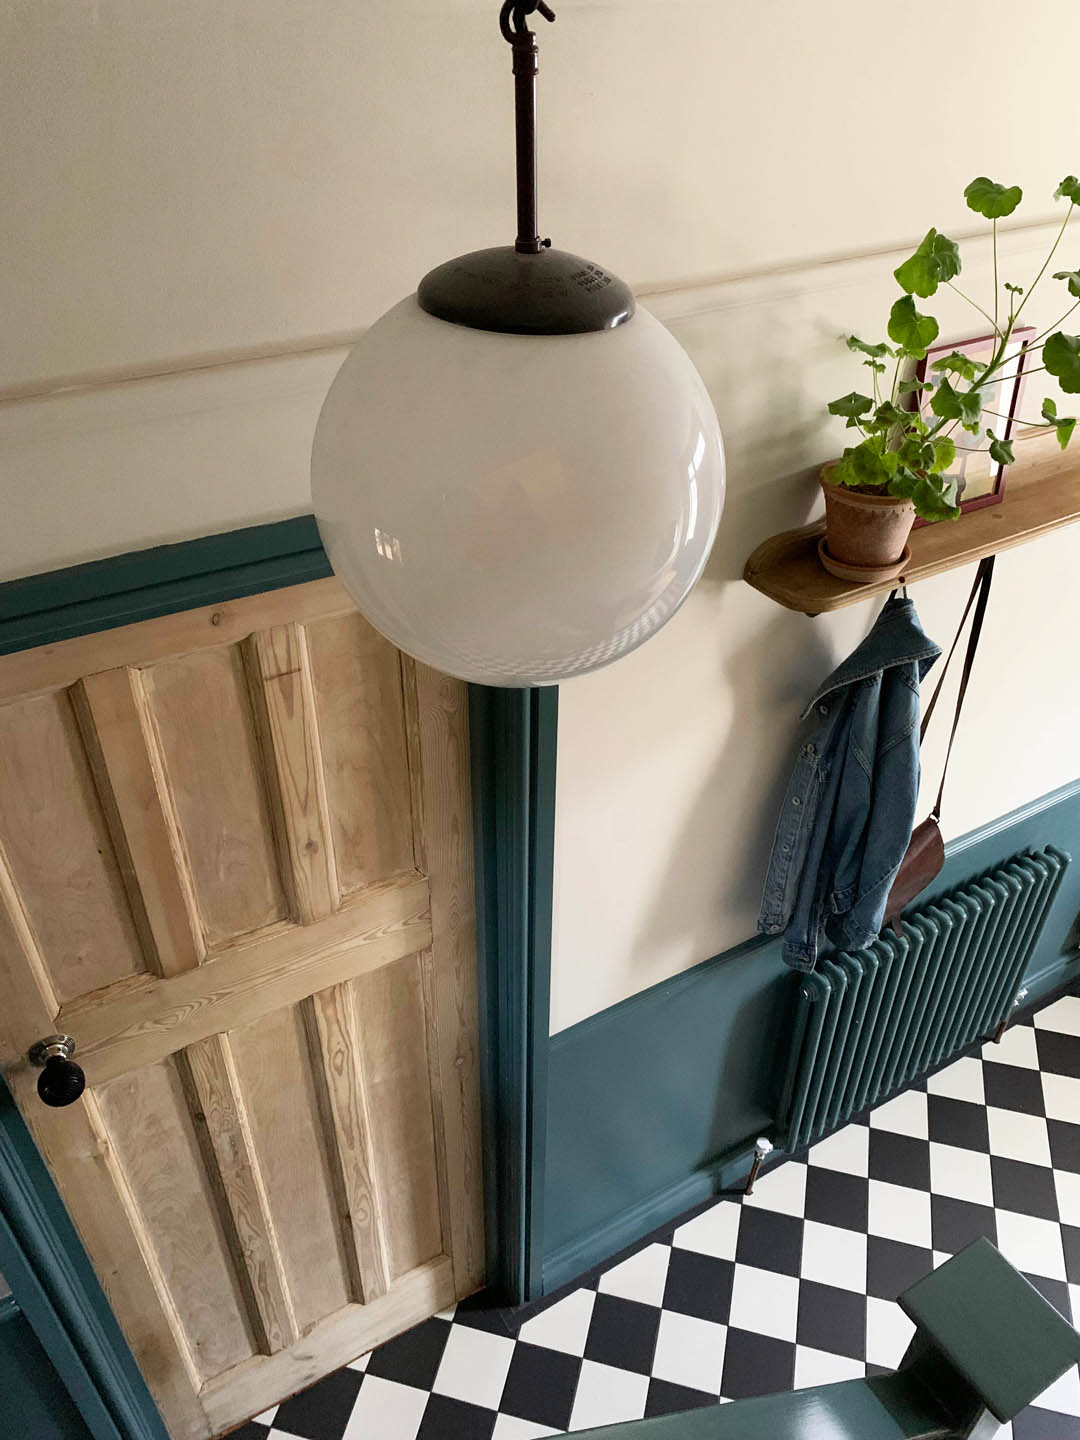
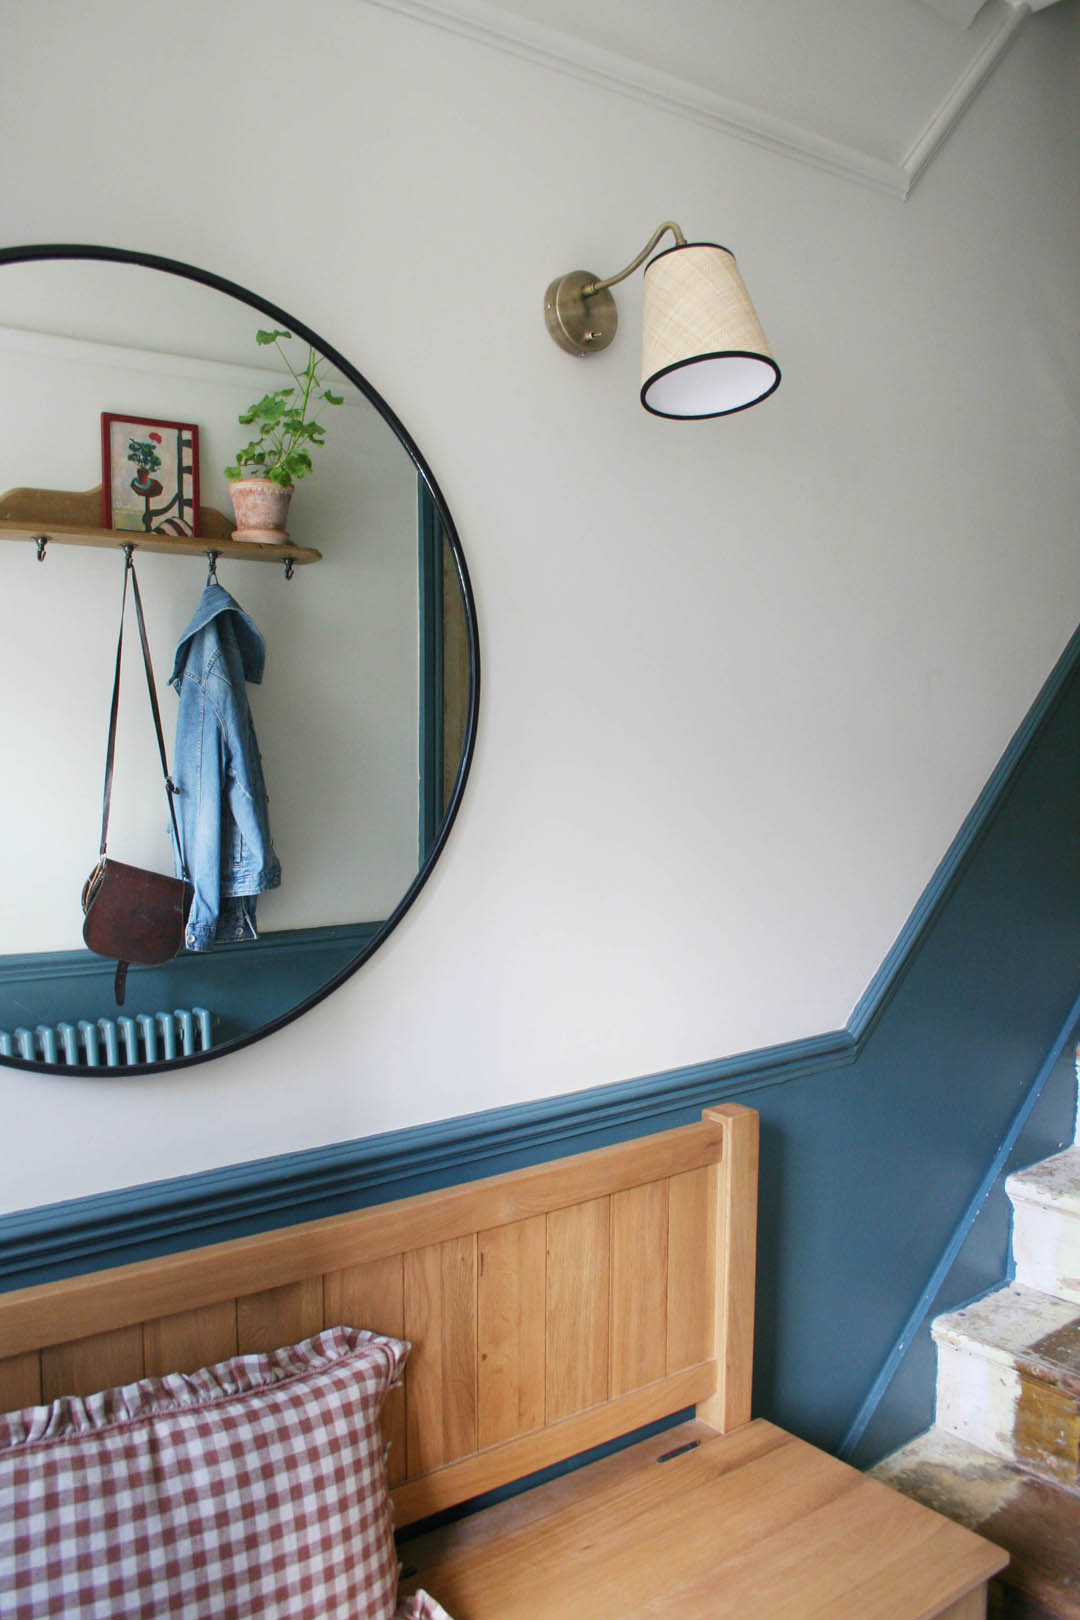
A huge priority for me was to improve the lighting in the hallway during this process. I’ve been desperate for wall lights to add some really warm light so I asked the builder to add a plug socket behind the bench which cost £100. I didn’t want to pay more to have the lights chased in and a socket gives flexibility if we ever shift things around or want a floor lamp, for example. I found relatively inexpensive wall lights on sale although I share the link with the warning that they come with plastic cabling (that I’ve removed in order to change it), bright white lampshades and euro plug adapters (so I will have to add UK plugs when I re-wire them). However, even with new lampshades, new cable and plugs they have still worked out about half the price of what I would have paid for an equivalent wall light. I bought new lampshades from the very talented Munro & Kerr that work so well in combination with the tiles and colours as well as adding some lovely texture and I ordered some linen coloured fabric cable that was delivered today so I will add that to the lights later. I am thrilled with the warm cosy light – thrilled!

Beautiful handmade raffia lampshades | Munro & Kerr

Accessories

The huge 80cm round mirror above the bench is perfect and bounces much needed light around. A plant up on the shelf makes more difference than you could ever imagine and I would really like to find a lovely piece of art to go where the portrait currently is next to the front door but all in good time.

Still to do

You may have noticed that the stairs are still in their raw state but we don’t quite have the strength to deal with those and I know I want to install Unnatural Flooring manmade sisal when we can afford it so there’s not much motivation to go to all the effort to paint them. We shall see. The front door is still very much on the list of something to change but in the mean time I plan to re-paint it a lighter colour as it feels very dark with the new tiles.

But other than that it really does feel like a finished space now, which is amazing after three years of it feeling like the remnants of the renovation building site. If you have any specific questions about the tiles or anything else do let me know and I hope you like the changes!

Katy x

Narrow hallway storage solutions

I asked whether this would be a useful post over on Instagram and the answer was a resounding yes. It seems to be a very common issue, no matter the type of flat or house. I count myself extremely lucky having a wider than average hallway and I can honestly say it is a complete game changer compared to homes I have lived in before this one. I recently did an interiors consultation for a family who live in a five bedroom house but their hallway is the width of the front door and it was driving them all mad so we really focused on how to solve the storage issues that come from having an extremely narrow hallway.

Obviously the decor of a hallway has a huge bearing on how it looks and feels but I won’t be focusing on that here other than to say that the lighting is absolutely key to how well a hallway works. If it is badly lit and gloomy it makes functioning in the space so much more difficult i.e. not being able to find shoes, keys, tie laces, see into bags etc. I would say that the first thing to do is really assess your lighting and whilst you don’t want it to be harsh and too bright as that feels unwelcoming, you do need to have a well balanced, even lighting from different sources – a pendant or two combined with wall lights is ideal (make sure they are on different circuits so you don’t have to have them all on at the same time as sometimes in the evening, for example, it’s nice to have lower lighting for just passing through the hallway) or a table lamp if you have space for a table and don’t have wiring for wall lights. A dimmer switch for hallway lights is also a good idea to help change the mood of the lighting.

So, moving onto the storage issues…

Coats and bags

Do try to remove as many coats and bags from the hallway as possible – whether that be storing winter coats in wardrobes (vacuum packing is good for big bulky coats) during the summer and vice versa or if you live in a house what about using landing space at the top of the first flight of stairs? If you have to hang coats and bags in your hallway then a high peg rail is what you need. Try to make it as long as possible to space the coats out so they don’t become a massive bunch of coats that will cause an obstacle and get dragged off the pegs as you pass. Also ensure the pegs themselves really do hold the coats to make it easier to hang them and less likely that they will slip off. I love the bespoke rail that Hannah from The Otto House had in one of her previous homes that you can see below. The length of it means coats don’t get bunched up and the shelf above can be used either to store bits and bobs or to display things to make the hallway look and feel more welcoming. Don’t be afraid to hang coats over a radiator as this can actually be quite practical especially in the winter when coats are wet and soggy. Try Etsy for similar peg rails shelves. You can go for a bigger shelf if it is high as this won’t encroach on the space but can be a very handy place to store things that aren’t used everyday.

Image via The Otto House

I have found that children’s coats are much better hung up at their level so that they can be in control of them and because they are generally a lot less bulky they don’t get in the way ion really tight hallways or knocked off their pegs even though they are at hip level.

We hang Mimi’s coats below the dado rail right next to the front door on a cheap wooden peg rail that I painted the same colour as the wall.

Shoes

Come to our house on any day of the week and the hallway is strewn with shoes. It is beyond annoying. Even a neat row of shoes against the wall is annoying, if you ask me. Shoe storage cabinets are really great for narrow hallways for every day shoes and slippers and they also provide a handy ledge for keys, glasses, face masks and all the other bits and pieces that build up in this space. We also make a big effort to keep shoes that aren’t worn often in wardrobes and we often keep walking boots and wellies in the car.

The white shoe storage cabinets above are from IKEA (they do a couple of different models) and MADE make a blue shoe cabinet, which is nice. The image below shows another lovely version that is much more of a feature by MADE.

Image via Made

Hallway table

If you really need a hallway table or console there are some great options for very narrow spaces. You want the table to work as hard as possible so it needs to have storage as well as a surface so go for something with a drawer or a shelf below. This is a great example from Cate St Hill’s lovely blog…

Image via Cate St Hill

Not only is this Ferm Living console table very slim and easily pass-able but it offers a decent amount of storage on the top and bottom, especially with the tray style surface so things won’t be knocked or dragged off as you pass by.

Another option that takes up the smallest space possible and can be used over a radiator, if needs be, is this Urban Size console table with a peg rail below.

Oak Hallway Stand

Seating

It’s impossible to add seating into some hallway spaces due to radiator or door placement but it can be done even in the narrowest of spaces. It seems like the ultimate luxury to me to be able to have a seat in the hallway and I have decided that it is a real priority in our hallway to make the most of a wider than average space. We have had a make-do IKEA console that I got for free second-hand and painted for the last three years until we had the budget to finish the space and so now it is time to choose a seat to replace the console. My family is very kindly gifting me part of a settle bench for my birthday, which has just been. Much like hallway tables I think hallway seats or benches have to work as hard as possible and provide storage. My bench hasn’t arrived yet so I can’t recommend it but there are a lot of options for second hand settle benches if you are interested in one. The one I am getting is £375, so not cheap, but it is a very flexible piece of furniture that can be moved around a house and I’m pretty sure we will have it for years and years to come. I’m hoping we can store some shoes, woollens, bike helmet and picnic blankets in the seat. If you do a quick google and search for ‘settle bench’ you will see the various second-hand and new options.

I am getting a settle bench similar to this but in bare pine.

Another good option for a storage bench is the IKEA Stocksund model as you can see below. A lovely soft seat in the hallway with decent storage. Just bear in mind that textiles in the hallway are prone to getting pretty grubby but saying that Bemz design bespoke washable covers for IKEA furniture that are worth investigating.

Stocksund storage bench – Image via IKEA

If you are tighter on space than the options above allow try a slimmer bench but still with potential shoe storage as can be seen in Jess’s beautiful hallway below. This is a storage bench from MADE and fits in very neatly to a narrow Victorian hallway.

Storage bench | Image via Gold is a Neutral

If you need something with even less depth and have more of an industrial style try a shoe bench like this vintage 60’s one from Vinterior or a new version from John Lewis.

Ultimately, if there is any way of building a bespoke seat storage bench then that is the ideal option as seen below.

Buggys

If you are struggling for space and have a buggy to deal with every day there are a couple of options. I came across this buggy hook called a Strollaway, which would be ideal on an unglazed door. You would have to be organised about not storing loads of stuff under the buggy but worth it, I’d say.

Alternatively, and something I discussed with a client in a two bed garden flat with two children, is the option of wheeling the buggy through the flat and storing it outside in a dedicated shelter.

Image via 600sft And A Baby

I hope some of those ideas help if you are stuck with how or where to store things in your hallway. I can’t wait to show you my new bench when it arrives next month some time.

Katy x

How to do a half-painted wall for a child’s bedroom

Hello, hello! I have to be honest and say that I have completely dropped all of the balls in the childcare/work juggle of late and the thought of painting a wall (albeit just half a wall) would tip me over the edge right now! I actually did this mini-makeover a few weeks back when I was pumped with motivation for the garden and we were in the middle of a long break waiting for deck boards so I turned my hand to Mimi’s room in my frustration to get things moving. I do not predict any more projects until schools re-open, believe me.

Ahyhoo, if you remember I had started doing a big shift around in Mimi’s room pre-lockdown to transform it from a baby’s room to a toddler’s room. I am SO pleased that I did do this because her room has been a little sanctuary for her over the last months of being at home all of the time and it has worked perfectly as a place to play rather than just a place to sleep and dress, which it had been before. I had intended to do a big re-decoration project in here BUT I decided a quick fix would have to do using only what I had at home already (as this was during full lockdown) just to make the room feel more ‘finished’ after changing up the furniture.

Light Blue estate emulsion from Farrow & Ball to match the estate eggshell woodwork.

I had a load of holes to fill where I had removed shelves, which meant getting paint out so I decided to paint half of the wall in the same colour as the woodwork as I had left Light Blue Estate Emulsion from my bedroom. I hoped the colour would unify the room more as it felt disjointed and jumbled since I changed the furniture around (often a problem when you disturb an existing ‘scheme’). So, this is how I did it…

This is the wall where I had lots of holes to fill and would need painting one way or the other. This wall has the door on the left and the window on the right so it is naturally divided from the rest of the room so just painting this wall would not look out of place.

Use frog tape (the green) to mark where you want your line to reach. I used a tape measure to mark the height of my line at several points along the wall and then used those marks to help me place the tape.

There is no right or wrong on how high the line should be – I was guided by the IKEA Trofast cabinet on the wall as I didn’t want to paint too near that and it ended up 105cm from the top of the skirting board. When you are in the middle of lockdown and you run out of frog tape switch to normal decorator’s tape (blue) and it will work just as well! Make sure the tape is stuck down really well to the wall on the bottom edge where you paint up to as this is where you don’t want paint to creep beneath. Good tip for painting is to line your roller tray with foil so you can throw this away at the end and avoid cleaning out the tray.

I always think three thin coats in better than two thick coats – the first coat you can see above is very thin as I think my old paint was watered down for the last job it was used for – and thin coats dry much quicker too. Roll or brush down the wall so you don’t end up pushing paint beneath the tape.

It took me a total of about two hours start to finish (I’m not one for leaving paint to dry as long as it should do!) and it really has helped to unify the room and make it feel a bit more interesting.

There was a play kitchen here but I swapped it out for this children’s table and Olli Ella Pollie shelf that had been in our living room and since relegated to the loft. Mimi wasn’t playing with the kitchen at all but she’s suddenly really into colouring in and drawing so this works perfectly. I’ll get the kitchen down from the loft in a few months time and it will be like Christmas 😉

The other big change was swapping the white rug that we had in here that was from her first nursery in our flat for this round jute rug (PR sample). There were two reasons for this: firstly, the colour and texture is much more forgiving and doesn’t show up mess and dirt and secondly, I think it helps make the room feel more grounded and less airy fairy baby style.

I layered the jute rug with another mat that I bought from H&M a while back and had downstairs in Mimi’s play area just to add a bit more interest (it is no longer sold in H&M but try this one). We also took down her fabric canopy as she asked me to (sob!) so I took the opportunity to put up some shelves in the alcoves using some old inserts from a book shelf that we had in the loft and some very old brackets (don’t look too closely as they have been in the outdoor storage boxes and are very stained). I kept a bit of pink with the OYOY duvet cover (PR sample), which is currently out of stock but try this blush pink duvet cover set instead if you are looking for something similar.

The thing that has kept her occupied more than anything the last few months is this fancy dress corner. By positioning one of the IKEA Trofast units at a right angle to the wall I created a cosy corner for her fancy dress bits, which are in the drawers as well as the rail. She chose this cute OYOY leopard rug (PR sample) to go in this corner (it’s actually out of stock but this lion rug is similar) and it’s nice to have more neutral colours instead of all the sickly sweet pinks that had been creeping into the room 😉

I would still like to paint the secondhand wardrobe a nice vibrant colour maybe taking a colour from the princess and pea poster but the change of rug has really helped to make the room feel more grown up.

I’m really pleased with how much more functional the room is for her now; there is space to play, storage for toys, and everything is accessible so she has complete control.

Mimi now has a completely accessible bookshelf, a desk for drawing, a storage unit for toys and a dressing up corner whereas before it was just a big chest of drawers along this wall for clothes.

I’m quite pleased with that for two hours work and I think we’ll leave it at that until she’s five or so other than adding some prints for the walls. We will then pass her bed onto my new niece and get her a bunk bed so that she can have sleepovers…eeek!

Katy x

Top 10 bedside tables

I have been meaning to do this round up for ages ever since I asked on Instagram whether anyone could recommend a bedside table that was ideally made of wood and had a drawer/shelf. I was deluged by messages from people who were looking for the same thing and were desperate for recommendations themselves. I had a stool next to my bedside and Jules had a printer next to his (don’t ask!) for months and I had spent a long time looking but nothing seemed to suit other than some very expensive finds that were way out of my budget. I wanted two matching tables as our bedroom is very small so symmetry helps to make it look and feel bigger and therefore some lovely vintage finds weren’t an option.

These are the tables I found on my hunt so for those of you who are still looking I hope this helps. If you are not keen on these particular tables do use the links to go through to the shops and have a browse as sometimes it can be difficult just figuring out where to look.

  1. Solid oak vintage bedside table 2. Bedside wall shelves 3. Marble top bedside table 4. Oak and cane bedside table 5. Ercol bedside table

6. Oak and rattan table 7. Marble top table 8. Jalousie door bedside table 9. Birch and leather handle bedside table 10. Floating bedside drawer

In the end I chose these oak and cane tables from La Reroute and waited until they were 30% off so I managed not to spend too much and I really like them. It’s also the first time I’ve had a drawer in my bedside table and it’s a bit of a game changer.

Oak and cane bedside table

If you are interested in a vintage option I would definitely have chosen a Victorian pot cupboard (use that search term in eBay etc). My ideal bedside table would have been something like this…

Image via Avenue Lifestyle

Just remember to think about the height of the table you choose, especially if it’s not being sold as a bedside table or if you have a particularly low/high bed. For example, I liked this table but luckily realised it would be too low for my bed.

Hope this is helpful as a starting point – do let me know if you have found anything really nice out there that I can share!

Katy x

How to frame your art work with eFrame

I have waited nearly eight months before hanging anything on the walls after moving in to the house. Firstly, I’ve been waiting to figure out what I want and where and secondly I’ve been saving up to buy a few new prints as I’ve never really invested in art work so I didn’t really have much to hang on the walls here (except a few pieces that I had for Mimi’s room that I had from our old flat). In fact, I’ve decided it’s something that I would really like to focus on saving for as it makes such a difference to the way a home looks and feels. Hanging the right piece in the right place can instantly make a room feel ‘finished’.

This is one of the new prints I have bought recently and framed using eFrame. I am beyond thrilled with it as I really feel that it has made this space feel complete.

Starting or adding to an art collection is a whole topic in itself but today I want to focus on framing art work as this often seems to be a massive stumbling block for a lot of us. I am very pleased to be collaborating with eFrame on this post to bring you my advice on how best to frame your wall art on a budget so that you can actually get it up on the wall rather than stashed in tubes or piled up in a corner.

I have had this portrait unframed and either propped up on a shelf or stashed inside a heavy book to keep it safe for the last few years. I am so happy to have had a bespoke frame made by eFrame to fit it perfectly so it can finally hang on the wall after all these years.

Budget for framing

First and foremost I would say that it doesn’t make sense to buy a poster/print/original art work if you don’t have the money to frame it. I think it’s really important to add the cost of the framing to the cost of the art work you are buying otherwise you run the risk of never ever getting it on the wall.

I bought this alphabet print for Mimi’s room and didn’t get a frame for it as soon as it arrived. This was a massive error as Mimi managed to get her hands on it and tear a corner and scrunch one side of it! I managed to salvage it and chose a simple 14mm black wooden frame from eFrame that will hopefully protect it from naughty fingers in the future.

There are a few different options when it comes to framing with a professional framer doing it being the most expensive option by far. If paying someone else to do it is out of your budget then eFrame is definitely your next best option. Not only do they offer custom frames (and mounts) made to your exact measurements but they offer such a wide range of frame and mount styles. Admittedly, it can be cheaper to buy mass produced frames elsewhere but choosing that option is so difficult unless your art work is of a standard size but even in that case the choice of frames is usually very limited and they always tend to be relatively bulky as they are not handmade as the ones from eFrame are.

Once you know what print you want to buy it is so easy to tap in the measurements to the eFrame site and get an accurate idea of how much a frame is going to cost for that exact piece so you can budget accordingly.

To mount or not to mount

It can be tricky to know whether or not to use a mount within a frame. Some art pieces look great with mounts and others look much better with just a frame. Generally I would say that smaller pieces look better with a mount as it makes the overall piece bigger and it draws the eye to the art work itself. Larger pieces, especially posters, don’t need a mount as they have enough impact on their own. 

You can add more drama to a piece by using a coloured mount or even a black mount but often restraint pays off as an off white mount will makes most pieces look lovely.

eFrame do standard sized framing mounts in lots of different colours as well as custom sized mounts cut to your exact specifications, which is so useful if you have an unusual sized piece. One tip I would give you is to always make your mount 0.5cm smaller than your art work so that it sits comfortably behind the mount and doesn’t fall through the aperture.

I decided to have a mount for this print that Jules bought me for Mother’s Day. I went for a textured rose pink colour to tie in the colours of the print and the colours within Mimi’s room where it hangs. I think this colour makes the art work stand out rather than detracting from it.

On the other hand I just love the simplicity of this frame with no mount and all the focus is on the print itself.

I was considering this frame with a mount for this print as it is a mid sized print so it looks good with or without a mount. However, although I love how fresh it looks with the white mount I just think it stands out more with no mount. What do you think?

For this poster sized print a mount would have been overkill as it is so big already.

Colour and material of frame

When buying new, I am a big fan of slim wooden frames as a rule as I think they are classic and they sit against the wall well without protruding too far (which is a major reason that I hate buying frames from high street shops as they are always so bulky and deep). I also think that wooden frames are preferable to metal ones as wood is softer looking and more elegant.

The choice of colours and textures that eFrame offer is brilliant; from bright primary colours to highly decorative gold frames that would make a vintage or antique piece look amazing. To help you decide what colour to go for it depends on the colours in the art work but also the colours in the room you intend to hang it in. eFrame offer a very handy tool where you can upload an image of your art work and try out the different frames. This is very helpful and I would definitely recommend using it.

Try to pick out a colour within the room that will complement the frame and make it feel a part of the overall interior scheme of that room rather than a random add on.

I chose a beautiful 12mm natural bare wood frame for this print as I knew I wanted to hang it in the bathroom and the bare wood ties in really well with the bathroom door.

I chose exactly the same natural wood frame for this print in my hallway as it ties in with the stripped doors so well.

This print is a bit more kitschy so I chose a moulded gold frame that actually works perfectly with the feel of the piece.

Another point to add is that all these frames are offered by eFrame with Clarity+ premium synthetic glass, which is so much better than real glass in my mind as it makes each frame so much lighter and safer to hang (especially like the one above that is near Mimi’s cot.

I have my eye on a few more pieces that I will get framed and hang very soon and then next up I want to focus on getting some family photographs framed as I have absolutely none up on the walls, which feels sad. I will definitely be using eFrame for that as you can upload the photograph directly on to their site and they print it and frame it for you so it takes all the hassle out of the process – amazing!

Hope this has been helpful and I will keep you up to date with how I do with covering my walls finally!

Katy x

*This post is a paid collaboration with eFrame but all opinions are my own.