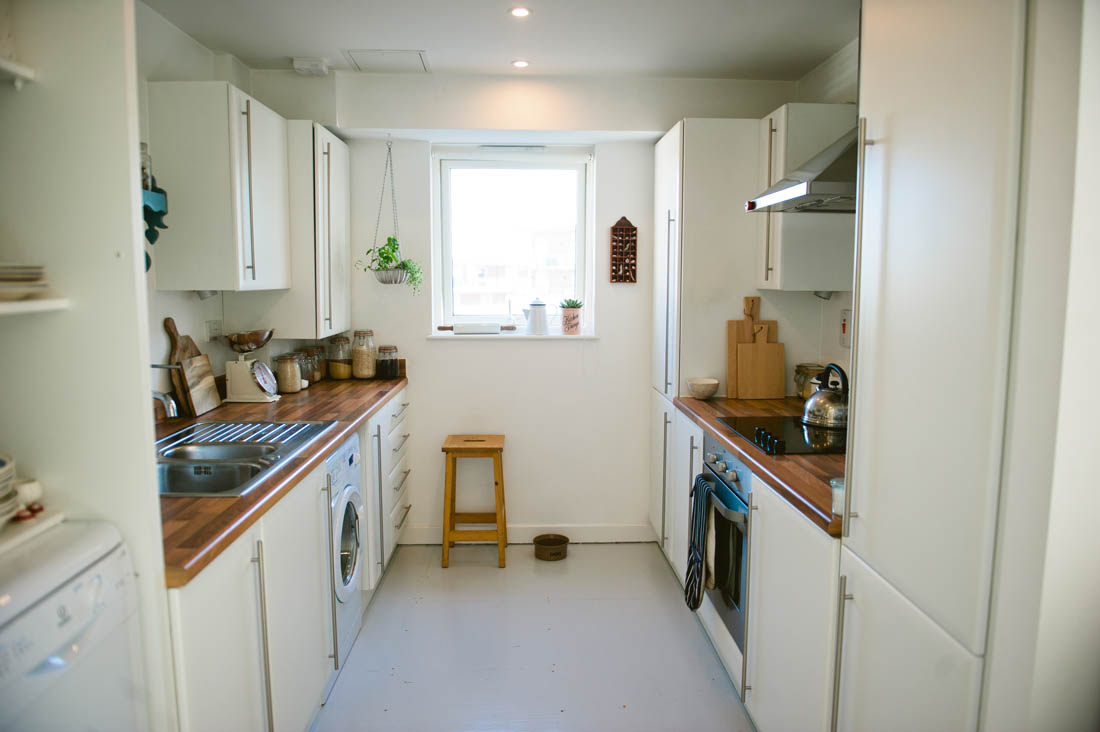
My kitchen has always been the room in my flat that I like least: boring, generic and lacking any character. When I decided to tackle the kitchen I knew it wasn’t going to be as simple as a lick of paint and a few nice new accessories so I had to spend a while persuading Jules to help me for this project. I also had to spend a while saving up for the work as it wasn’t going to be cheap.
Before
What I didn’t like:
– I HATED the cheap laminate work tops as they were dark and a bit too ‘shiny’. None of my nice kitchen stuff looked nice on this surface! It absorbed all of the light and energy in this space.
– The door handles have always offended me a disproportionate amount; I don’t like how big they are.
– There is no big expanse of work surface
– The stainless steel sink is a nightmare to keep looking clean and it looks dull.
– Even though it is a large galley kitchen the wall cupboards and the full height cupboards at the entrance to the kitchen encroach on the space a lot.
– The kitchen felt very generic and lacked any character or felt like ‘me’.
Here’s a hotch potch selection of ‘before’ pics – I NEVER remember to take proper before pics!
Lots of cupboards made the space feel small.
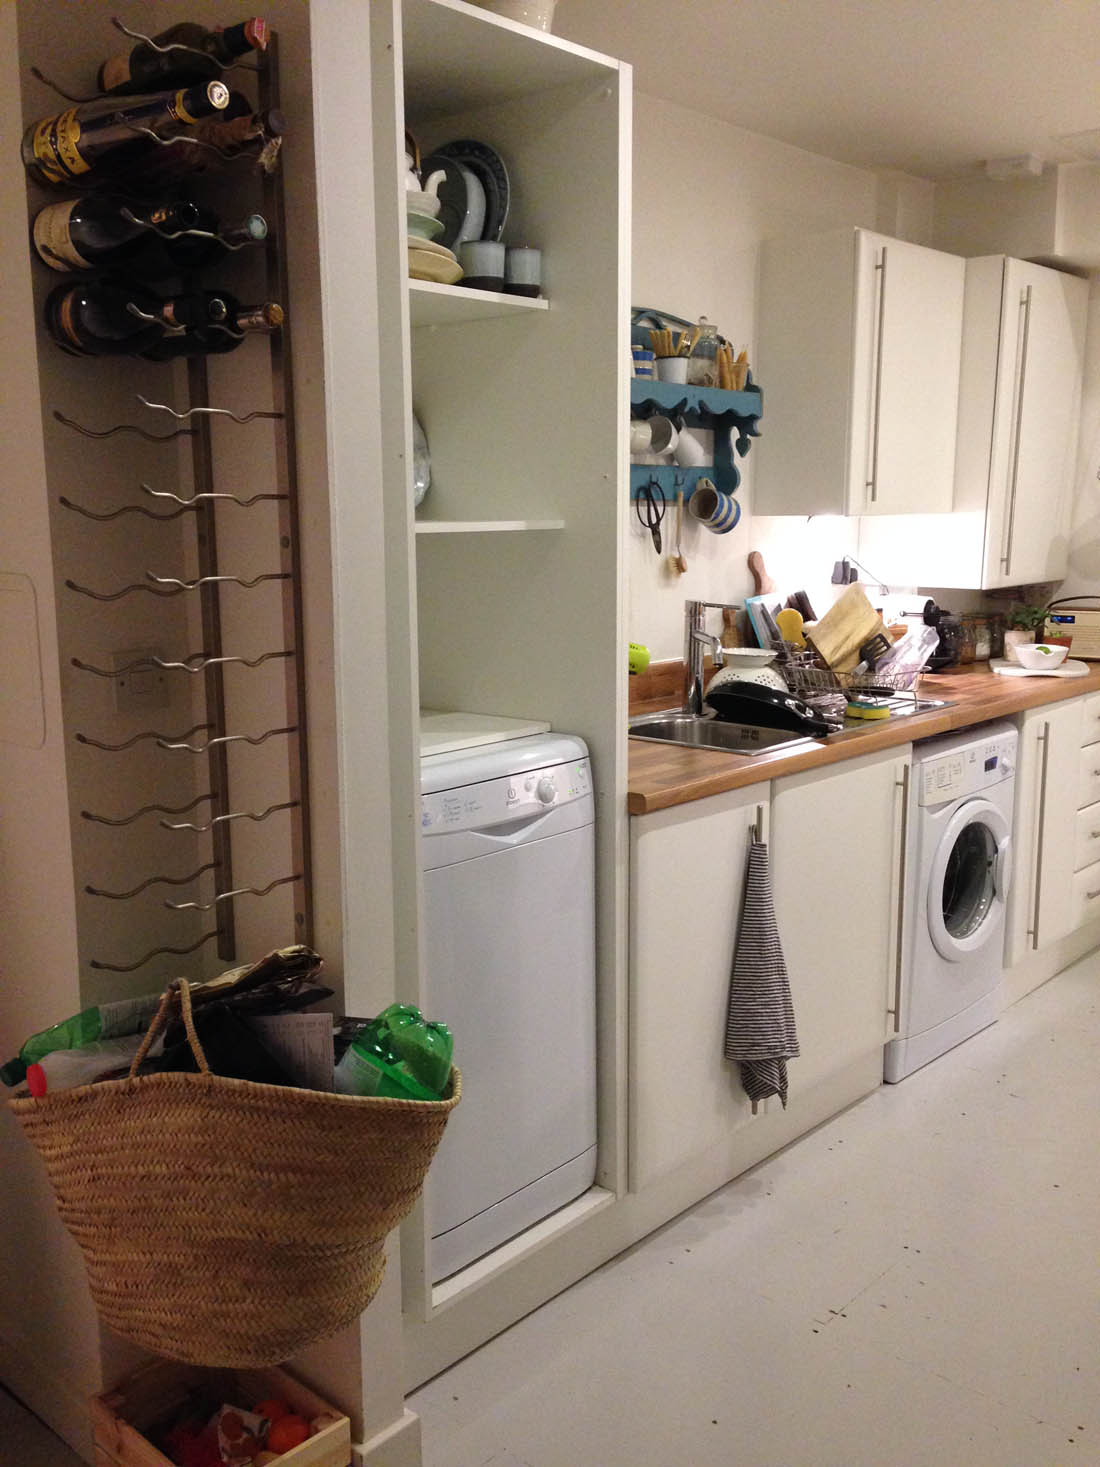
At the entrance to the kitchen was this HORRIBLE wine rack (Jules loved it because it was so practical) and this HORRIBLE open full height cupboard that always looked a bit of a mess and disjointed.

During the project
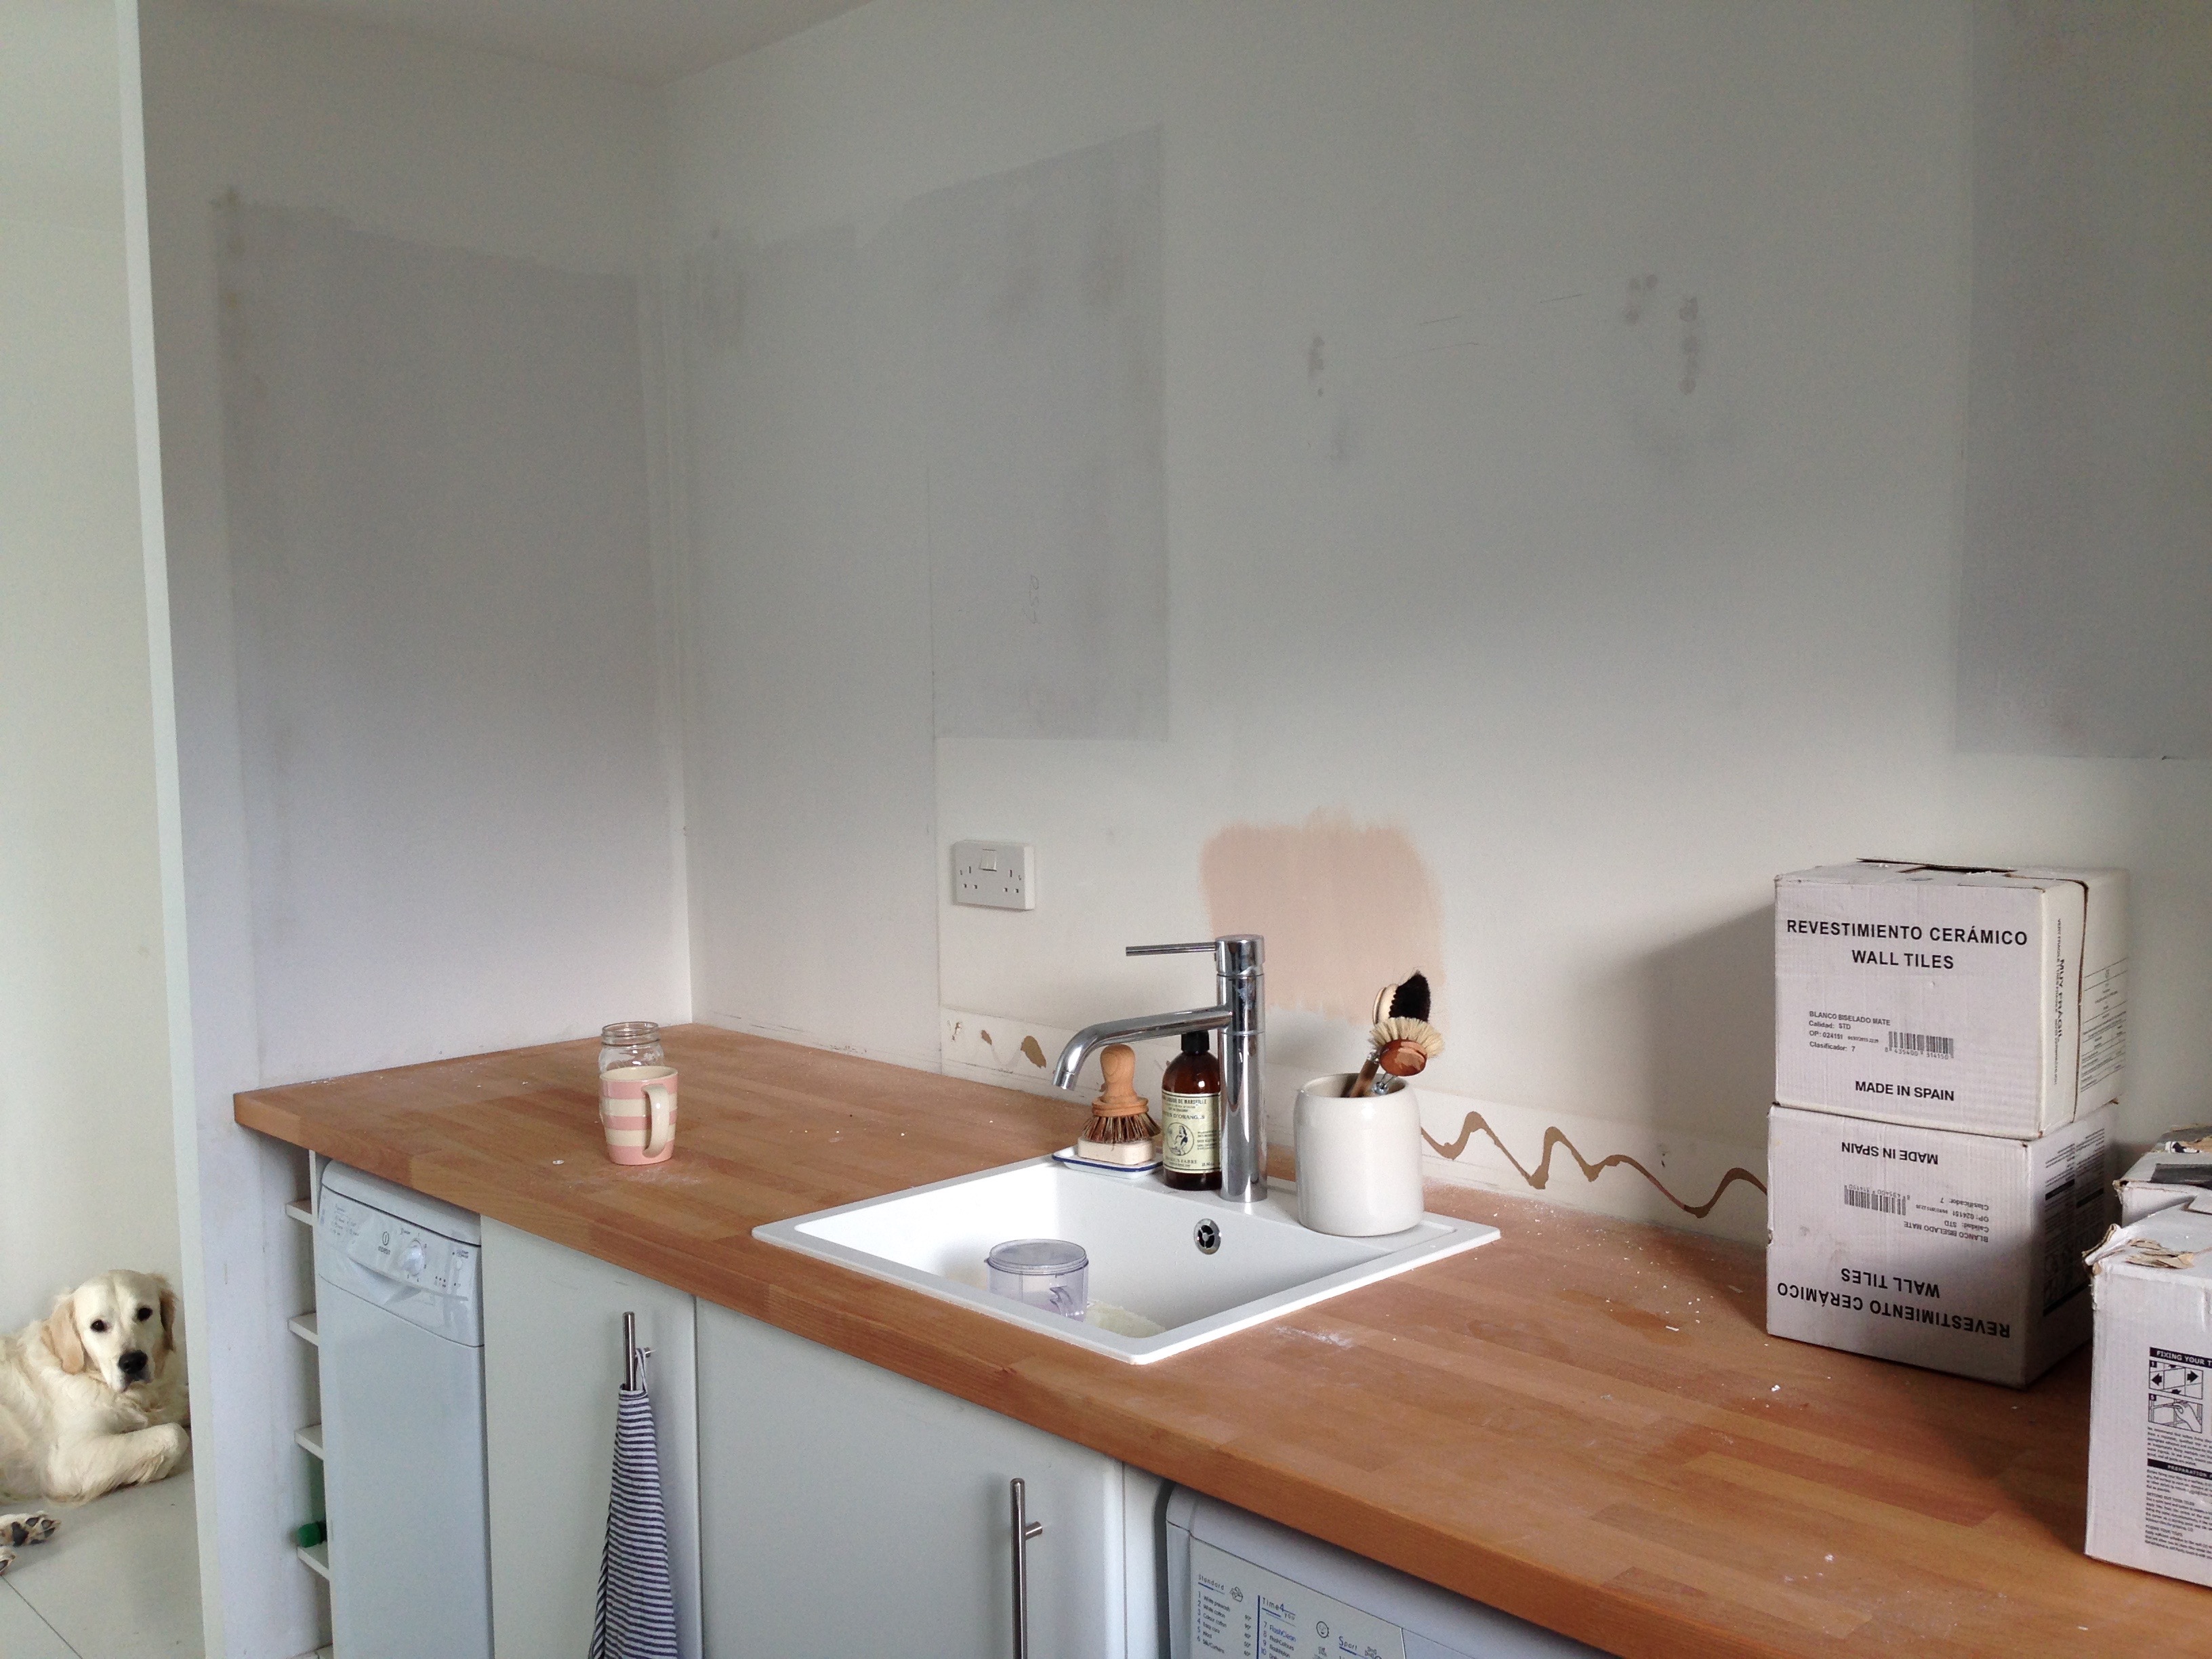
I have to say that Jules did the majority of the hard graft for this DIY project. We spent all four weekends of January getting it done and it was a complete mess. We couldn’t afford to take time off during the week to do it so it dragged on and on and one weekend we didn’t finish installing the new sink so we spent that week washing up in the bath – oh the fun! I’m not going to lie, it was a slog.
We made the massive mistake of getting over excited when we first started and didn’t pack up everything from the kitchen, which added so much chaos to the mix…

What were we thinking?!
We started by replacing the work tops for real wood and Jules had to cut them to size and cut out the holes for the hob and sink using a jigsaw – I think I’m still finding saw dust in cracks around the house and Jules’s laptop packed up as it was so full of it! It was a really difficult job because the new worktops weighed a tonne and the one for the left side of the kitchen measures over 3m so manoeuvring it in our small flat was like a Crystal Maze challenge.
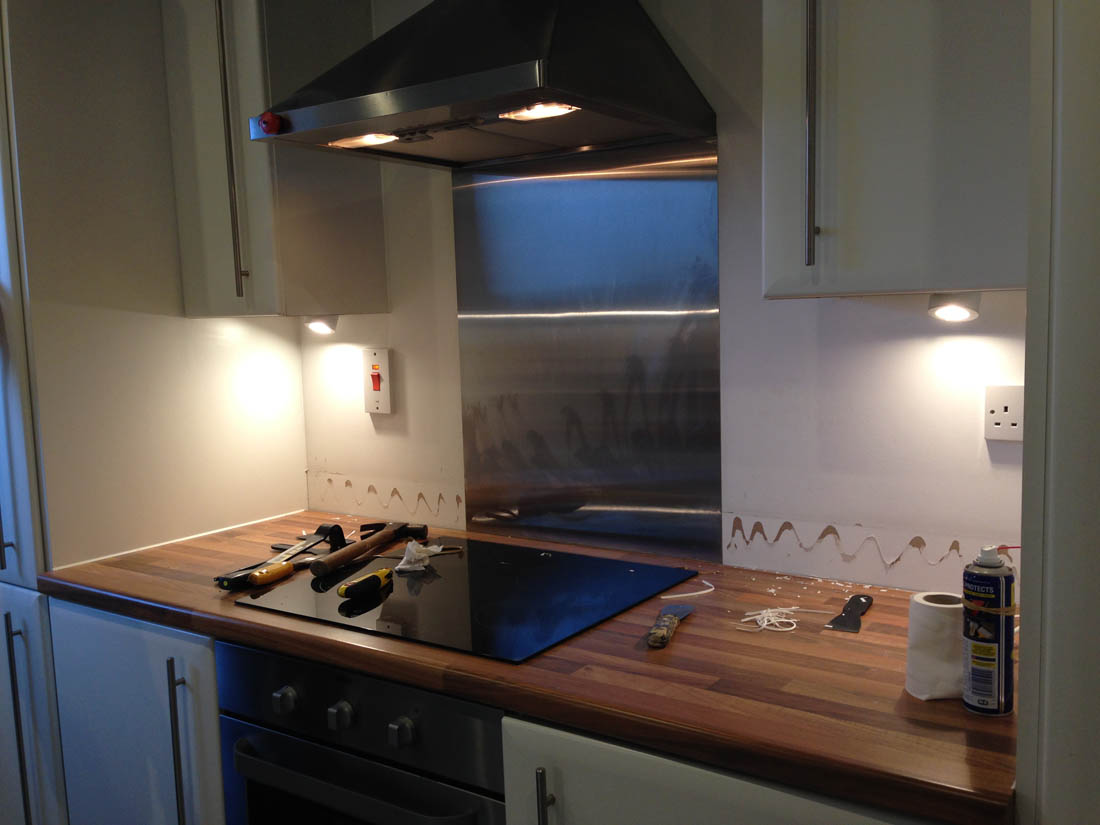

I also decided to remove the stainless steel panel behind the hob because I hate how difficult it is to polish and it feels quite heavy. In the future we will change the hob to a gas one but we didn’t have the budget for that this time round.

On the other side of the kitchen we had much more to do as I decided pretty early on that I wanted to remove the full height cupboard and the wall cupboards to be replaced by open shelving.


As soon as the full height cupboard came down the kitchen instantly looked twice as big!
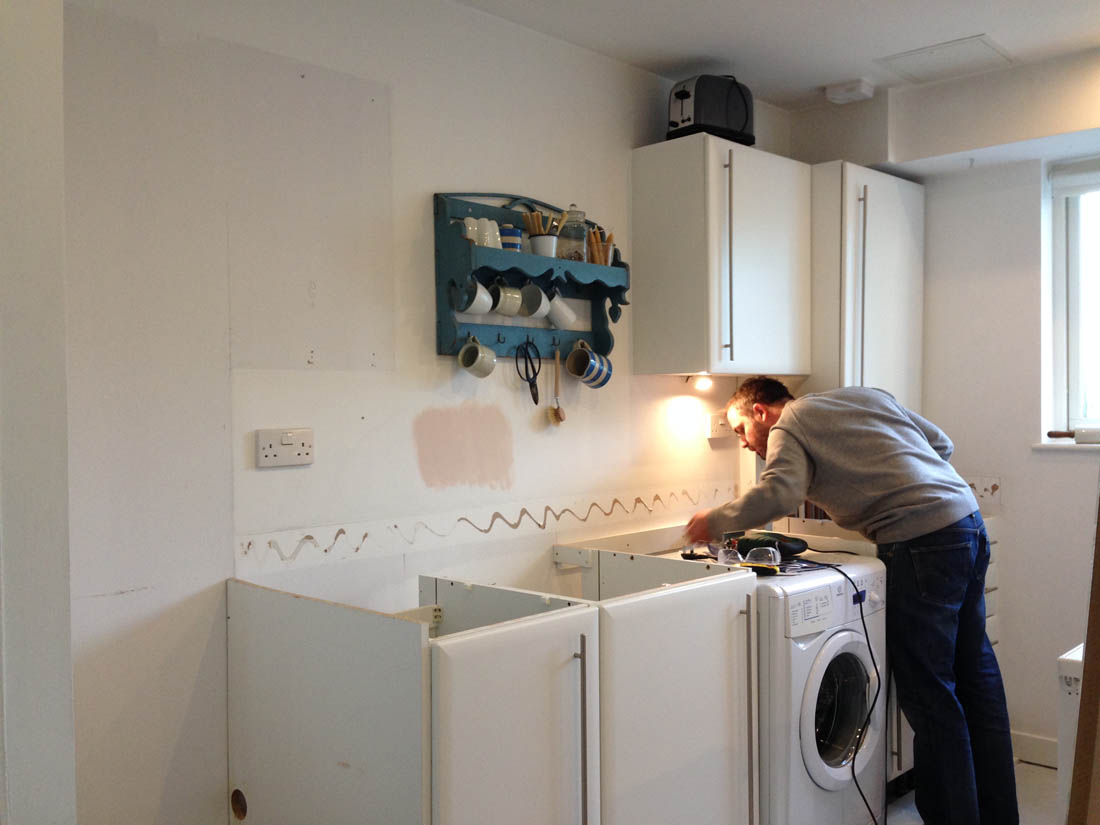
Without that cupboard we could have a much longer work surface, which makes such a big difference.

Without the full height cupboard the dishwasher could sit underneath the work top and there was a gap so Jules made a wine rack to fit the space perfectly, which also meant we could get rid of the horrible metal wine rack.

We installed and plumbed in a new sink.
And then I painted. I chose Farrow & Ball’s Pink Ground (it took a bit of convincing – Jules was not a fan of having a pink kitchen) but he now really likes it because it is such a brilliant neutral and adds a soft warm glow to the kitchen. Definitely no sugary candy pink present here!

One of the last jobs was tiling both sides of the kitchen and I chose these white metro tiles from Tile Giant, which add a fresh contemporary feel to the space.

I changed the door handles – did you see the DIY leather handles I made? – and then we put up the open shelves on the left hand side of the kitchen. You will have to pop back next to see the full reveal!
Katy x
Love love this! Did you do a lot of the work, like plumbing and tiling yourself? I need to learn! X
Author
Jules did the plumbing (just learnt how to do it from YouTube) and we did the tiling together (again, figured it out from online tutorials). It’s just a hard slog when you do it yourselves but saves so much money xx
Wow. It certainly does look so much bigger now. And it will be so much nicer having that longer expanse of work surface. Great colour choice. Can’t wait to see the final reveal.
I have just recently found your amazing blog….I just love it!! I do not however love the fact you are going to make me wait to see the after…ahhhhh!!!
I bought a small apartment myself and there are a lot of things I would love to change..just need more time and of course a lotto win would help!! Cant wait to see the kitchen finished , all the best Christine
Lovely to see the work you did. I tiled the bathroom in my last house with those tiles, I found it quite relaxing! Looking forward to seeing the end result. x
Hi Katy, I’m always so inspired by your blog posts! I too have a kitchen that’s not working for me and want to take down cupboards, put up shelves and replace counter tops (ours are a revolting shade of red laminate). Anyway, I don’t like our stainless steel sink either and would love a ceramic one like the one you’ve chosen – but I agonise about the whole dish drying issue… where do you leave your dishes when they’re drying? Do you use a tray? Thanks!
A million percent better with just those changes!
What an exciting project, kitchen makeovers are my favourite as it’s such a vital room in any house. I can’t wait to see what the finished result is like and the new sink already looks great!
Gemma x
The British Feather – A UK Lifestyle & Home Decor Blog
I must say…I don’t think there was an AWFUl lot wrong with this kitchen – OK it needed a bit more personality but at least it was bright an airy 🙂 just checked out your finished kitchen and it really is stunning.
I agree – but it does look amazing now! Hope you guys are continuing to love it 🙂