I’m pretty sure this is the BEST thing I have ever made. I’m super proud of these handles because they look good, they are inexpensive, they are very useful AND they are made from bookmarks, yes bookmarks!
I’ve hated the handles on my kitchen cabinets since I moved in six years ago (you can see them here) but because they are so long I didn’t know what to do about the fact that they would leave two holes – how would I fill one of them in? Well, turns out that the hole is much smaller than I thought it would be and a squeeze of sealant later and you really can’t see it – hurrah! So that left me with a better problem of what handles to replace them with. I sold the old solid steel handles on eBay for £40 and I started looking around and realised that nice handles are pretty expensive. I decided to challenge myself to make myself new door handles for less than I sold the old ones for.
The wonderful Katharine Peachey bought some rather lovely leather handles for her kitchen that I instantly fell in love with – total swoonage!

Katharine’s kitchen, photographed by her.
I had a look online and each handle cost between £10 and £20 and I have 18 cupboard doors – you do the maths (ok, I will, a set would cost me between £180 and £360 – wowzers). So I started searching for leather online instead and hatched a plan to make my own.
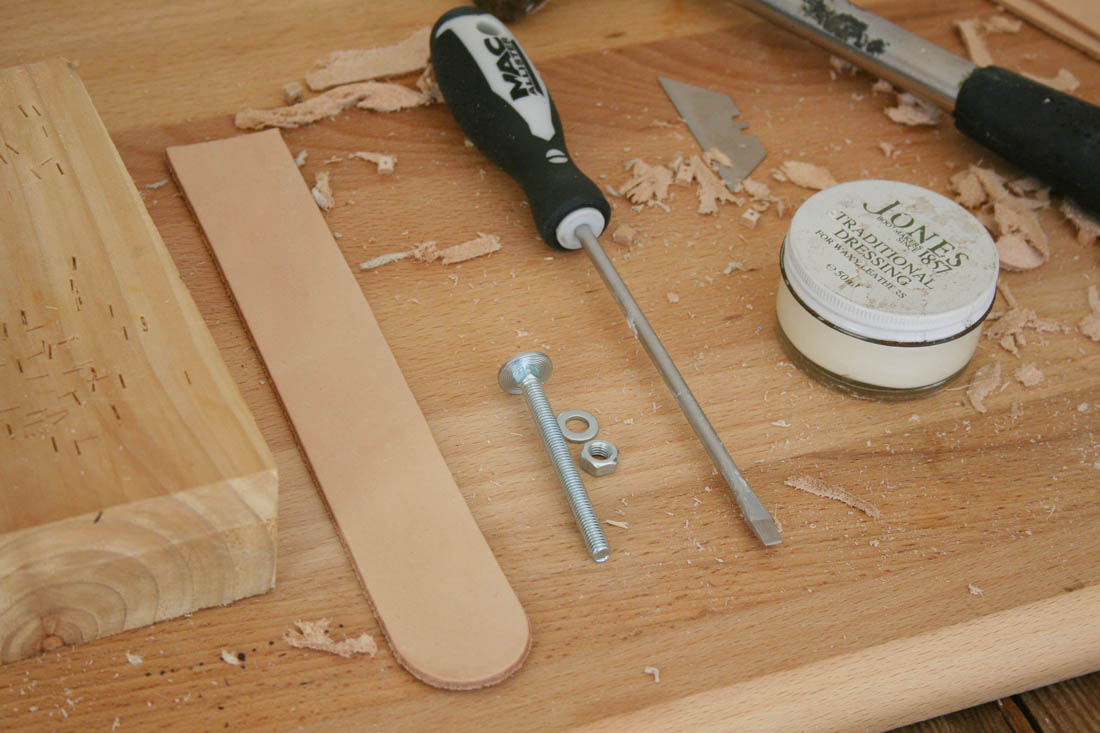
You will need
Leather – I bought these pre-cut bookmarks from The Identity Store £16.50 for a pack of 10. You can oil or stain them if you like.
Cup square bolts – I bought these from B&Q £3.57 for 10
Sharpened screwdriver – I used a 6mm one as it has to be the same width as the square bolt (the little square on the back of the round head of the bolt). To sharpen it I used a diamond stone. Alternatively you can use a chisel.
Hammer
Hacksaw
Pen
Tape measure
Leather wax or even shoe polish (I already had some)
Optional – Stanley knife blades or a sharp craft knife (I already had this but you can also use sand paper for this
Offcut of wood to work on
TOTAL for 20 handles: £40.14 (14p over budget!)
Step by step
To make 8.5cm long handles.
1. Wax or ‘feed’ the leather strips so that they don’t crack.
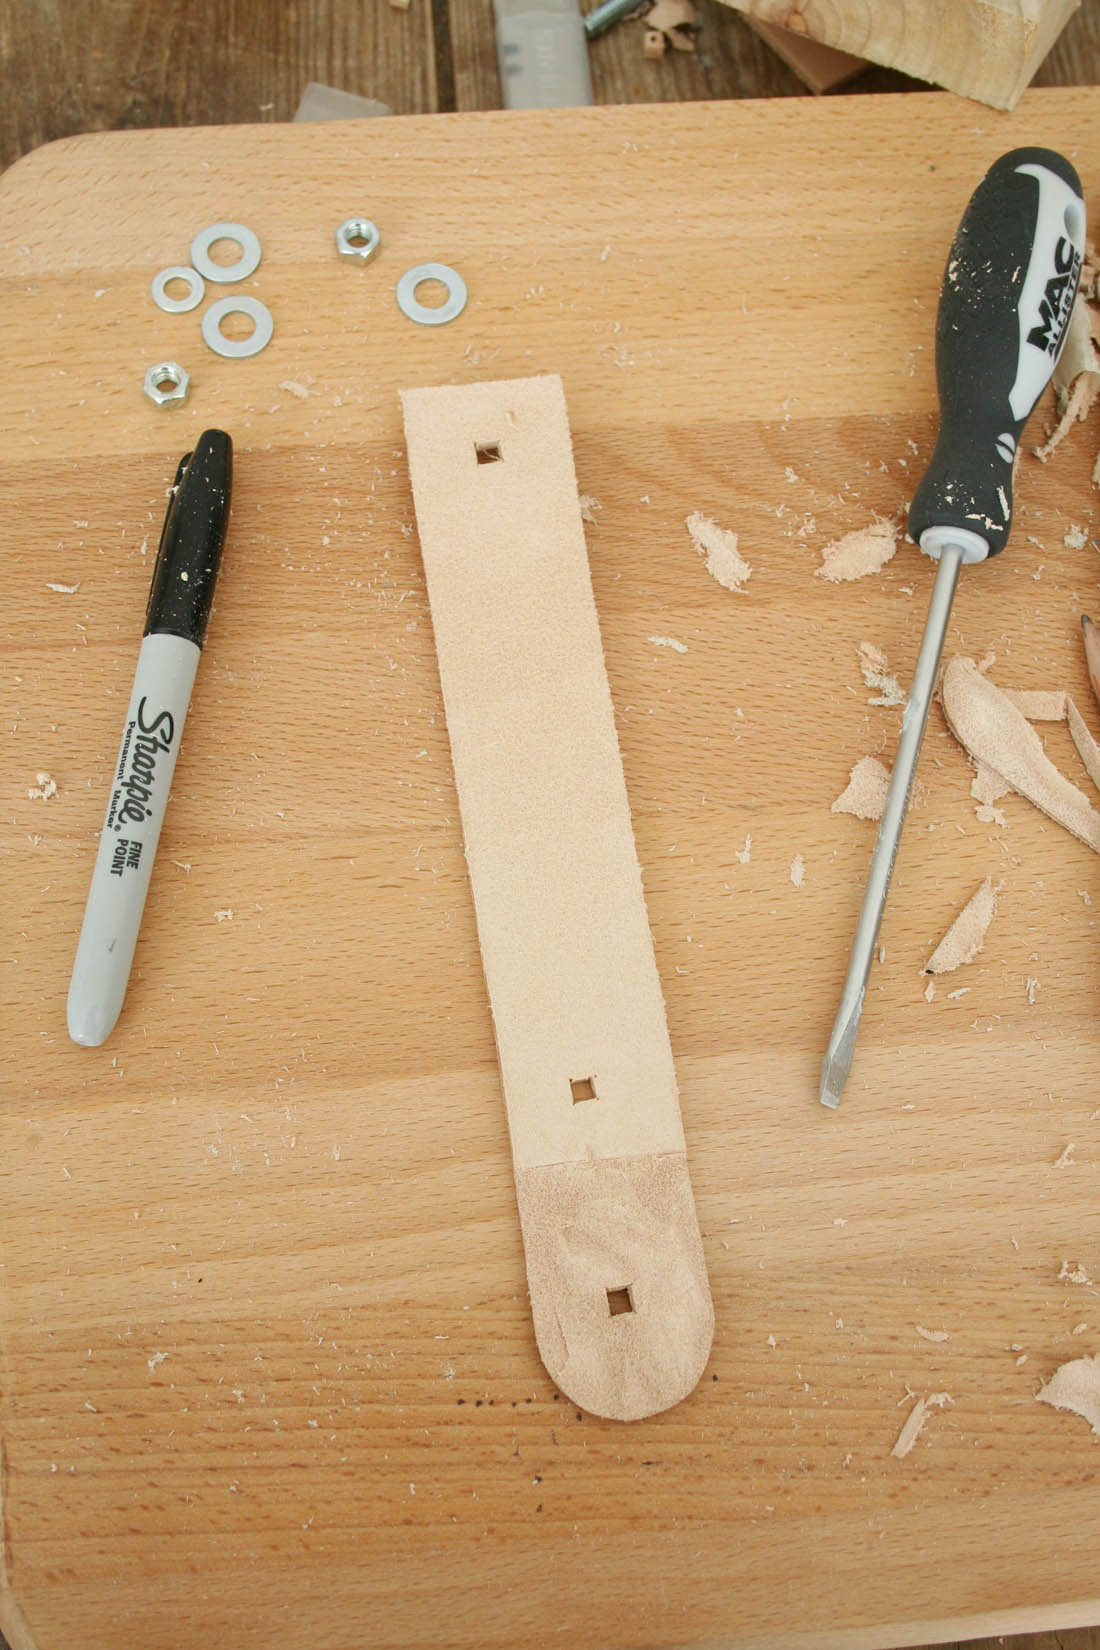
2. Measure and mark 5cm from the tip of the rounded edge.
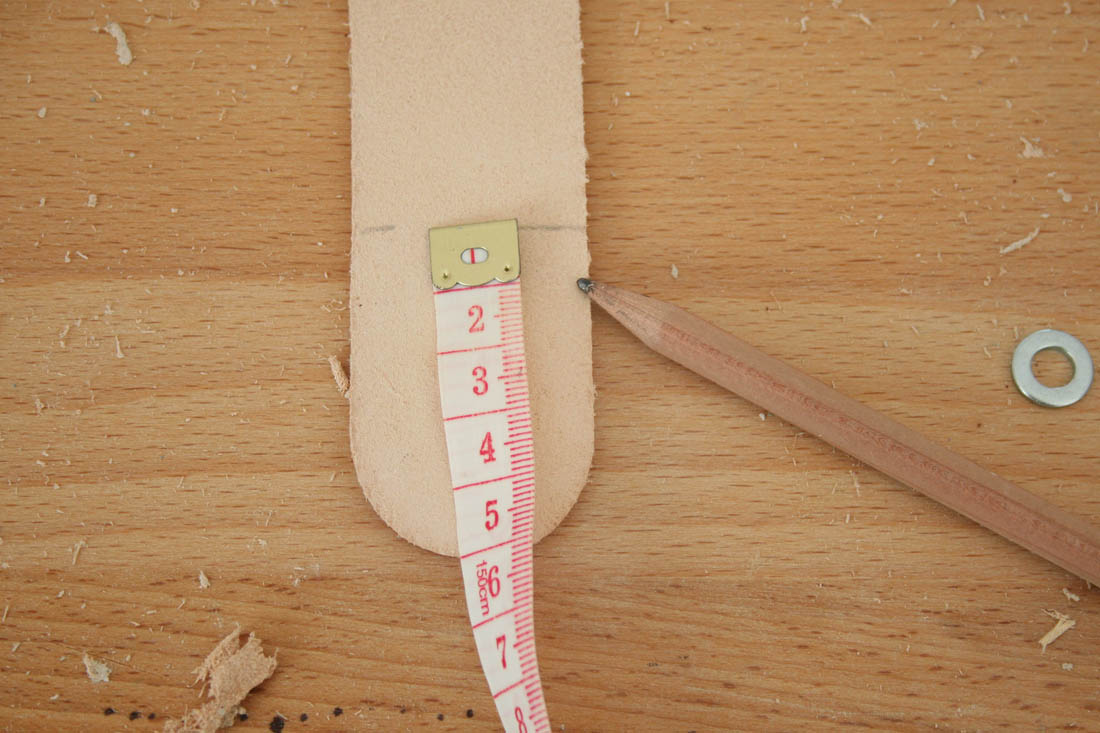
3. Score this mark with a craft knife – I used a stanley knife blade as that was all that I had. Note the plaster on my thumb by the end of the tutorial 😉

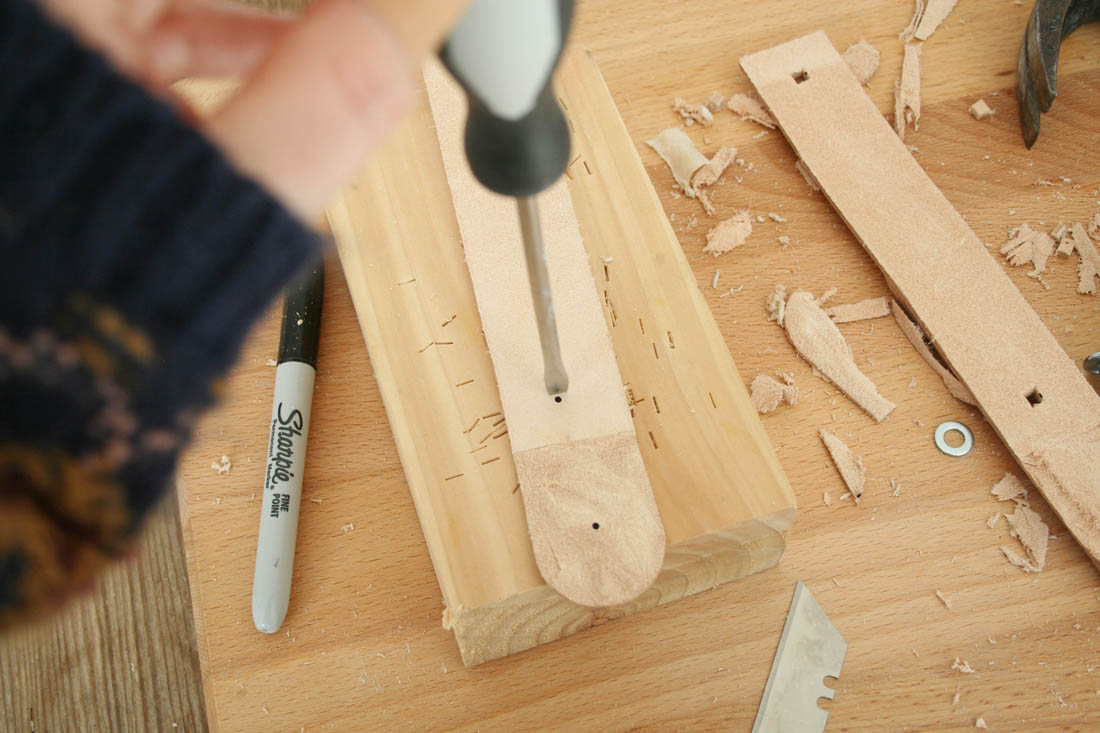
4. Use the knife/blade to shave off the bulk of the leather from the suede side. You don’t have to do this but it helps the handle lie as flat as possible on the door.

5. Mark the three points where the bolt will pass through the handle. To make a 8.5cm long handle from a 22cm long piece of leather your three marks will be 165mm, 175mm and 275mm from the straight top edge.

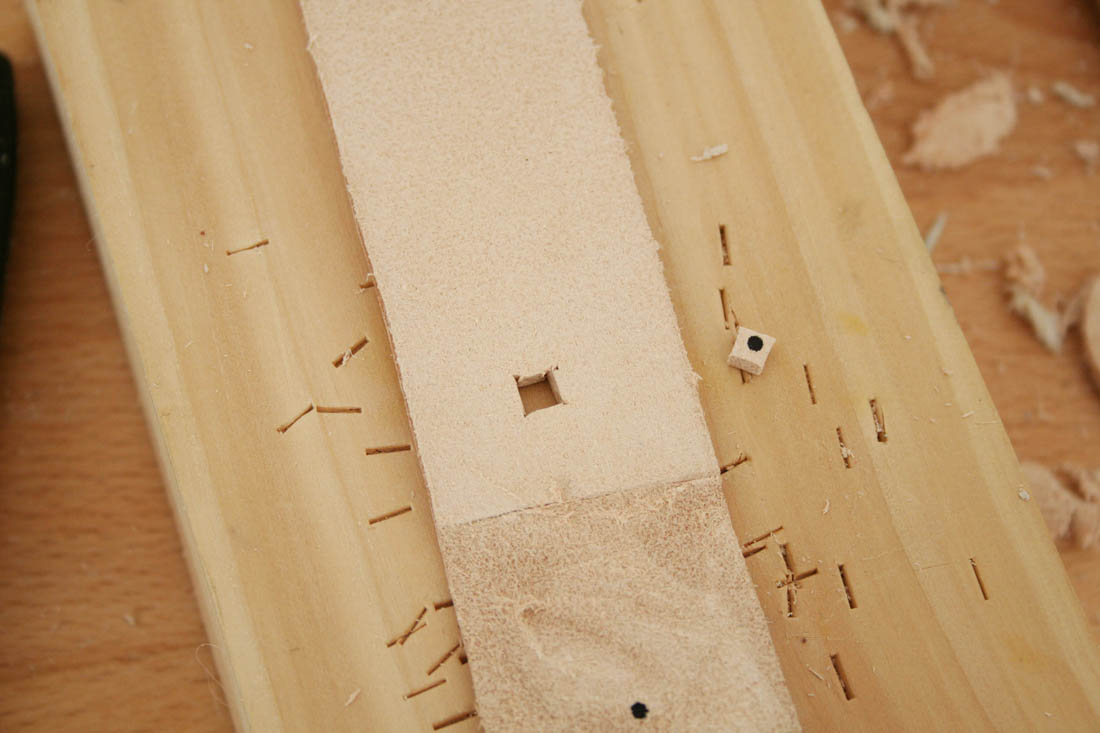
6. Sharpen the 6mm screwdriver on a diamond stone or whet stone and place the leather on a wooden offcut. Cut out a 6mm square with your mark in the middle of the square. Use the hammer to force the screwdriver through the leather.
7. Use the hacksaw to cut the bolt to the right length to go through your kitchen cabinet door (or wardrobe/drawers) making sure that there is enough length to screw on a washer and the nut.

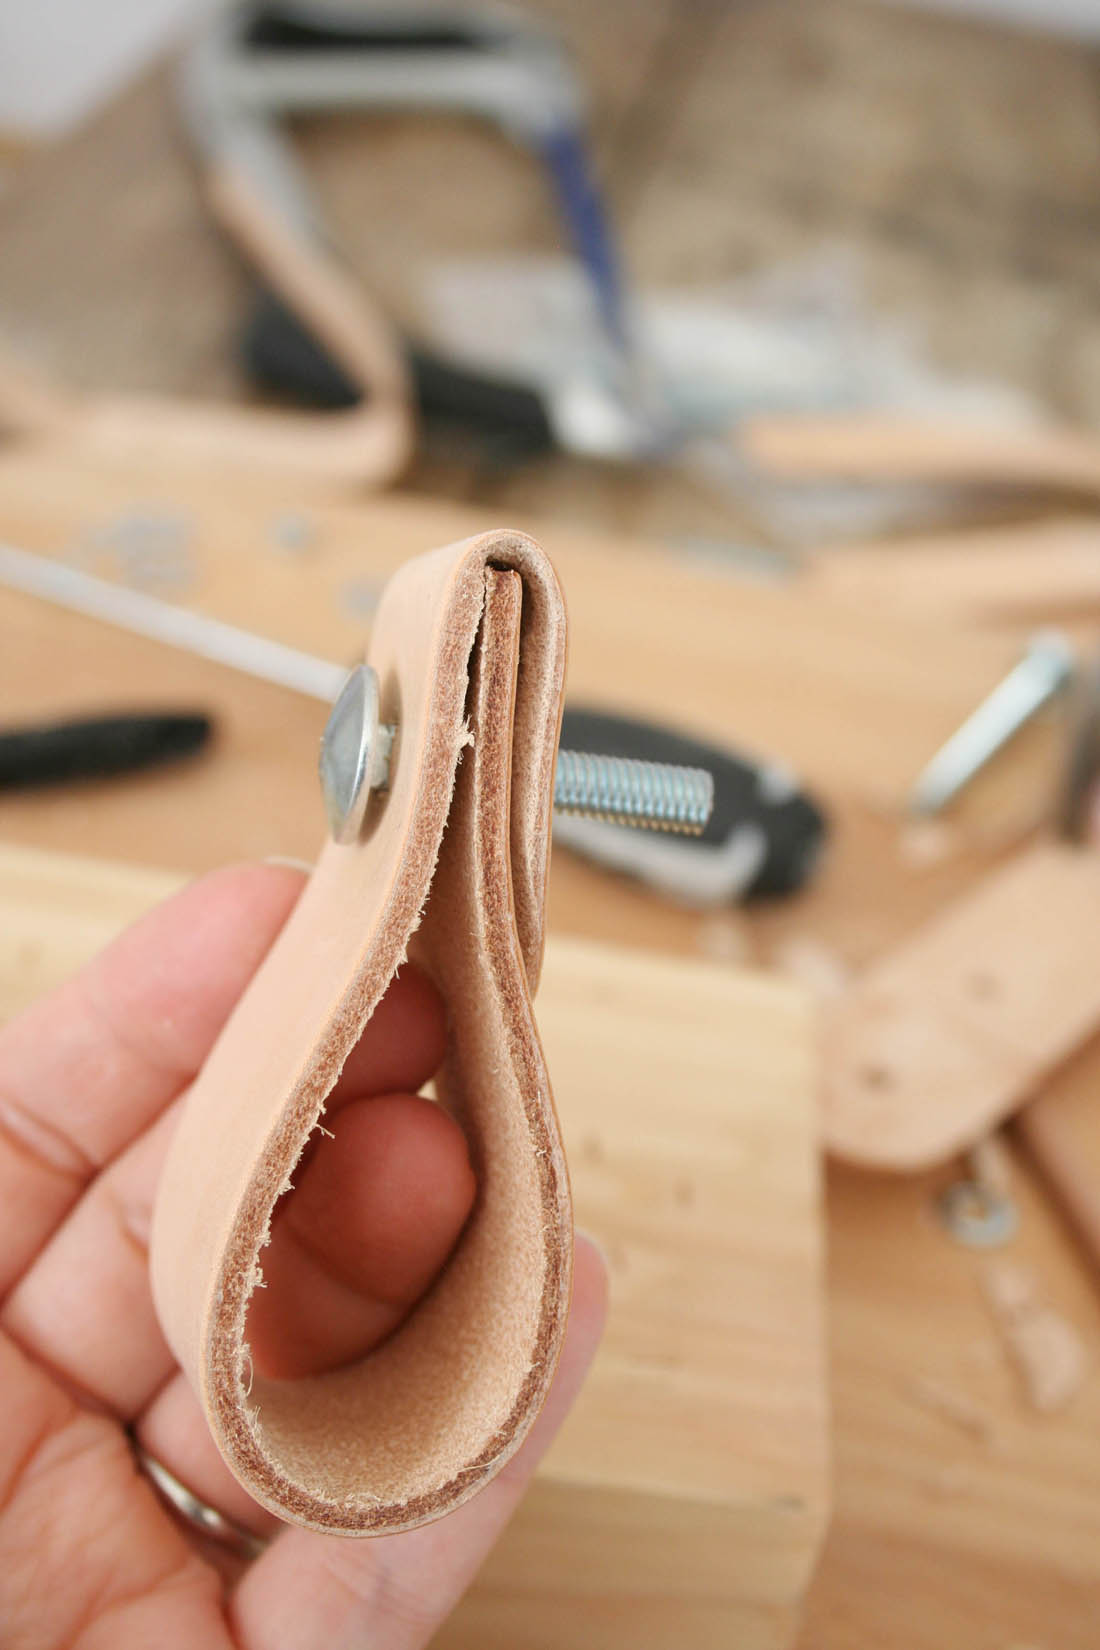
8. Fold the leather over so that the scored mark is at the top and the curved end folds over the back and all three holes line up.I didn’t want my handles to be folded in half as I wanted a smooth top edge instead of raw leather.

9. Screw the bolt through all three holes.
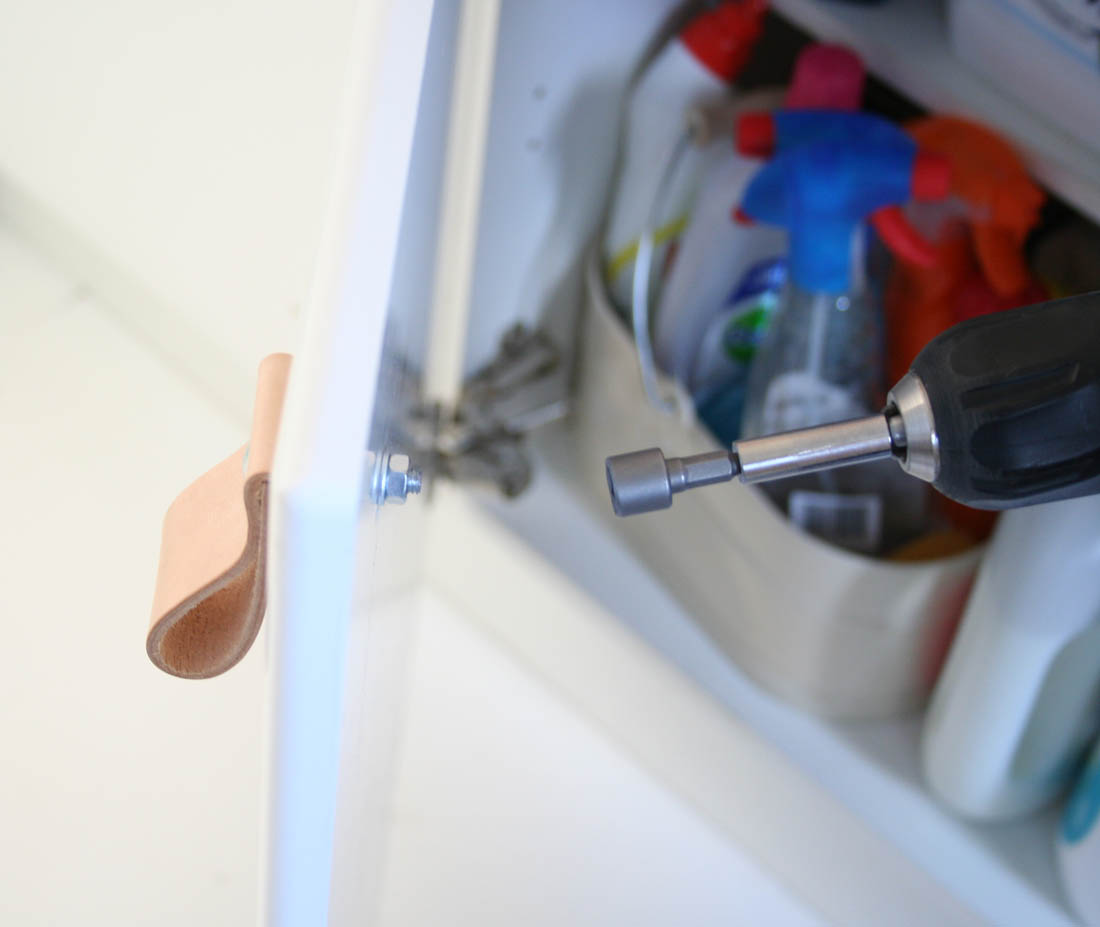
10. Pass the bolt through the door and use a spanner or socket set to screw on the washer and nut as tightly as possible so that the handle can’t spin.
And there you have my new DIY leather door handles and a glimpse of my ‘new’ kitchen. Over time the handles should age and take on a lovely patina to the leather.

They work really well as they are large enough to get your fingers through the loop or you can pull the whole thing to open the cupboards.
Love them! What do you think?
Katy x
What a brilliant idea. Love your blog.
A bookmark in to that? Flipping brilliant. I have a strong desire to change my door handles now!!!
These look gorgeous Katy and brilliant step-by-step instructions! Love the end result.
You are SO clever! These are brilliant. I wish you had written this two weeks ago before I (ahem) bought new leather handles for my cupboards….then you could have made some for me too! Mine are the long versions as I have two fixings but I love leather handles in a kitchen.
XK
oh MY! this is amazing, you are soooo wonderful for sharing. am literally giddy, you have solved my dilemmas since I could only find the super spenny options … wow! am sending your blog to my hubby right now so we can plan the replacement, thank you X
Amazing! What a brilliantly satisfying result – they look fab! Very nice work. X
Thank you so much for sourcing the leather and bolts and including links to them. I always see great DIY’s that I want to try but can never find the right materials so this is perfect. Thanks for sharing, too.
These look amazing! Pinned immediately!
Oh they’re fab! Great to read a detailed, easy to follow tutorial too 🙂 We had the same handle issue with our kitchen last year – all the nice ones just make the project rack up up the £££s. We ended up getting cheap brass handles from ScrewFix which are fine although now I wish I’d been a little more inventive!
Hi Katy
How did you fill the holes left by the old handles again? Did you use sealant rather than filler? Do you mean like bathroom sealant? I’ve also got those long handles with two fixings on each door, but itching to get rid…!! x
Author
Yes, silicone sealant like they use in bathrooms. Obviously this only works if you have white doors. Squeeze a bit too much in and then wipe the residue away with your thumb (put a dot of washing up liquid on your thumb beforehand). X
Brilliant!! You have honestly just saved me a packet on buying new doors! thank you!! x
Ooh these are beautiful, I love how they match the piegnoir on the walls and they look pretty easy to make. I did the same with some wardrobe handles in our spare room and used an old belt! x
Author
A belt! Brilliant idea x
What an amazing idea for door handles. Really cool too 🙂
Hopped over from IG especially to see these handles- not disappointed! They look amazing and unique!
This is absolute genius!! Am also loving the wood worktops with blush walls (F&B Setting Plaster…?!). Looking forward to the full kitchen reveal!
Author
I very nearly went for Setting Plaster but it’s actually Pink Ground. love it xx
They’re fabulous Katy, I’m looking forward to seeing your finished kitchen! x
Such an effective yet easy DIY – love them!
OMG I hadn’t realised you had made these yourself!!! They are AWESOME!!!! Great job 😀