Studio living

Nearly ten years ago the first property I bought was a 33 m2 studio flat in Borough, just down the road from where I am now. I thought it was the BEST THING EVER and there wasn’t a day that I didn’t love living there. I never felt cramped, claustrophobic or penned in and the only reason I left that flat was to move in with a boyfriend (he definitely made me feel penned in so that didn’t last long).

I learnt a lot about staying organised and living without ALL the stuff from that studio; it felt so simple and carefree living in such a small space and everyone who visited me there would wax lyrical about how great it was. Anyhoo, why am I telling you this? Well, one of very good friends is moving next week to a studio flat about a four minute walk from my flat (yay!) after I found it for her on RightMove – finally, my guilty pleasure of snooping in other people’s homes online has paid off! We visited the flat together and we both loved it and she decided on the spot that it was right for her and didn’t bother seeing anything else.

My friend has since asked for advice on living in such small space so I thought it might be helpful to share some of that here as I’m sure we are not the only ones who live in small flats.

Love the area

I think it’s really important that you choose an area that you love if you are moving into a small flat. You need to feel that you can get out and about easily so that you don;t feel hemmed in. Knowing that there is a great bar, restaurant or park on your doorstep makes studio living so much more bearable.

Declutter

You must get bored of me harking on about decluttering but I really do believe it has the power to change the way you live. When you live in a small space the last thing you want is to be surrounded by stuff and have to sacrifice an important piece of furniture such as a dining table because you have too many clothes/books/crap to fit in.

Studio apartment | Home of Emmy Lundström | Ennui blog

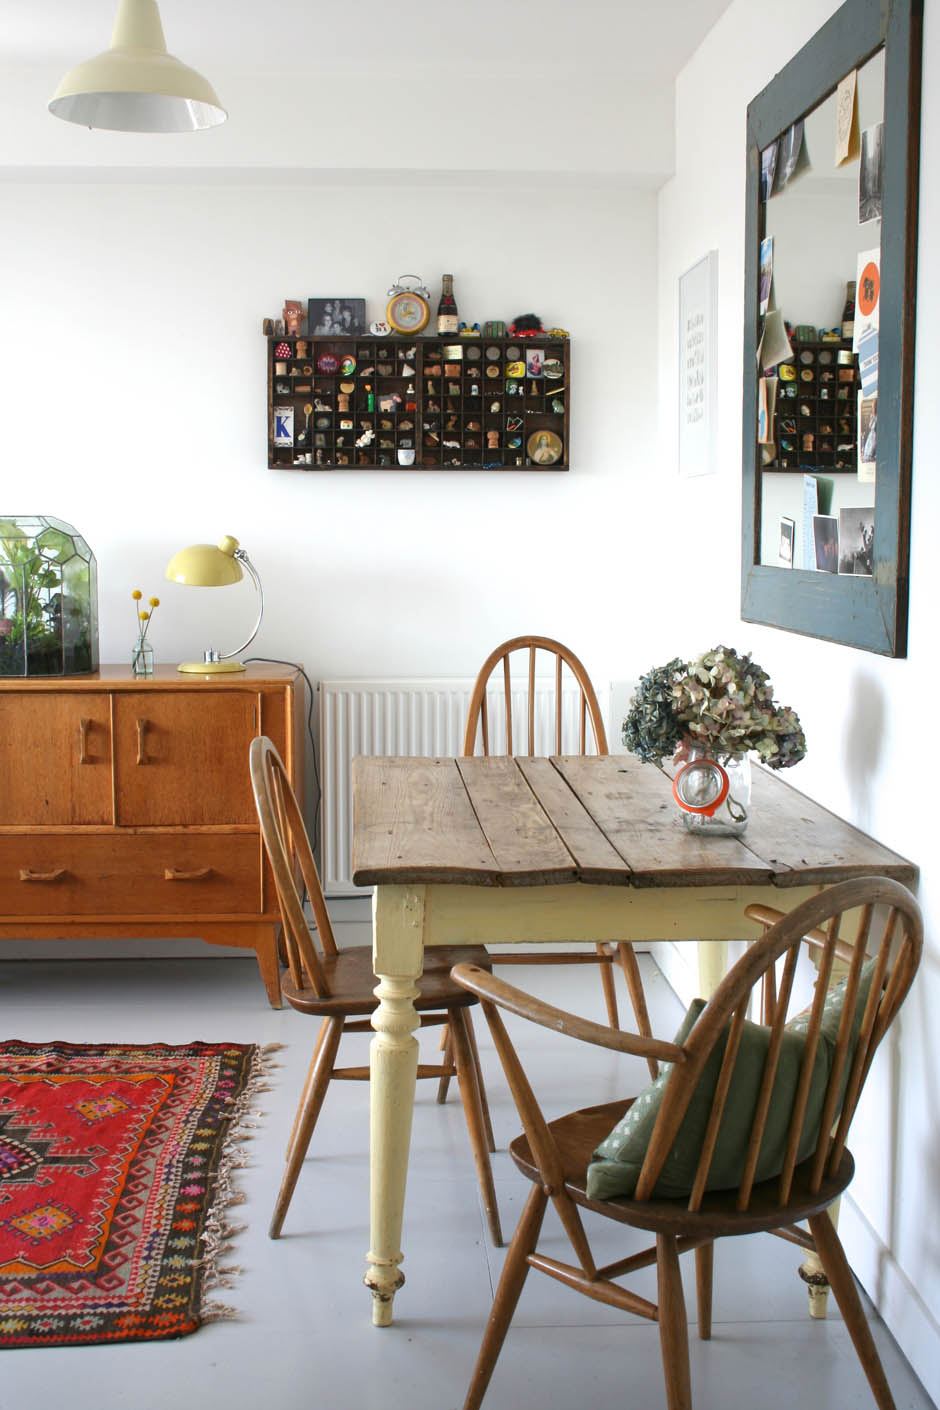
You need to be able to fully function in a small flat. For example, get rid of clutter if it means you can fit in a good sized dining table. Image via the gorgeous Ennui blog featuring the home of photographer Emmy Lundström.

Use wall space

Don’t underestimate the amount of storage space you can achieve by using the walls. Whether it be high shelves, wall cupboards, picture ledges, shelving or hooks there is always a way to use the walls without encroaching on the space too much.

Keep floor clear

Keeping the floor clear of anything other than furniture and the odd basket is something I have always strived to do and it makes a huge difference to how spacious a flat feels. Piles of stuff precariously balanced around the place is a big no, no.

Create zones

Try really hard to make it very clear what each part of the flat is for, which will help you keep organised and keep the whole place from becoming one big mess.

Studio apartment | Stadshem

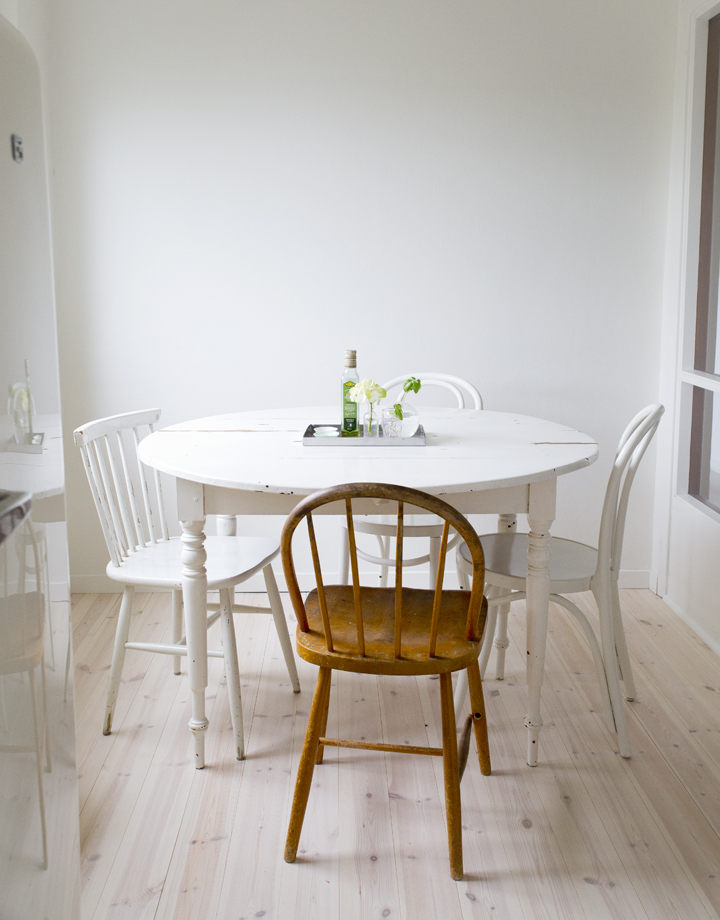
Working happens at the desk, sleeping happens in the bed, relaxing/reading/TV watching happens in the seating area. Keep everything separate so that it doesn’t become a confused space with everything everywhere. Image via Stadshem.

Studio apartment | Home of Emmy Lundström | Ennui blog

Love the way this bedroom has been divided off from the rest of the living space – those windows are genius. Image via Ennui.

Outdoor space

If you can find somewhere with outdoor space you need to grab it and make the most if it! Have the windows and door open every day (weather allowing) and make sure to actually use the space in a productive way so that it feels like an extension of your flat; it will make a huge difference to the feel of the place.

Alaska building Bermondsey | Converted factory | Apartment Apothecary

This is the studio flat my friend is moving to. It is a converted factory with its own terrace – look at those windows!

Don’t scrimp on style

The worst mistake you can make when moving into a small place is to think that there is no point putting any effort in to the way it looks. Taking care and paying attention to the colour scheme, adding character and injecting your personality into the space will make it feel so much more special and you will want to spend time there.

Studio apartment | Stadshem

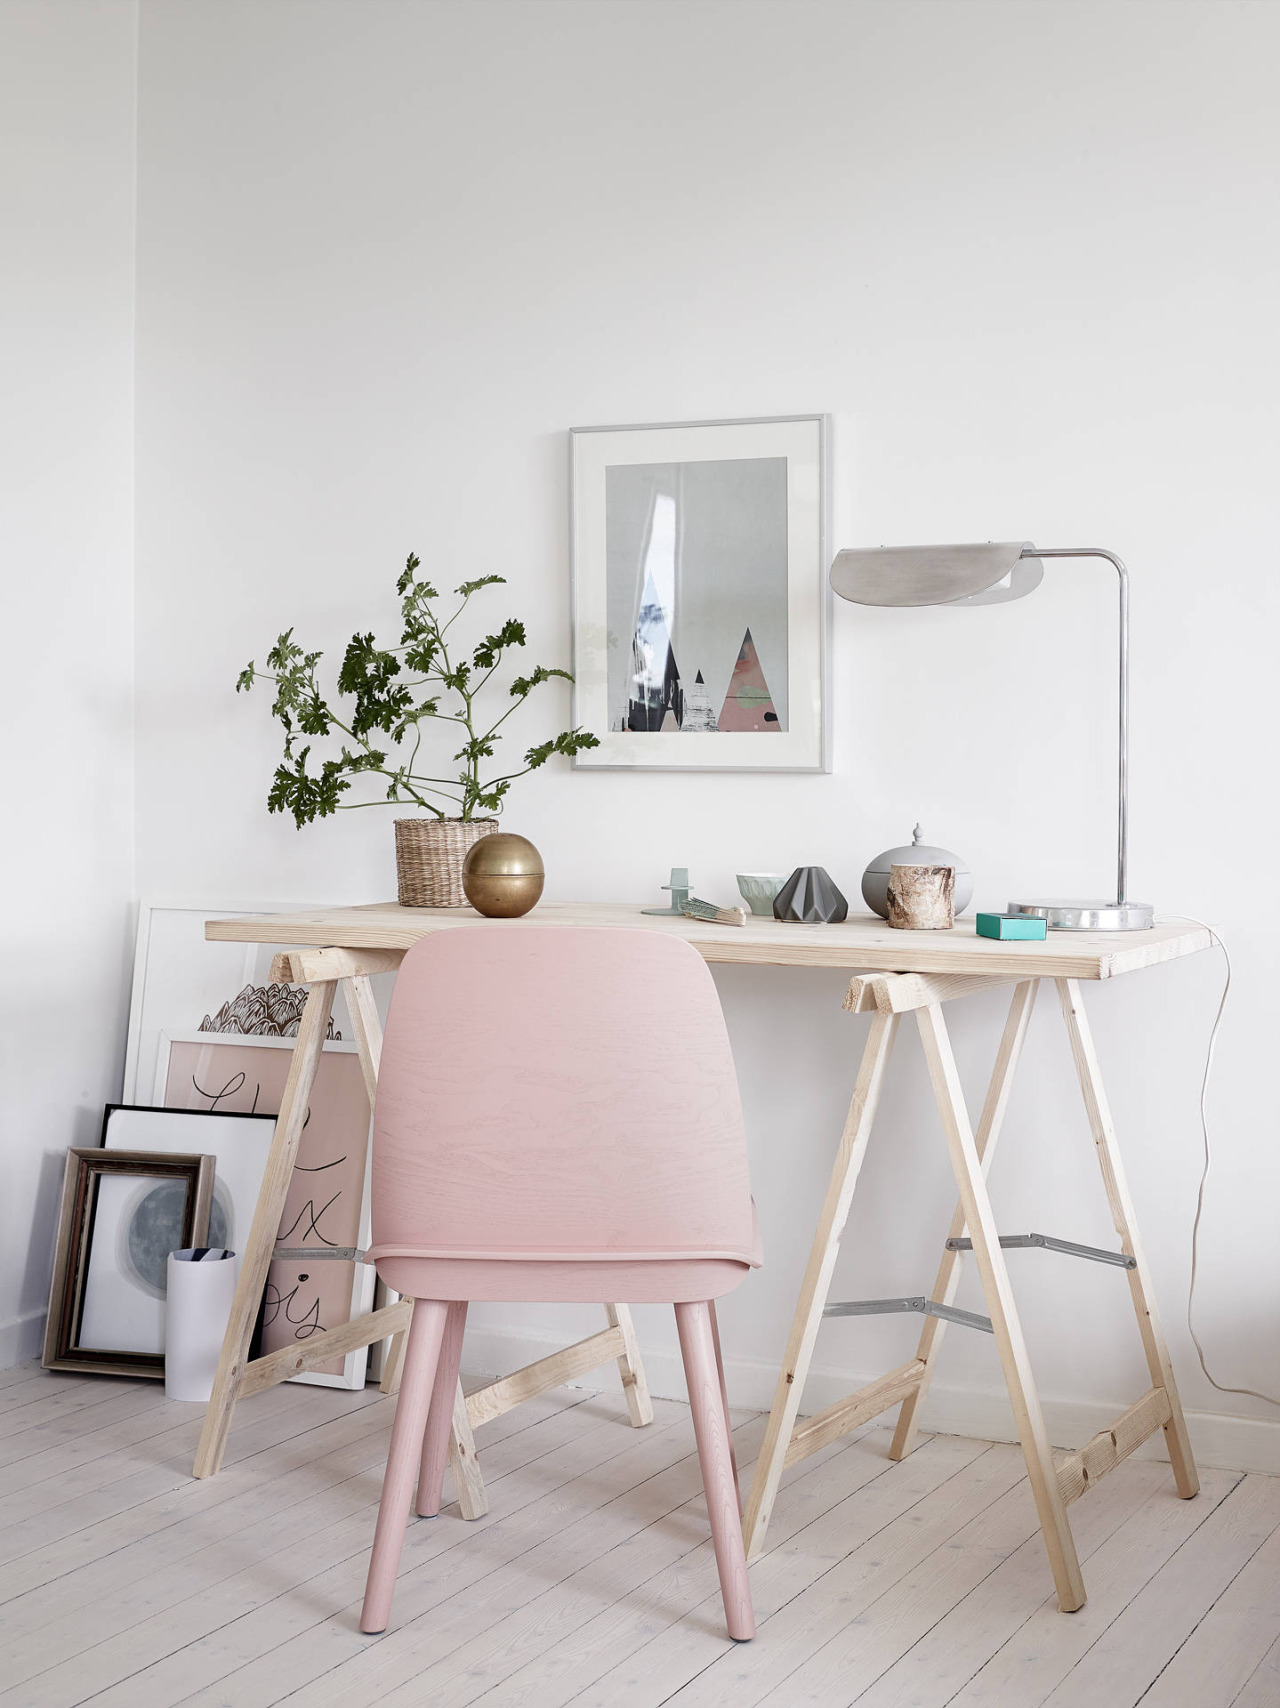
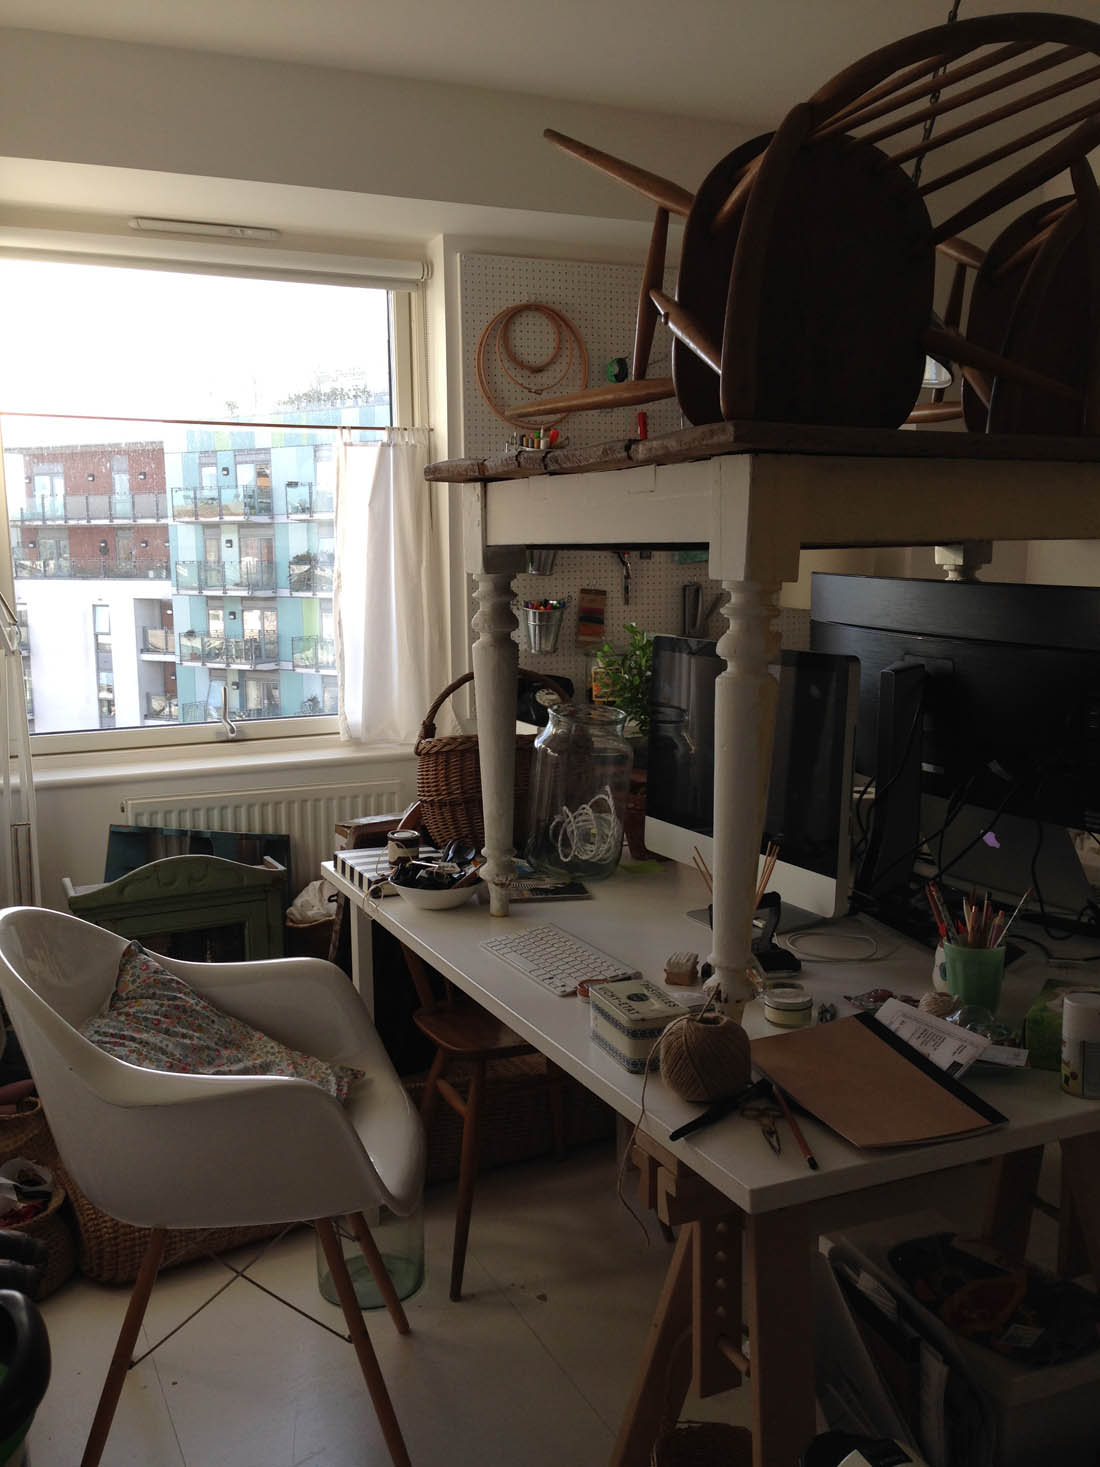
Beautiful and stylish work area. Image via Stadshem.

Establish tidying routines

When I lived in my studio flat I decided to have a sofa bed with a fully sprung mattress. I had to be very disciplined to put the bed away every morning so that the living area was a useable space when I got home from work. Very quickly it became a deeply engrained routine, as did putting away all my clothes every night and cleaning everything away after dinner. These small actions made the space functional at all times.

Studio apartment | Home of Emmy Lundström | Ennui blog

Making the bed every day is very important if you have no other rooms to escape to. Image via Ennui.

Have you ever lived in a studio flat or bedsit and got any good tips?

Katy x


Rug placement

A day arrived a couple of years ago when Jules had taken Otto for a walk and he called me on the way home to warn me to line the hallway with towels leading straight into the bathroom. In came Otto covered from head to toe in thick, sticky mud and I knew that our carpet had to go. I couldn’t give this huge dog a bath every day for the rest of time for fear that the carpet was being ruined. Therefore, the carpet went and we painted the MDF boards underneath with floor paint, which has given us an easy to clean and more modern feel in our flat. However, there are those times when all I want in life is to feel the soft, sumptuous tread of carpet underfoot, especially at this time of year. That’s where a good rug comes in. I can not express how important a good rug is in pulling a room together, bringing cohesion, adding a cosy feel, softening the echoes and hard edges of a wooden or stone floor.

I bought the most beautiful kilim rug from Turkey a couple of years ago that I have had to surrender as it shows up Otto’s hair so much and it is so thin that he was starting to make holes in it. I have packed it away safely for that forever home in the country I will have one day (!) and instead have bought a much more practical one. As we begin to finish our DIY and I can start to think about styling our sitting room with a new sofa, chairs and rug my mind has wandered to rug placement (yes, that’s a thing). When putting a room together the placement of your furniture in relation to your rug is incredibly important to the overall feel of the room and it impacts on the size of rug you choose.

If someone is struggling with a room and they ask me to take a look almost always one of the glaring problems is that the rug is too small, big or the furniture is laid out in the wrong formation around the rug. Just with a little tug here or pulling a chair forward there and the whole room can feel different – honestly! So, here are some helpful  guidelines that I will be following to help me lay out my rug and furniture in my sitting room…

Floating rug v. Grounded rug

Rug placement tips | Apartment Apothecary

A ‘grounded’ rug. This rug is part of the beautiful range of House Beautiful rugs designed exclusively for Carpetright and is called ‘Horizon’.

A floating rug is a bad rug. The sofa (block at the top of the graphic – apologies for my poor design skills) does not touch the rug (rectangle in the middle) and nor do the two chairs (two dark blocks at the bottom of the graphic). The rug is too small resulting in the room feeling disjointed and ‘bitty’.

A grounded rug, on the other hand, is a good rug. It is large enough for the two front legs of the sofa to sit on the rug, as well as the front legs of both the chairs. This pulls all of the furniture together, creates a cohesive feel and grounds the room. Ideally there should be about 50cm from the edge of the rug to the walls of the room. I have decided to go with two chairs opposite our new sofa, now that we have sold our teal loveseat, so I will be arranging them to follow this simple rule.

In the past I have struggled to find affordable on-trend rugs but it feels like everyone is catching on quick so I’m very pleased to be collaborating with Carpetright on this post to introduce you to their new range created by House Beautiful – pretty good, hey? I love the different textures, muted colours and bold designs and I think my favourite design is ‘Valley’.

Rug placement tips | Apartment Apothecary

Available in store at Carpetright.

Right, I’m off to place my rug – happy weekend!

Katy x


DIY behind the scenes

Gah! I am currently sitting on my bed with my iMac precariously balanced whilst trying to type up this post after painting myself in to my bedroom for the next eight hours. Oh, the joys of DIY! I don’t have anything pretty to share this week so I thought I would give you a glimpse into the chaos around here instead – makes for a nice change, no? Kitchen is almost done, just tiling and door handles to change. Sitting room is half painted and floor is half painted, too. Jules and Otto have gone to stay with his mum for a week so I can crack on with it all (floor painting and Otto do not mix, believe me!).

I wish I could afford to pay someone else to do all our home improvements but we are able to do it ourselves, we have the time, we have the flexibility and between us we have the know-how so somehow it seems like a huge luxury to pay someone else to do it for us. However, there are times when I’m covered in paint or the whole flat is filled with sawdust that I wish I was anywhere but here. Although, there are a few things that I have learnt along the way that make DIY so much easier and less chaotic that I will share with you, too.

Are you ready for the ugliest photos this blog has ever seen?

Tip 1: Don’t freak out!

When the new work tops arrived I burst into tears. In isolation and before they had been oiled I worried that the wood looked too pink and I was terrified that I’d wasted a huge amount of money on something I didn’t like. However, as soon as the worktops were installed and I could see them in context they are exactly what I wanted. It is far too easy to panic when you are doing home improvements that something isn’t right. However, until you have put the whole room together it is far too difficult to tell whether you have made a mistake so don’t freak out prematurely!

Behind the scenes of DIY | Kitchen makeover | Apartment Apothecary

Behind the scenes of DIY | Kitchen makeover | Apartment Apothecary

Tip 2: Prepare practical stuff

I knew that there would be a few days without a cooker, hob, sink, plumbing for the washing machine and dish washer. Therefore, I cooked some meals that could be frozen and then heated in the microwave so we didn’t go hungry. As well as that I did all the laundry before we began and got the bath set up for washing up (back breaking, I tell you!).

Behind the scenes of DIY | Kitchen makeover | Apartment Apothecary

Old worktop coming out.

Behind the scenes of DIY | Kitchen makeover | Apartment Apothecary

Everything had to be unplumbed to remove this worktop and for a new sink to be installed.

Tip 3: Don’t get carried away!

On the first weekend of our DIY endeavours we fitted the smaller of the two worktops. It all went pretty smoothly and without much disruption. However, after waiting until the next weekend to do the other side of the kitchen we both got a bit carried away and rushed into starting the work without preparing as much as we should have done. Jules was ready to get going and asked me to clear out the cupboards and instead of doing that job properly I rushed it and didn’t bother packing everything into boxes. Instead I just heaped it onto our table and onto the floor. Such a silly mistake  – the second worktop required far more cutting and the amount of sawdust was out of control! Every single thing that I didn’t bother packing into boxes got covered  and very quickly it all became pretty chaotic. Our over exuberance to get started on that second weekend actually slowed us down in the long run.

Behind the scenes of DIY | Kitchen makeover | Apartment Apothecary

Tip 4: Plan time carefully

I think it’s best to work back from when you want the room you are working on to be complete. I knew that I wanted everything to be done by the start of March. Therefore, I made sure I ordered new furniture/materials with long lead times before Christmas. I also organised to sell old furniture by the weekend before I planned to paint (the point I am at now). That way it makes painting so much simpler, especially because I have decided to re-do the floors so getting rid of our old sofa and selling our teal loveseat made clearing the floor space so much easier.

Behind the scenes of DIY | Living room makeover | Apartment Apothecary

Although there is still a fair bit of stuff packed into the office and bedroom!!!

Behind the scenes of DIY | Living room makeover | Apartment Apothecary

Tip 5: Buy all the materials you will need in good time

I am lucky enough to be trying out one of the nine new Farrow & Ball colours in my sitting room (they launch on February 1st so keep your eyes peeled and try to guess which one I have chosen!). Only problem is I didn’t order quite enough – rookie error! There is nothing worse than having to interrupt DIY because you don’t have the materials you need. We have also had to do an 7.45pm dash to B&Q in a taxi before it closed to buy the correct jigsaw blades. Gah! Waste of time and waste of money so make sure you prepare properly and always get more than you think you’ll need.

Behind the scenes of DIY | Living room makeover | Apartment Apothecary

I still have a couple of coats of paint left to do before Jules and Otto come back on Friday and then we will do the tiles in the kitchen this weekend. After that I may never do DIY again…until the next time, at least!

Katy x

Changing the layout of a room

Just a quick post today because I am up to my eyeballs in paint! Last week I showed you the last home tour of my flat before I make major changes in the living room and kitchen. When it was photographed it was in that weird in-between stage of feeling a bit bare and naked, ready for painting and new furniture (and yes, shock horror, it is not going to remain white!!!). Stripping back has made me realise how easy it is to forget that just because your furniture is laid out a certain way does not mean it has stay in that position forever. Even the smallest change to the layout of furniture can change the whole feel of a room and costs you nothing! In fact, I had a moment last weekend when I had just made a couple of changes to my living room layout after selling a couple of pieces and I thought “why on earth am I spending hundreds of pounds to re-do this room when a couple of layout changes makes it feel like a new space?!”. So, I suppose today’s post is a small reminder that it is possible to change things up for nothing.

We have sold the sideboard that you can see in the picture below to create more space, which already makes the room feel different, and then suddenly it came to me that the position of our dining table wasn’t working. For almost six years that dining table has sat in that position and it has never felt quite right when we sit down to eat but it wasn’t until I stood back and looked at it with new eyes, once the sideboard had gone, that I figured out the problem. I usually sit at one end (in the chair nearest us in the pic below) and Jules sits in the chair facing the mirror as it is a rectangular table so sitting at either ends feels too far apart. Therefore, we are not directly looking at each other and it feels a bit odd so we never really linger at the table, immediately opting to sit on the sofa after dinner. I very quickly pulled the table round so that we could sit opposite each other and that evening we sat and talked and lingered. It was wondrous! I woke up the next day and walked into the living room and the new table layout made it feel like a brand new space.

Changing the layout of a room | Vintage furniture | Eclectic style | Ercol chairs | Apartment Apothecary

So, why not take another look at one of your rooms and see whether a very small change could reinvigorate the whole room without spending a penny. Think about whether furniture is blocking out light, functions as well as it should do, ask someone else’s opinion – a set of fresh eyes always helps – and experiment.

Katy x


The magic of baking soda

So, are you ready for the in-laws and your family to descend this Christmas expecting a clean house, pristine beds, comfy sofas and lots of yummy food and drink? No pressure.

I realised recently that both our bedlinen and sofa are getting totally trashed by our dog, to the point where I caught a guest moving to a different part of the sofa after pulling a face at the dog stains she was sitting on – I tell no lie. The next day I immediately pulled off all the covers and stuffed them in the washing machine but they have to be washed at 30 degrees because they shrink and the blue stripes against the white fabric can run. When they came out of the washing machine they looked exactly the same as they had when they went in: mud stains, drool stains and general yellowing – gross!

I don’t want my sofa to be grubby and unpleasant with a house full of people over Christmas, not least because the vast majority of time is spent on the sofa watching Xmas telly and drinking as much as is humanly possible. However, I also couldn’t bear the thought of paying to have my sofa covers professionally cleaned. This is where the baking soda comes in.

Oh my god. This stuff is A-MAZING! Seriously.

Here’s what I did to tackle the sofa covers:

1) 1 cup or mug of baking soda poured into 8 litres of very hot water in a bucket and stirred.

2) Submerge cushion covers into bucket (I did it in three different batches as I only have one bucket, which doesn’t fit all of the covers into it at once. I did try putting them all in the bath and adding more baking soda but it just didn’t work very well at all – no idea why). Stir the covers around in the water and soda solution and then make sure they are all submerged, even if you have to weight them down with something.

3) Leave to soak for 18 hours.

4) Remove covers, wring out and then put into a cold wash in your washing machine.

I did no scrubbing and the baking soda just lifted out these stains as well as the general dirt that had discoloured the covers. I promise you, the results are miraculous considering a conventional wash in the machine had not made any difference at all.

I have done the same to my bedlinen, which works amazingly well as the main reason bedlinen goes past its best is the build up of sweat (horrible, I know). The baking soda break down the oils and sweat build up, which makes whites yellow and robs them of their fresh feeling. My linen is back to its best and ready for ALL the house guests this Christmas.

Keeping your whites white with baking soda | Cleaning sofa covers with baking soda | laundry tricks | Apartment Apothecary

Do it! I promise you won’t be disappointed.

What are you doing to prepare for houseguests this Christmas?

Katy x