Happy Christmas!

Everything is ready! The house is dotted with decorations and all the presents are wrapped. I’m going to do a round-up of what’s been my first blogging year just after Christmas – it’s been amazing! Thank you to all those who have read the blog, commented and shared. I hope you all have the most wonderful Christmas full of happiness, family, friends and laughter xxx

Christmas berries in vintage bottles by www.apartmentapothecary.com

Berries in vintage bottles on the kitchen window sill.

Katy x


The Garden Edit

The Garden Edit is a new online store set up by gardener, John Tebbs, who has brought together a beautiful collection of timeless pieces for, and inspired by, the garden.  If you are looking for a functional piece of art for a Christmas present this year, then you’ve found the right place. Everything is handcrafted: planters by ceramicist Pilar Wiley, copper bird feeders designed by American Vasse Vaught and made using vintage tools in the Blue Ridge Mountains of Virginia, brass and cane watering cans by Bauhaus trained designer Carl Aubock – this is no ordinary collection of products and no ordinary shopping experience.

Take a look for yourselves…

The Garden Edit. Designed in 1948, this indoor watering can is handmade from polished and patinated brass, with cane wrapped around its handle.

Designed in 1948 by Carl Aubock, this indoor watering can is handmade from polished and patinated brass, with cane wrapped around its handle.

The Garden Edit:Designed by American Vasse Vaught, the Pediment Bird Feeder is handcrafted using vintage machines and tools in the Blue Ridge Mountains of Virginia.

Designed by American Vasse Vaught, this fly-through feeder has a watertight removable copper tray and can be used as a bird bath. Made from 16oz copper, it can be cleaned to retain its shine or left to patinate.

The Garden Edit:Handcrafted by American ceramicist Pilar Wiley. These meteor planters are wheel-thrown and made from altered stoneware.

Handcrafted by American ceramicist Pilar Wiley. These meteor planters are wheel-thrown and made from altered stoneware.

The Garden Edit: Spade with Steps by Sneeboer & Zn. This spade has a turned handle made of ash and a hand-forged stainless steel blade. It has a “D” handle for ease of grip, a step to protect your boot, and a smaller, shorter blade making it perfect for turning over an allotment or decorative border.

Spade with Steps by Sneeboer & Zn. This spade has a turned handle made of ash and a hand-forged stainless steel blade. It has a “D” handle for ease of grip, a step to protect your boot, and a smaller, shorter blade making it perfect for turning over an allotment or decorative border.

The Garden Edit: Matthias Kaiser is an Austrian potter who uses unrefined materials for his ceramics and often exposes the process of making to give pieces a raw quality. This vase is made from porcelain and makes a wonderful container for long-stemmed flowers or a single twig.

Matthias Kaiser is an Austrian potter who uses unrefined materials for his ceramics and often exposes the process of making to give pieces a raw quality. This vase is made from porcelain and makes a wonderful container for long-stemmed flowers or a single twig.

The Garden Edit: Designed in 1949 by Carl Aubock and crafted from brass. This handmade piece was conceived post war when cut flowers were too expensive, allowing you to grow more affordable ivy in the house.

Designed in 1949 by Carl Aubock and crafted from brass. This handmade Ivy Vase was conceived post war when cut flowers were too expensive, allowing you to grow more affordable ivy in the house.

Such wonderful design and craft; I’m in awe.

Katy x


How to make a dried hydrangea wreath

I am very excited to introduce my very first guest blogger here at Apartment Apothecary! The lovely Tamsyn has a passion for all things vintage and shares all her beautiful finds over on her blog, The Villa on Mount Pleasant. She also loves shabby chic style and is the co-owner of  The Rustic Rose, beautiful French style hand-painted furniture. I saw a tweet she wrote about collecting hydrangeas to dry and I jumped at the chance to ask her to show us how to make a dried hydrangea wreath. I can not wait to make my own! Over to you, Tamsyn…

Hello everyone! My name is Tamsyn and I blog over at The Villa on Mount Pleasant.  I was so delighted that Katy asked me to write a guest post for Apartment Apothecary, as her blog is such an inspiration to me! Here’s my tutorial for making a hydrangea wreath…

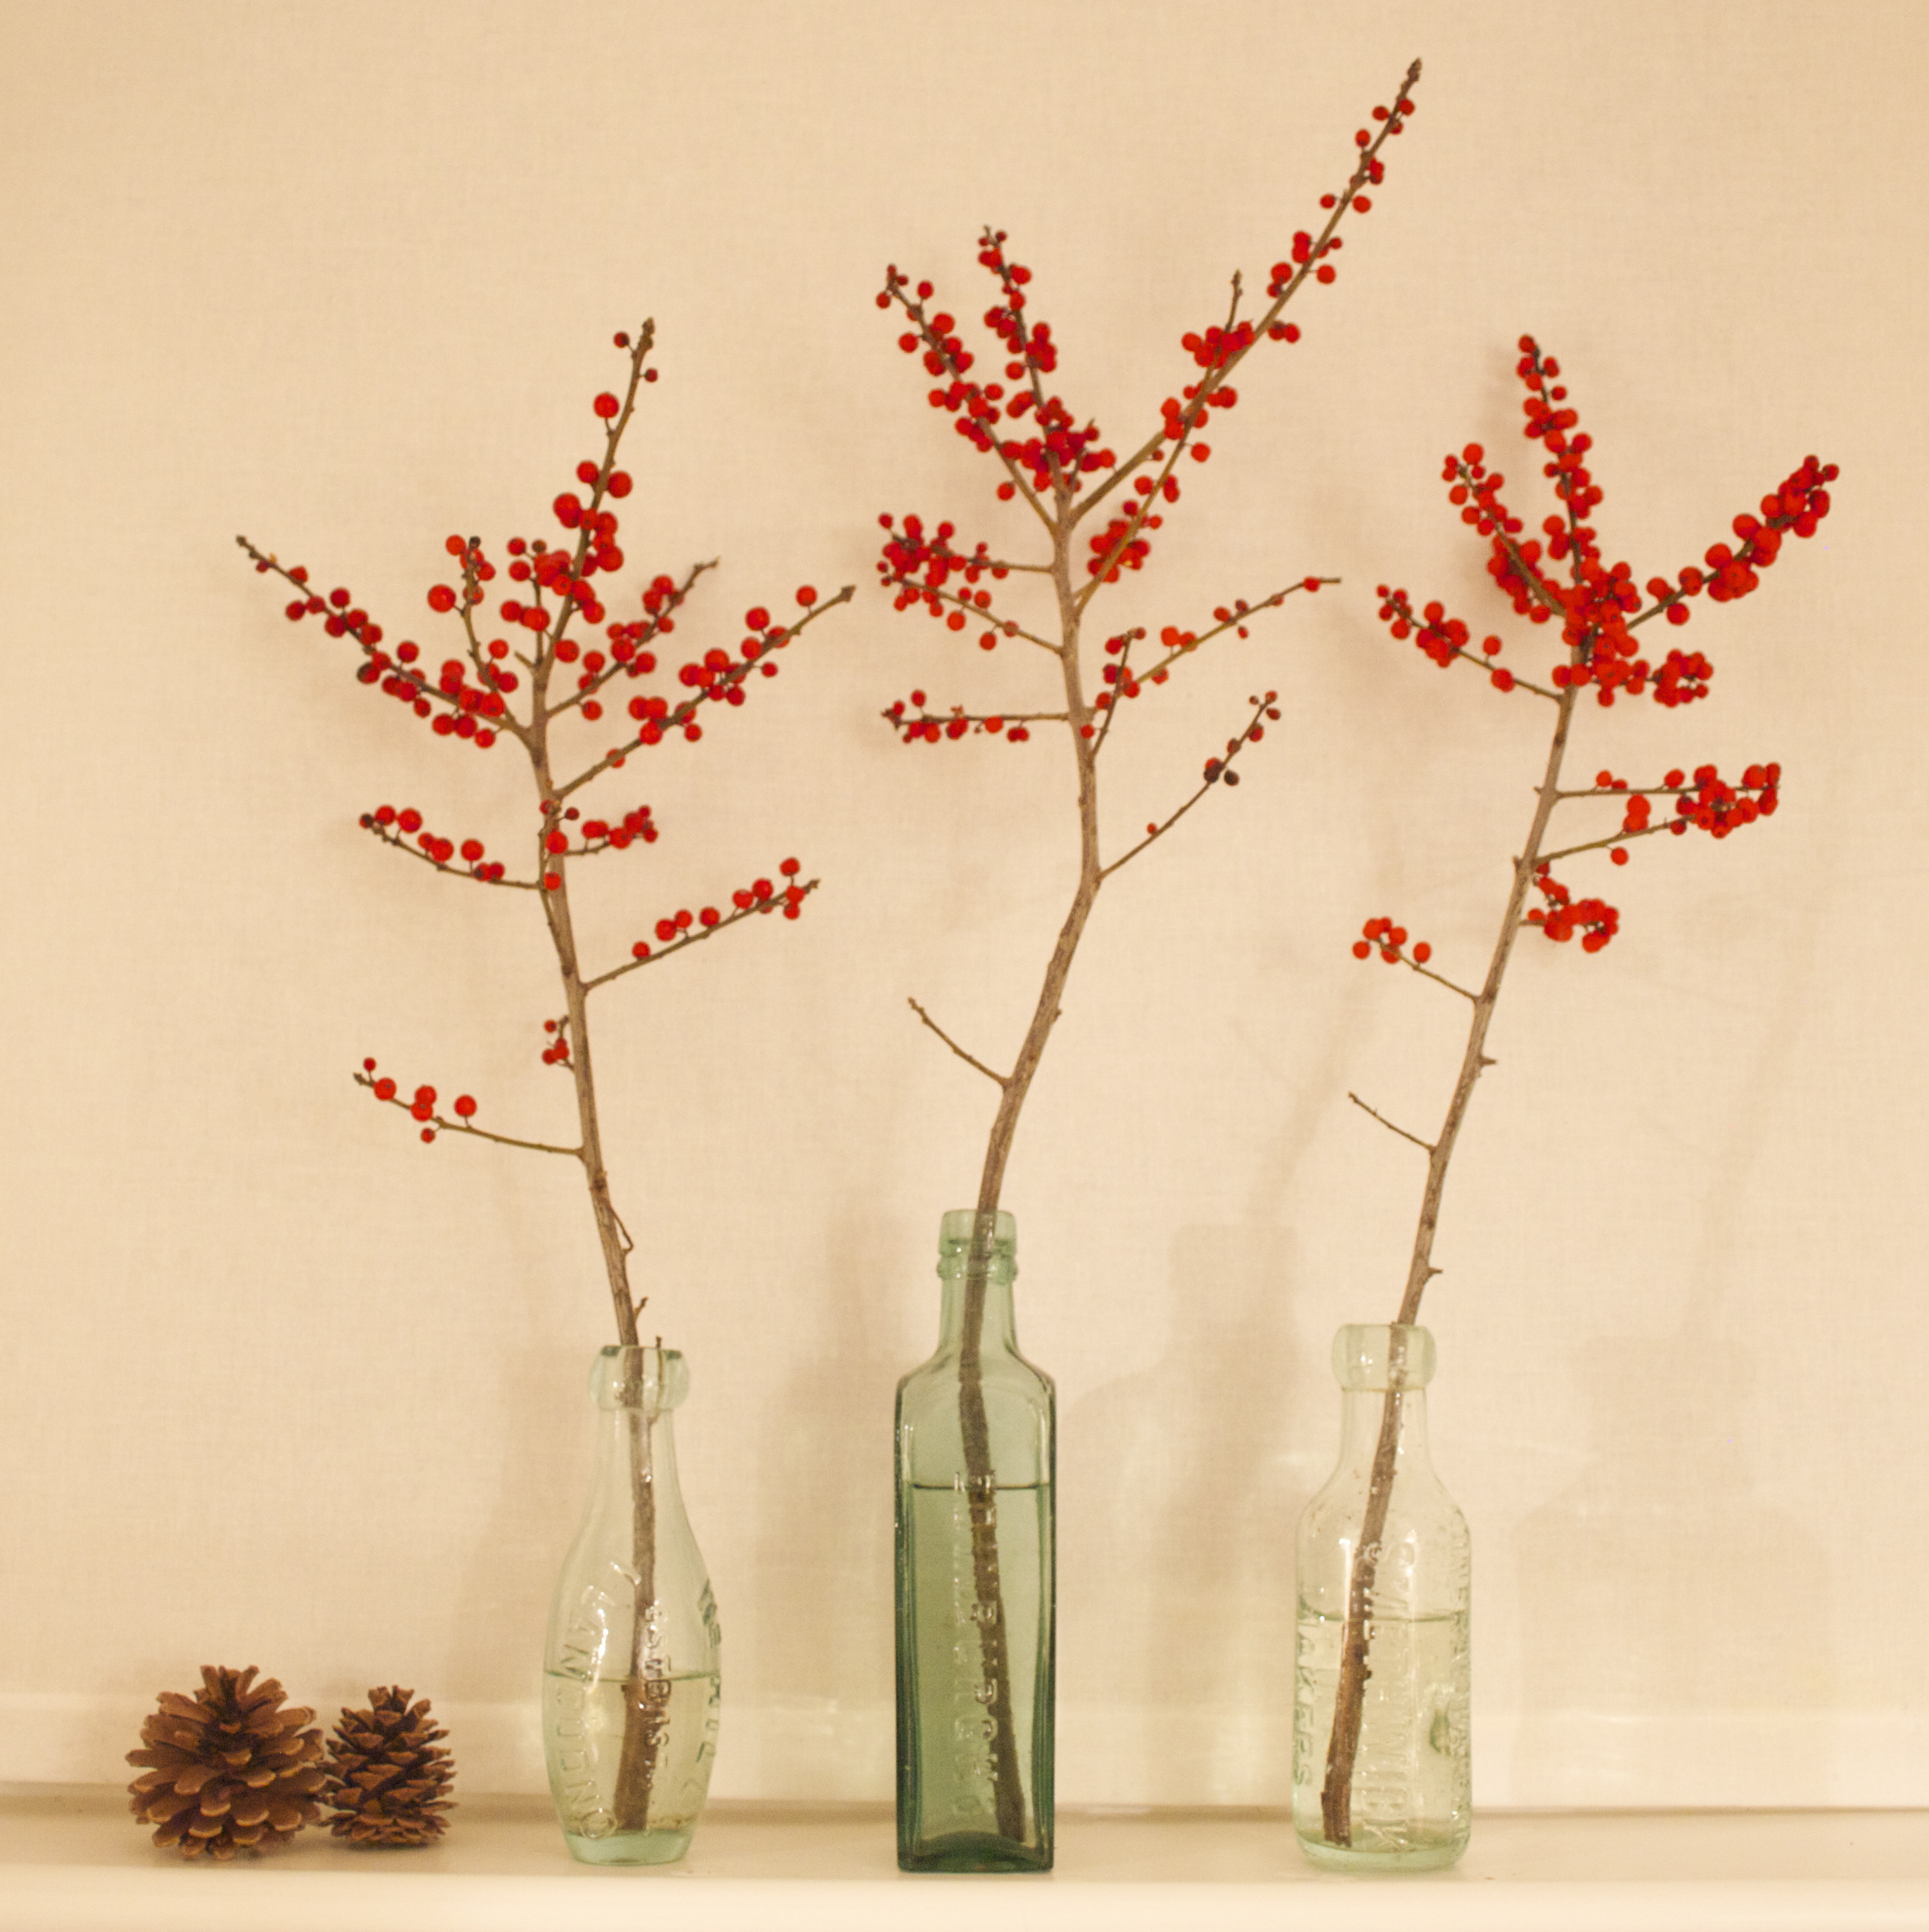
Hydrangeas can be bought cheaply enough from markets or car boot fairs, and it’s worth getting a couple to plant out in the garden, as the flowers turn beautiful faded colours in September, and look fantastic dried and placed in big zinc florist buckets.  If you don’t have any dried hydrangea heads, you could use ivy, dried roses, berries, pine cones, seed heads, artificial flowers – anything really!

Dried Hydrangea wreath tutorial

You will need:

A natural rattan wreath (I got mine from Hobbycraft)

Dried hydrangea heads

Thin pliable wire

Ribbon of your choice

Scissors

Dried Hydrangea wreath tutorial

Tutorial:

1. Take your dried hydrangeas, and trim the stalks right down to the flower heads.  I roughly planned out my wreath by placing the heads on the wreath, and working out where I wanted to put them according to colour and shape.

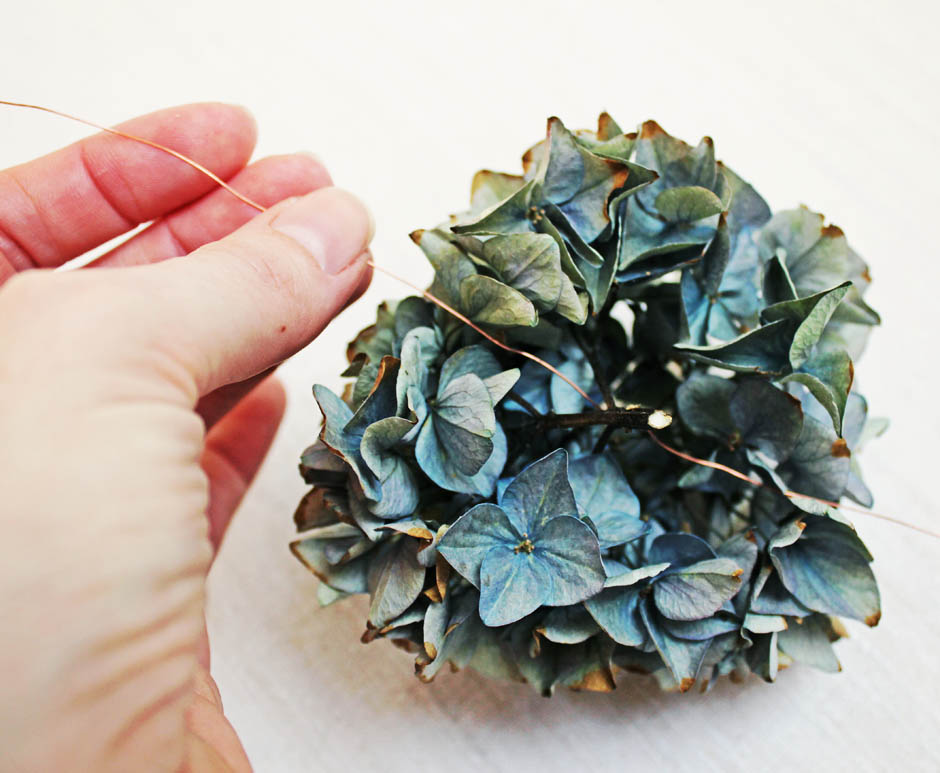
2. Cut a length of wire approximately 30cm long.  Thread it through the flower head just above the cut stalk, and then attach the head to the wreath.  Wrap the wire round the wreath and twist it together at the back to fasten it.  Don’t trim the wire yet, as you may decide you want to take it off and reposition your flower once you have more heads on.

Dried Hydrangea wreath tutorial

Dried Hydrangea wreath tutorial

3. Work your way around the wreath fastening your heads on with the wire.  As I didn’t have quite enough full heads to complete my wreath, I used smaller heads clustered together to fill the gaps.

Dried Hydrangea wreath tutorial

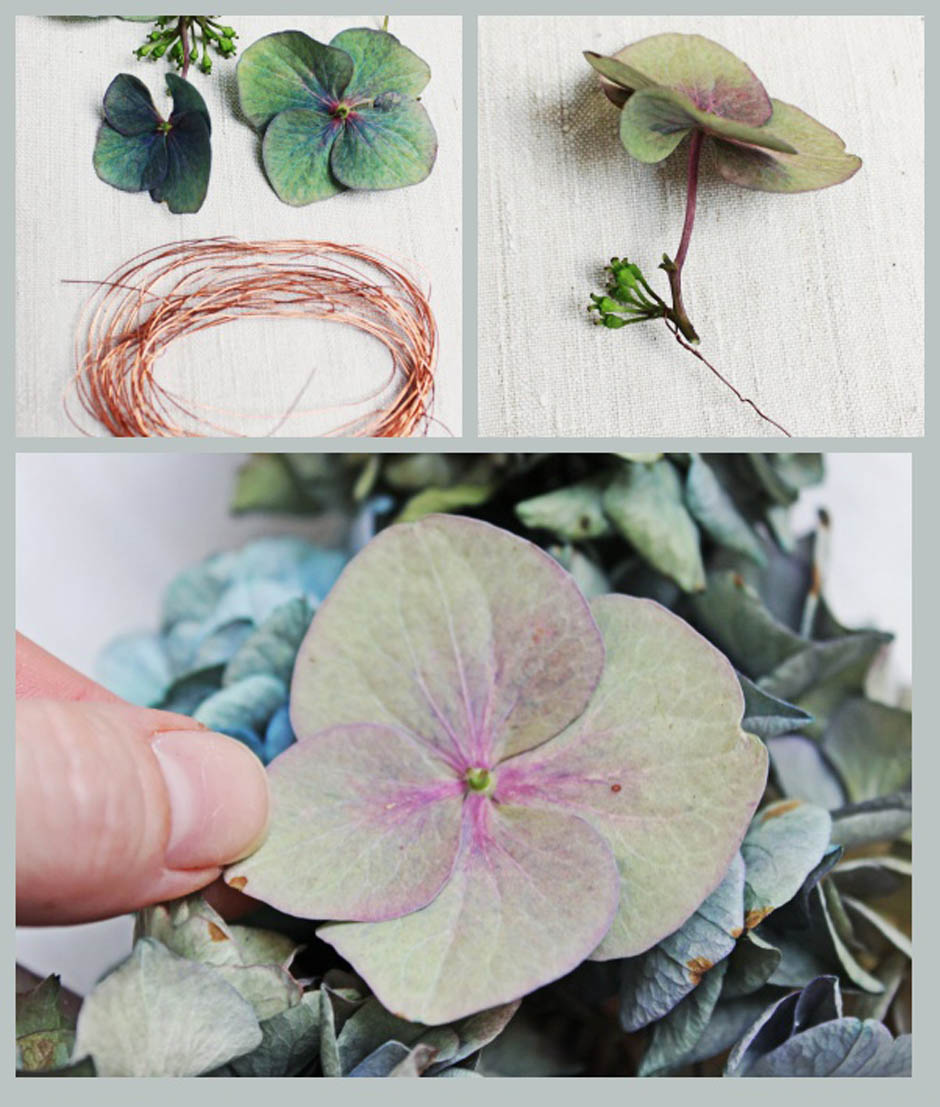
4. Once my wreath was covered I had some smaller gaps to fill, so I took some of my large individual petals, and twisted the top of a piece of wire approx 15cm long around the stalk.  I then threaded  the wire through from the top of the wreath through to the back, and fastened by twisting it round the rattan.  Berry sprigs would look lovely dotted around too, using this method.  At this point, I kept my wreath looking quite rustic – maybe I could have trimmed some of the heads a little to make more of a perfect circle shape, but I didn’t want  to get in a tizz about it – rustic is good!

Dried Hydrangea wreath tutorial

Dried Hydrangea wreath tutorial

5. Finally, cut a piece of ribbon, and choose where you would like the top of your wreath to be.  A wide piece of vintage lace would look lovely too.  Thread the ribbon through the rattan and tie in a knot to make a large loop.

Dried Hydrangea wreath tutorial

Thank you so much Tamsyn for being my first guest blogger! This is such a beautiful idea and definitely one I am going to try for Christmas.

Make sure you drop by Tamsyn’s blog for lots of vintage inspiration.

Katy x


Hanging jelly planters

Last week I told you about how much I love jelly moulds and how I hanker after an Angus and Celeste hanging jelly planter. Well, I have successfully made my own and I have to say these are the best things I have ever made. I really do love them and they cost me the grand total of about £15: £10 for the jelly moulds and £5 for the chains and hooks. Here’s how I did it…

You will need:

Metal jelly moulds – I bought mine from eBay and searched for ‘vintage metal jelly moulds’.

Chain from  Homebase

S-hook from Homebase

Ceiling hook from Homebase

Pliers

Hammer and a centre punch or a drill

Plants

Tutorial:

DIY hanging basket made from vintage jelly mould

I bought an enamel jelly mould and an aluminium blancmange mould, which is ring shaped.

DIY hanging basket made from vintage jelly mould

1. Either drill or use a hammer and a centre punch to make three, evenly spaced holes around the edge of your mould. If you intend to plant straight into your mould you will also need to put a few drainage holes in the bottom of it. However, if you want to hang your planter inside, and therefore do not want water draining onto your floor, either keep your plants in their plastic pots or put a layer of small drainage pebbles at the bottom of the mould.

DIY hanging basket made from vintage jelly mould

2. Use the pliers to unlink your chain to make three identical lengths. Hook the end of each length through your holes and use the pliers to close the link together again.

DIY hanging basket made from vintage jelly mould

3. Make sure your chains are all exactly the same length so your planter will hang straight.

DIY hanging basket made from vintage jelly mould

4. Hook the ends of your chains onto the S-hook and you’re done!

DIY hanging basket made from vintage jelly mould

I want to hang the enamel mould in my kitchen so I have left the plant in its pot and not made any drainage holes in the mould. I have chosen this Rose Moss, which is perfect for a hanging planter as it sprawls over the edges.

DIY hanging basket made from vintage jelly mould

DIY hanging basket made from vintage jelly mould

DIY hanging basket made from vintage jelly mould

I am going to hang this planter on my balcony so I have planted some Violas straight into it and I made drainage holes in the mould.

DIY hanging basket made from vintage jelly mould

I don’t really like traditional hanging baskets because they remind me of the ones that hang outside pubs. However, using something different like these jelly moulds make them so much more interesting. They are also perfect for us now because Otto is obsessed with eating plants and these are well out of his way!


Jelly moulds

When I was a child I had the most amazing birthday parties. Highlights were the games, the novelty cake my mum always made (the Care Bear one was my favourite) and the rabbit shaped jelly. We had a burgundy plastic rabbit-shaped jelly mould that I have always remembered. Anyhoo, I’m getting off the point.

The point is I love a jelly mould. The more vintage, the better. When I came across these jelly mould hanging planters from Angus and Celeste I was at the ready with my bank card. However, I realised they were very expensive and the company is based in Australia and the shipping alone was going to cost $45! I just couldn’t justify spending that much on a hanging planter – although I would happily accept it as a present (Jules, I hope you’re reading this).

So, feeling inspired, I am going to try to make my own next week, but I want to show you the original, just in case you are feeling richer than I am…

Angus and Celeste Hanging jelly mould planter collection

Angus and Celeste Hanging jelly mould planter white

Angus and Celeste Hanging jelly mould planter green

Angus and Celeste Hanging jelly mould planter blue

Angus and Celeste Hanging jelly mould planter pink

Angus and Celeste hanging jelly mould planters

Angus and Celeste hanging jelly mould planters cream

If anyone can tell me why jelly is traditionally made in the shape of a rabbit, please let me know!