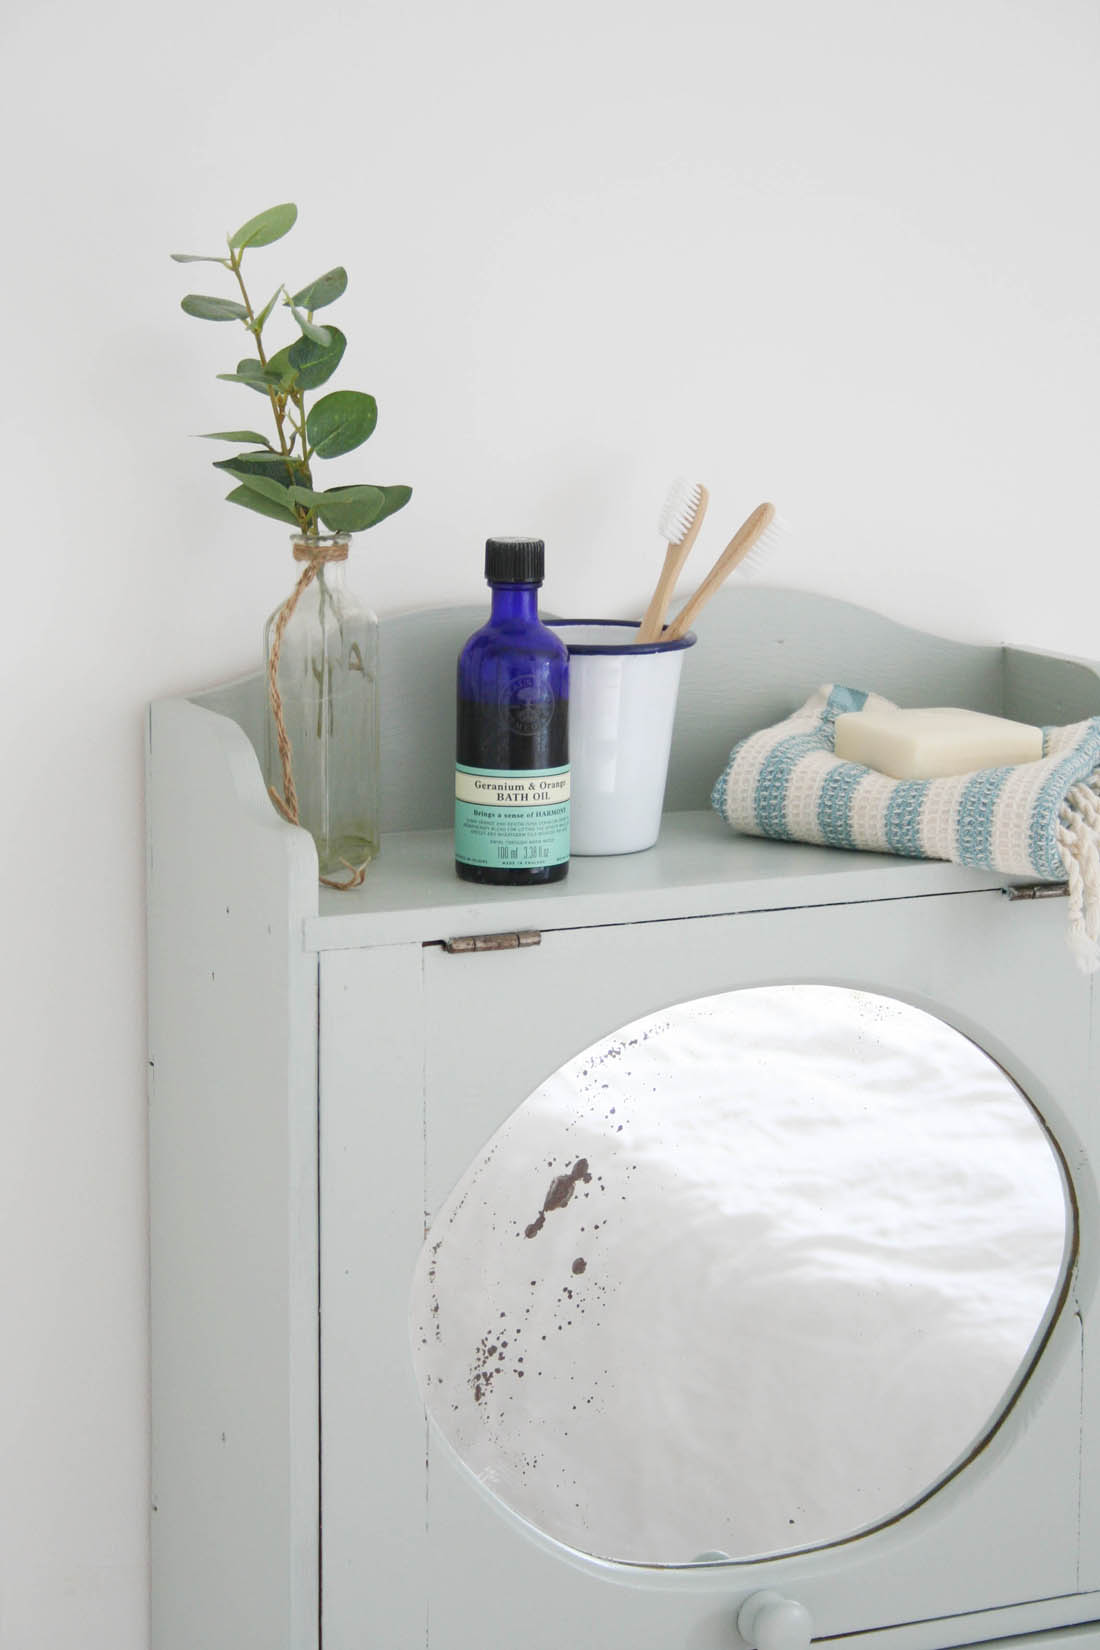
Have you ever seen a photograph of my bathroom? No, I didn’t think so. It’s the one room in our flat that I never let anyone photograph because it is dull as dishwater and worse it is now becoming quite rough round the edges after living here for six years. The bath panel and skirting boards have begun to swell with water, the white walls are scuffed and marked and there isn’t anything ‘nice’ in there – you know, no fancy bottles, candles, plants or fluffy towels. It needs a bit of a refresh, nothing major as we don’t have the time or money for that right now, but a few quick additions/changes that I can make with relatively little effort.
The first thing I have decided to do is paint a little cabinet I have on the wall in the bathroom. I’ll be honest with you that I pretty much hate painting furniture as it can be a real faff but I have discovered a great chalk paint from Ronseal that solves this issue. No primer is needed, just two coats of paint and no wax is necessary either and it is super quick drying too (that is very important for me as I am SO impatient when it comes to painting – you’ll often find me hanging shelves or shifting drawers back into place even though the paint is still wet!). The paint also resists knocks and scuffs, which is perfect for my bathroom cabinet as it gets a lot of wear and tear. I chose the duck egg blue to help add a bit of subtle colour to the room.
So, here are my tips for painting wooden furniture and I will be back another time with pics of my bathroom ‘refresh’ if I feel brave enough 😉
Cabinet painted in Ronseal’s Chalky Furniture Paint in duck egg blue.

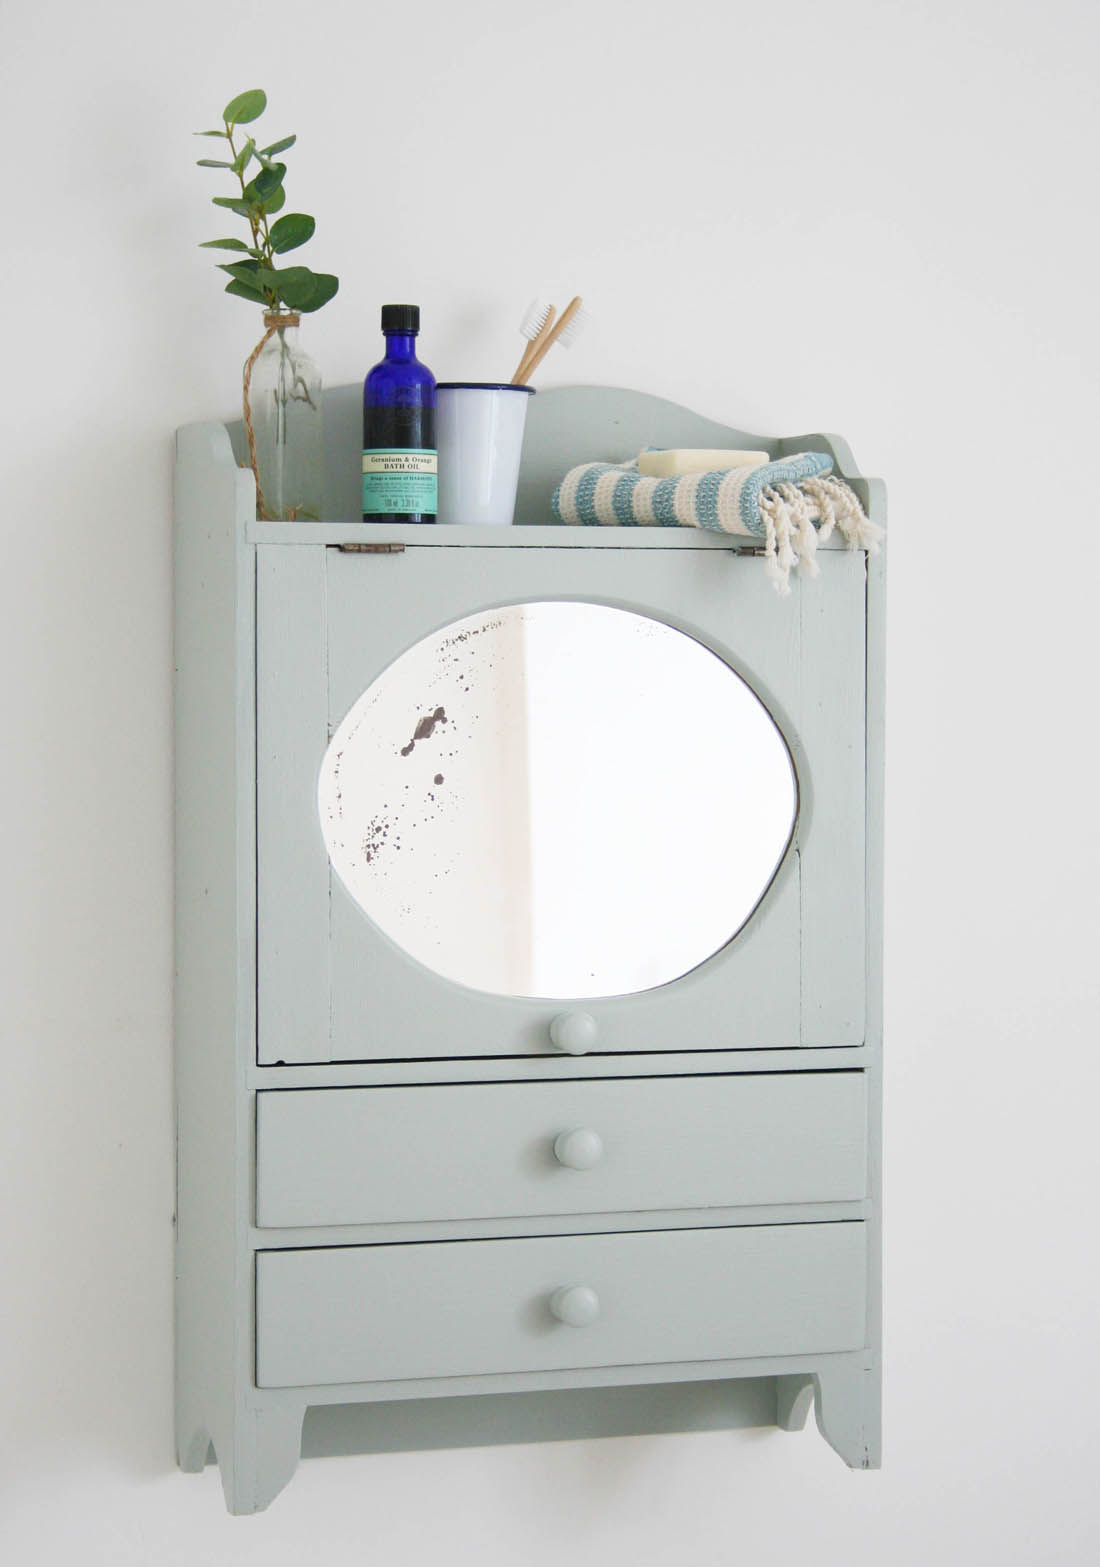
I’ll show you what it looks like when it is back in the bathroom when I have made a few more changes to that room.
Tips for painting furniture
The cabinet is quite old (I bought it ten years ago from an antiques shop) but the pine isn’t a lovely aged colour, it is actually quite bright orange and it kind of stands out like a sore thumb in the bathroom. Therefore, I decided it would be an ideal candidate for a bit of an update. The wood is in a good condition with a few dents and knots here and there but I don’t want to make it look like new so I don’t bother with filling any of them. I give it a really light sand and then hoover it well so there is no dust or dirt and then I am ready to paint…
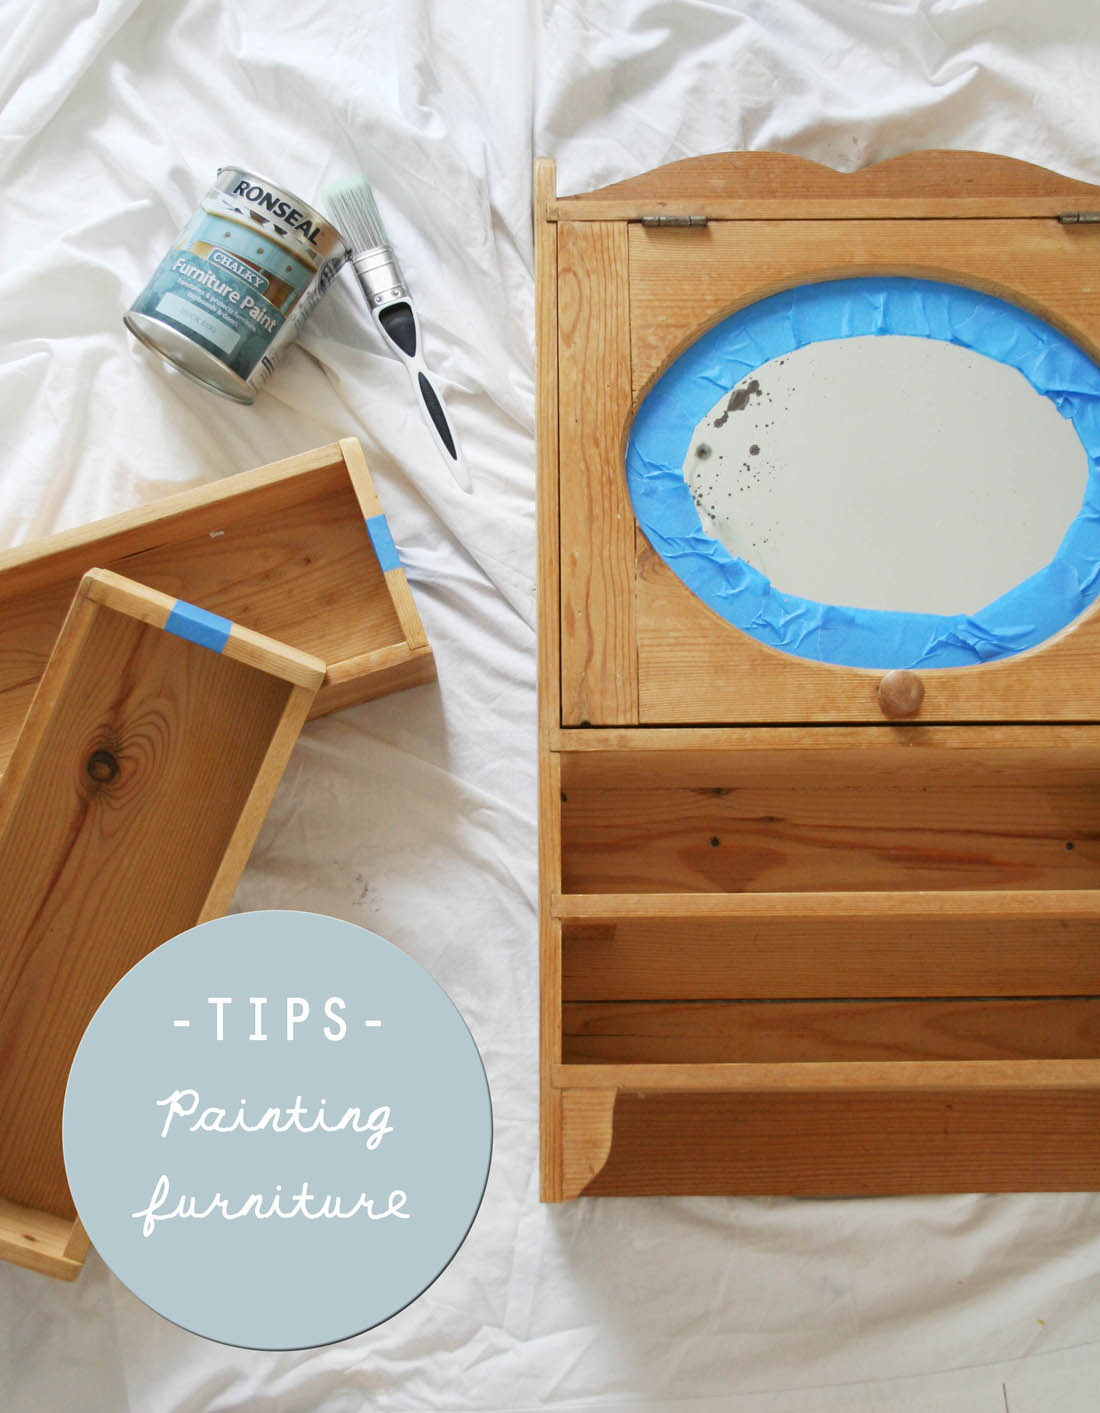
1 – Spend time taping off where you do and don’t want to paint
I like to use blue decorators’ tape as it adheres really well compared to normal masking tape. For this particular piece I spent time taping off the mirror so that I could get a really crisp finish and it saved me loads of time as I didn’t have to faff around trying not to get paint on the mirror.
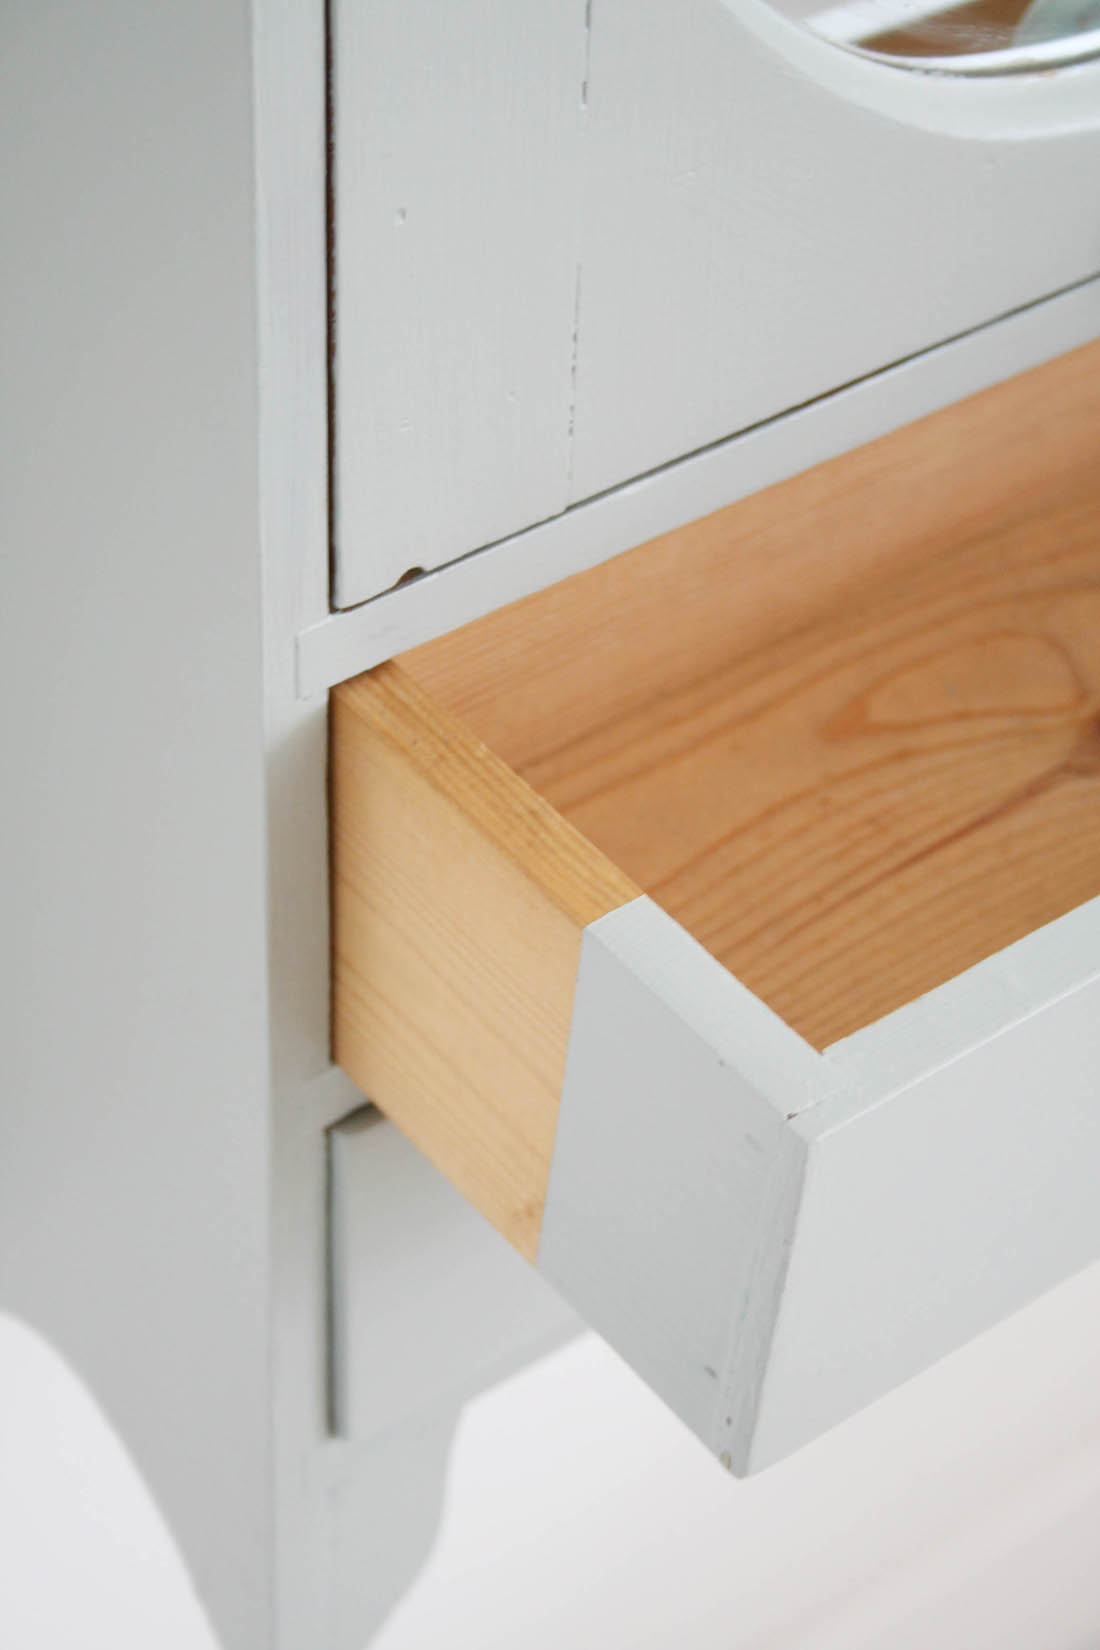
2 – Only paint the outside
I never paint inside a piece of furniture. The main reason for this is that a couple of layers of paint can mess up how well a cupboard door closes or a drawer slides in and out – often the paint can make these things ‘stick’. Therefore, I only paint a couple of inches of the inside of a drawer, just so you don’t see any raw wood from the outside (see the outcome of this in the finished photograph above).
3 – Use the right sized brush for the job
I am famous for using a massive brush on the teeniest tiniest project or vice versa just because I’ve used the first brush I find. However, if you choose the right sized brush it will save you so much time and have a really noticeable effect on the finish.

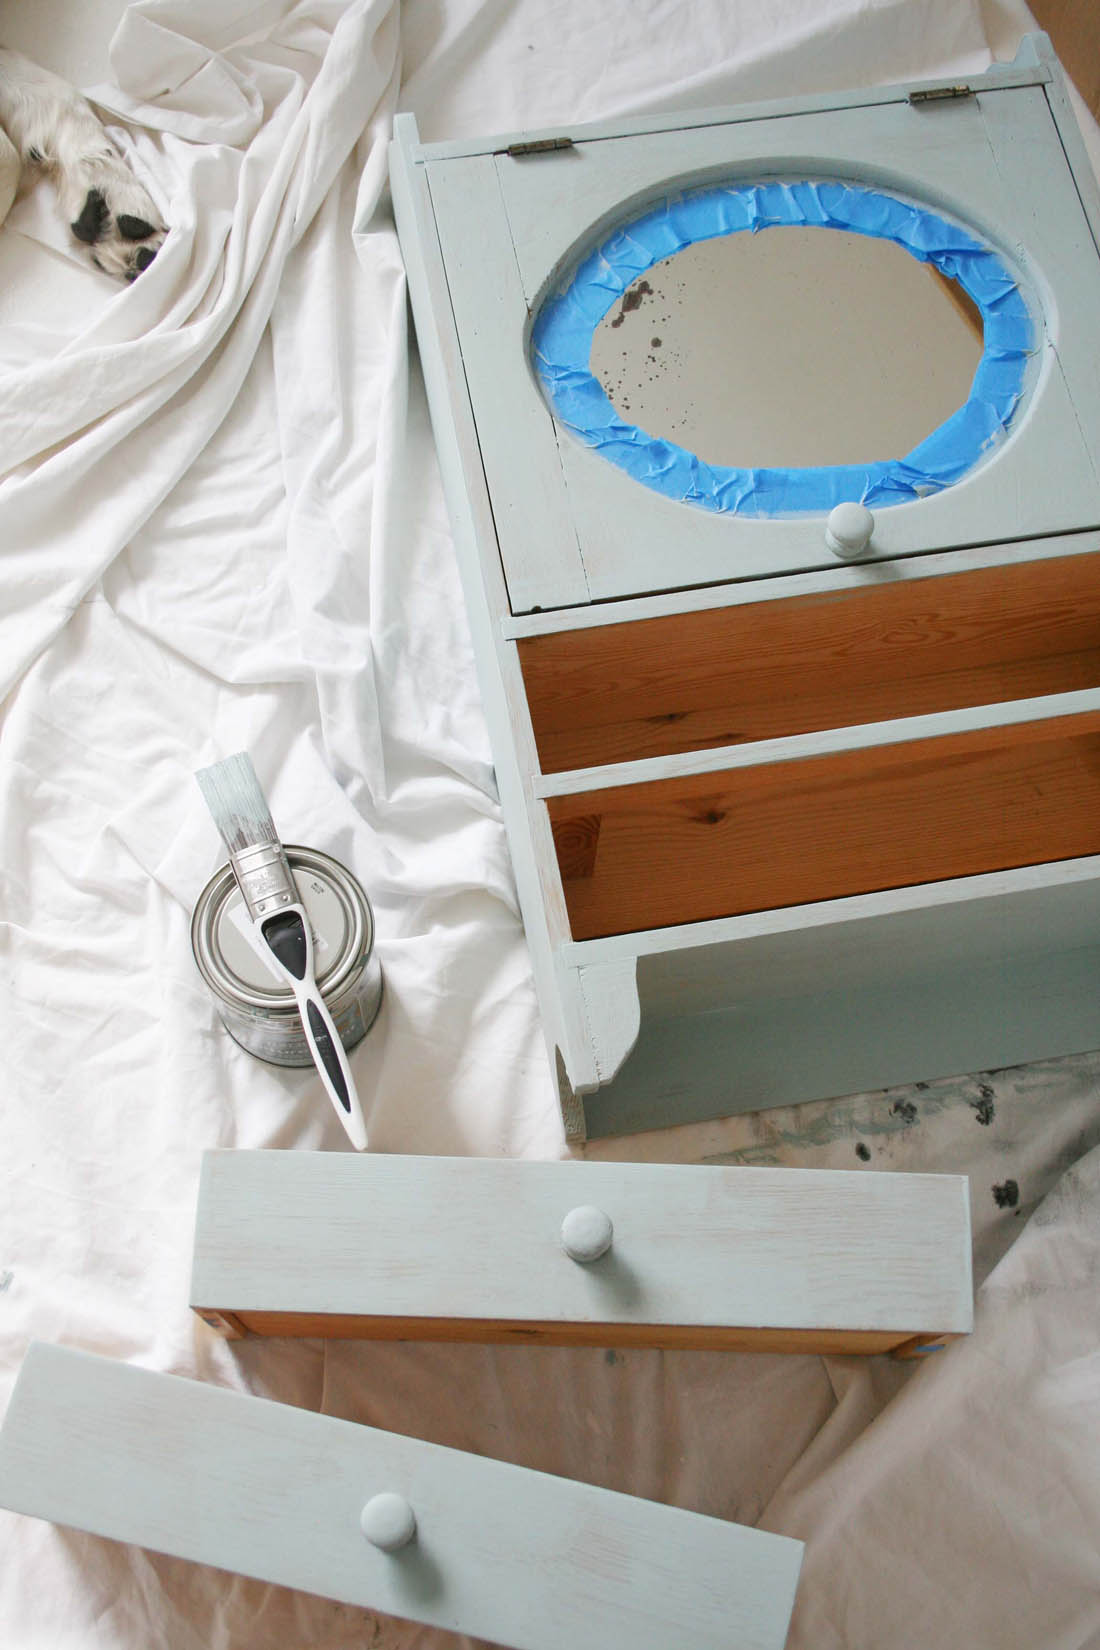
Ronseal’s Chalky Furniture Paint is really easy to apply as it’s water based and it only requires just two coats – no primer or wax. It also drys really quickly and has no smell so it’s a great product to use at home for a quick project.
4 – Apply thin layers of paint
The first layer of paint (as you can see above) should be thin and you should still be able to see the grain of the wood. Don’t lather on huge amounts of paint as it will pool and drip – have faith that the second coat of paint will provide all the coverage you will need.
5 – Work with the grain
Try to apply the paint in the same direction, working with the grain of the wood. This will help create a good finish.
6 – Be patient
Make sure you follow the paint instructions and let the paint dry thoroughly between layers. Also, don’t remove the tape until the next day if you have the patience (I took mine off after a couple of hours though – I can’t help myself!).
What do you think? I hope you agree the cabinet looks better painted than it did before. Back soon with a few more bathroom updates.
Katy x
*This post was written in collaboration with Ronseal.
Stunning cabinet. It looks fab! x
Author
Thanks, Natasha! x
Great tips, Katy…thank you. I particularly like the one about not paining g the inside of the furniture as I’ve never really thought about that but it makes total sense. I have a dresser that I have been umming and ahhing about painting for months and months so I think I’ll give it a go (like the idea of not having to prime and wax too!)! Thanks again.
Author
OOO, yes – go for it! x
I had no idea Ronseal did a chalky paint… thank you! I wonder if that will cover up the awful black mdf built in shelf thingy we have lurking in the sitting room…
Author
Black MDF sounds like a prime suspect for a bit of a makeover 😉 You may need three coats to cover black x
looks lovely, katy – love that colour!
Author
It’s nice, isn’t it? I love the cabinet so much more this colour than the orange pine it was before x
A brilliant piece about using chalk paint to update furniture.
Author
Thanks, Laura 🙂
I love the colour – so soft, and just perfect for a bathroom!
Author
It’s my new fave x
It looks really lovely. Do you think this paint would work on my orange pine stair rail and spindles?
Author
Yes! You’d have to give them a light sand to help the paint adhere but this paint should save you loads of time as you won’t need to prime or wax them. Good luck! x
I really like the finish on your cupboard – fab! Would this paint work on chairs, or is ot ‘too’ chalky? Thanks
Author
I think because it has a slightly different make up to traditional chalk paints i.e. you don’t need to wax it, it’s not as dry and matt. Therefore, I think it would work well on chairs x
Great transformation Katy, love the colour!
Very nice tips for painting bathroom furniture. Many Thanks!!!