This was such an enjoyable sewing project to do for Love Sewing magazine and I’m really pleased to be able to share it here with you today. These fabric buckets are quick and easy to make and useful for all sorts of purposes whether in the craft room, as plant pot covers, in the nursery or bathroom.

You will need:
Two pieces of calico for outside of bag 40 (h) x 30 (w) cm (I bought unbleached calico from Homecrafts)
Two pieces of heavy weight interfacing 40 (h) x 30 (w) cm
Two pieces of lining fabric 40 (h) x 30 (w) cm – I used Koi Cloud fabrics, Smile and Wave print
Ruler and fabric pen or chalk to make and mark boxed corners
Tape measure and scissors to cut pattern
Black fabric paint and pencil with round eraser tip to print calico (I used Dylon black fabric paint)
Plastic sheet to protect table whilst printing calico
All seam allowances are 1cm.

Dimensions for the other sized fabric buckets:
Finished large bucket (pictured filled with wrapping paper) 40 x 35 cm – use 50 x 38 cm pieces of fabric and interfacing. Measure the boxed corners 10cm from corner.
Finished small bucket (pictured filled with embroidery flosses) 28 x 22 cm – use 34 x 26 cm pieces of fabric and interfacing. Measure the boxed corners 6cm from corner.
Finished extra small bucket (pictured filled with paint brushes) 16 x 14 cm – use 24 x 18 cm pieces of fabric and interfacing. Measure the boxed corners 4cm from corner. The gap in the lining should only be 7cm.
Tutorial:

N.B. Instructions are for the medium 32 (h) x 26 (w) cm fabric bucket (pictured filled with balls of string).
Step 1 -Personalise the calico by hand printing polka dots using the eraser tip of a pencil. Protect your table with plastic sheeting (or use a bin liner). Dip the eraser into the paint and print onto fabric, making sure you press firmly and that all of the eraser comes into contact with the fabric. Print polka dots – no pattern is necessary, just random spots look great. Follow the instructions on your paint to fix the colour. This really is as easy as it looks!

Step 2 – Attach the interfacing to the calico pieces by following the manufacturer’s instructions. I used iron-on heavy weight interfacing to make it as rigid as possible so the bucket will stand on it’s own.
Step 3 – Place the the two calico outer pieces right sides together and sew the two sides (40cm) and bottom (30cm).
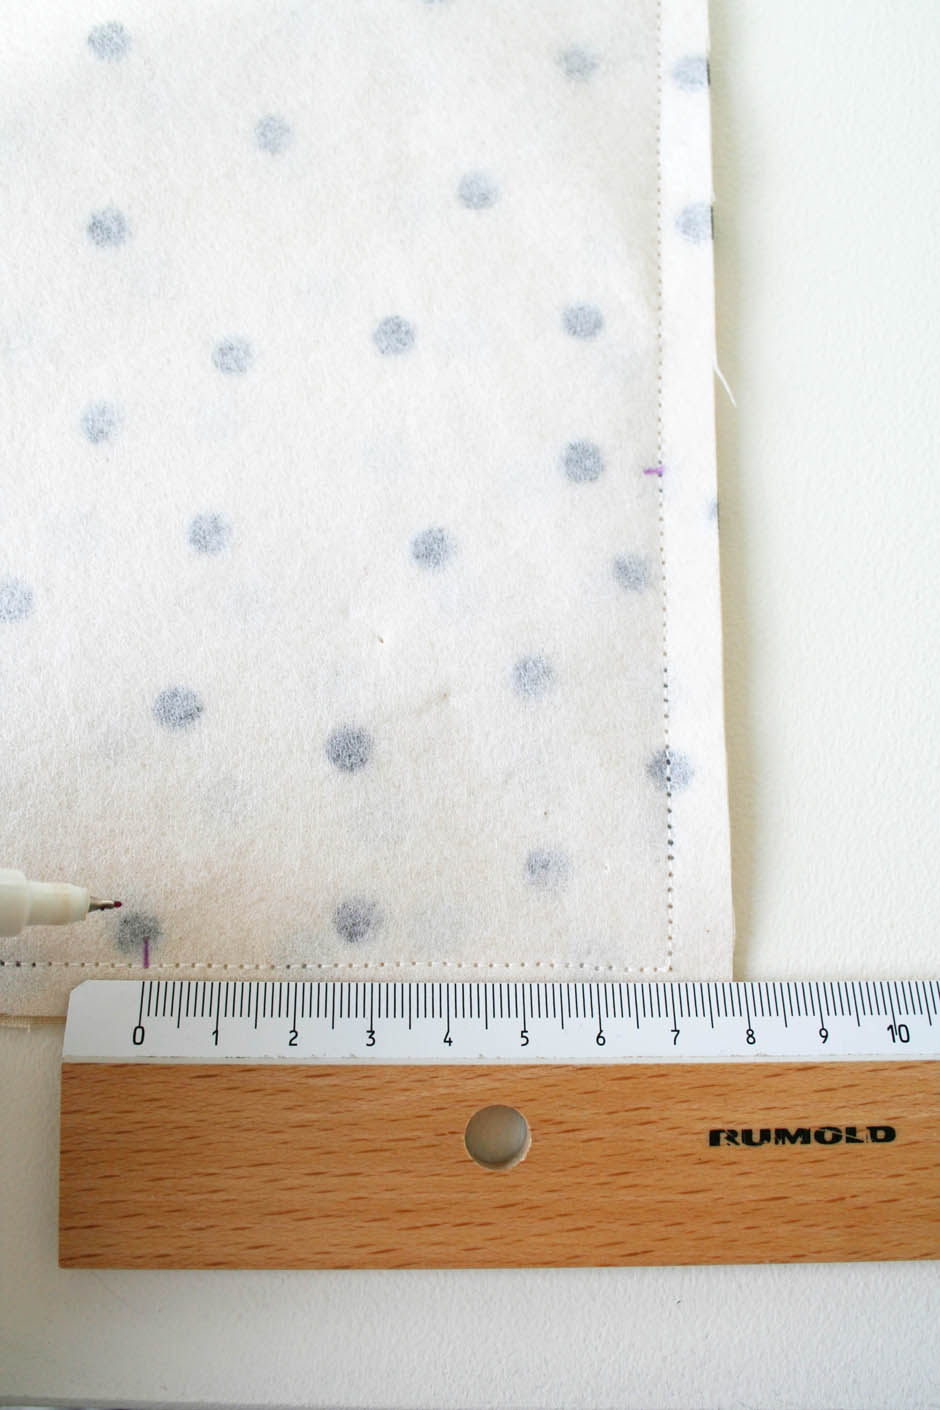
Step 4a – Make boxed corners. Measure 7cm from the corner seam (don’t measure from the edge of the fabric) in both directions.
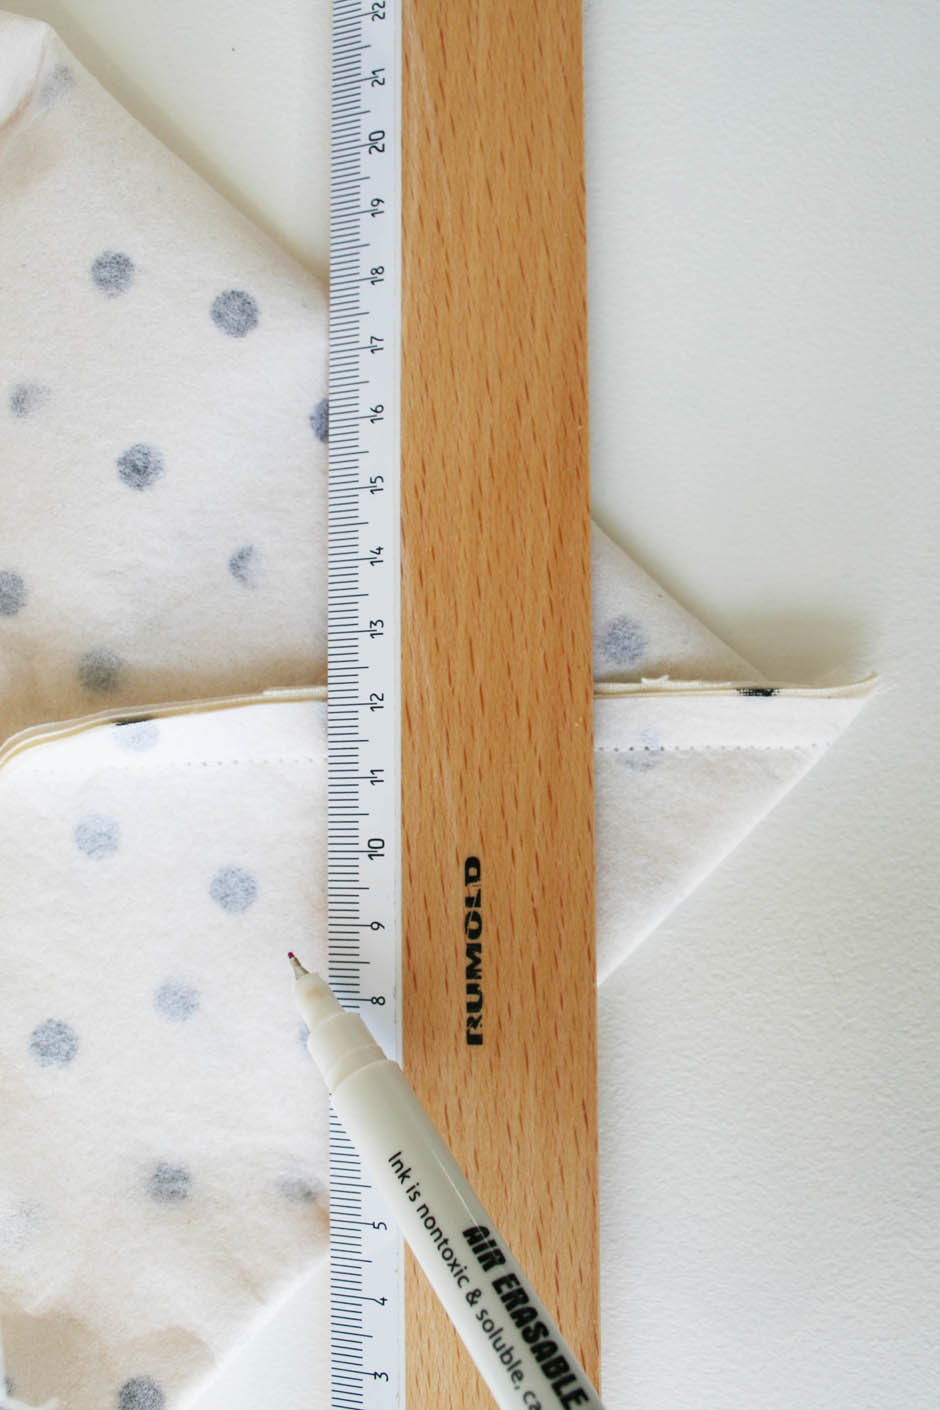
Step 4b -Pull out the sides of the bucket and line the marks up.
Step 4c – Draw a line across the corner and sew along the line (I do a double row of stitching to strengthen).
Step 4d – Cut off corner and repeat on the other side of the bucket. Press seams out and turn the bucket right sides out.

Step 5 – Place the two pieces of lining fabric right sides together and sew the two sides (40cm) and bottom (30cm), but this time leave a 10cm gap in the middle of the bottom pieces.

Step 6 – Make boxed corners by repeating step 4. Press seams out but don’t turn the lining rights sides out.
Step 7 – Place the calico outer inside the lining i.e. the right side of the calico outer should be next to the right side of the lining. Make sure you line up the seams and boxed corners. You also need to line up the top edges of the lining and the calico bucket.

Step 8 – Sew the top edges of the lining and the outer bucket. Cut away any seam allowance.

Step 9 -Gently pull the outer bucket through the 10cm gap in the lining.

Step 10 -Top stitch the 10 cm gap closed.

Step 11 – Press the top edge of the bucket and topstitch all the way round. Turn over as much or as little of the top of the bucket as you want to and the buckets are fully reversible if you fancy a change.


If you do make them I’d love to see a pic! I’m definitely going to do more fabric printing – it’s quite addictive once you start.
Katy x


I love these – thanks for the tutorial. I have a load of calico that I bought off eBay on a whim a couple of years ago, and I’ve never got round to doing anything with it so this will be perfect!
Author
Yay! Look forward to seeing a pic xx
Love this DIY! Super cute fabric idea painting the dots on too! Can’t wait to try it!
Author
I’d been looking for black and off white polka dot fabric for ages and couldn’t find it anywhere. It is soooo easy to make, I promise! x
Yet another great tutorial. I’ve been looking forward to this tutorial since I saw that wrapping paper bucket when you published it for the magazine. Can’t wait to make some, I’m thinking teddy bear storage for my girls room. Plus I’ll clearly have to make some grown up ones for my craft bits and pieces
Thanks Katy. xx
Author
Perfect for toy storage, especially if you make the largest size! Would love to see them on your blog x
Adorable and a must make! I can’t wait to make one of these for my knitting wool 🙂
The Fairytale Pretty Picture
Author
Ideal for wool, Alina. Enjoy making them x
These are brilliant! Could use some of these in every room in my house.
I have a tonne of fabric painting plans too…
Author
I have had fabric painting plans for years! It’s one of those things that I always put off but when I did this it was so easy so I must do more x
I made the small basket with some fabric scraps I needed to use up. Super adorable! I am definitely making more…gifts and for around out house! Thanks for sharing!
Author
So pleased you have made some! They can get a bit addictive, I warn you x
Hello Katy,
I was wondering if you also measure 7 centimetres for the boxed corners if you make the biggest model? I even took a bigger size because I want to make a storage bucket for laundry!
Thanks for the great tutorial
Author
Hi Sofia. Have another look near the top of the post there is a sub-heading “dimensions of other sized buckets” and it gives you the measurements for the boxed corners of each sized bucket. Hope that helps! A big laundry one would be great – you could add handles too xx
I love these! I made the biggest version, but used quilting cotton instead of calico. Even with the heaviest fusible interfacing, it does not stand up on its own: oh well. I want to make another one, but use a stiffer interfacing instead. It’s a very cute design!
Author
Ah, yeh you need to use calico, especially for the bigger ones – it is so much stiffer than cotton. Hope your next one is more successful 🙂
Hi, I made the medium one for a baby shower gift and then I winged a larger one using your instructions but different dimensions. The mother-to-be loved them. I used quilting cotton and flannel for one (with interfacing) and two flannels for the other (ran out of interfacing!). The tutorial was easy to follow and I’m so pleased with the way they turned out.
https://www.instagram.com/p/BCQtrKLoaUQDhDFtkO1snOK3G24TLbn_YHR78o0/?taken-by=megbmd
Love this!! Such a great DIY!
These basket are cuteee, thankyou for sharing 🙂
I love this tutorial. This is my second try at it.