Craft room

I have been very busy recently trying to transform our guest room into a work space for both me and my boyfriend. The challenge is to fit a double bed and enough space for two people to work into a relatively small room. Oh, and the budget is only £150…eeek! We need:

– Desk space for two

– Space for a lap top and desk top computer

– Storage for craft materials

– Filing cabinet

– Space for sewing machine

– Double bed

– Drawers for clothes

Difficult? Just a little.

Before:

Home office

This is the desk that we had before. There was absolutely no storage and only really enough room for a computer, definitely no craft space, let alone room for two to work here at the same time. Photograph by Peachey Photography

After:

I did a lot of planning and searched around for creative storage solutions. Have a look at my last post in which I show my inspiration and my tips for creating a functional, yet stylish, work space: Tidy desk, tidy mindWhat I have created is a much more practical, functional space and even though it may not look quite as nice as it did before I think considering how much we had to spend and how much we needed from this space it is as stylish as it can be. I have kept the whole room white with clean lines so it looks as large and as uncluttered as possible. See what you think…

Home office and craft room

I painted a chest of drawers we already had and changed the knobs (one is missing, I know!) so it could act as an extra ‘leg’ and it provides lots of storage for craft materials. I then bought a 2.5m long piece of MDF for £30 from a timber yard, which I painted and varnished. This sits across the drawers and two Ikea trestle legs that only cost £25. An off-cutting of the wood top is used for the shelf.

Home office and craft room

This is my end of the desk for my sewing machine, cutting mat and space to craft. A tutorial to show you how to make the cotton reel holder will follow. I have used the noticeboard as an inspiration board with my favourite pictures, magazine cuttings, fabric swatches, postcards.

Craft storage solutions

Jam jars screwed onto the shelf for easy access.

Craft storage solutions

Make sure you use at least two screws otherwise your pots will swivel!

Craft storage solutions

I put a broom handle, that I painted, between the shelf brackets and hung Ikea Fintorp pots on Grundtal S-hooks for tools and pens.

Craft storage solutions

I’ve used more S-hooks to hang tools so everything is to hand.

Washi tape

Washi tape and ribbon reels on the broom handle.

Craft storage solutions

A magnetic board that I made from a baking sheet…tutorial to follow!

Home office and craft room

Using a 2.5m table top gives us both space and flexibility.

Craft room

My chalkboard storage boxes (see tutorial) are used for craft materials and my favourite interiors books sit on the shelf. I’ve also hung my favourite Double Merrick print. I’ve also added a Loaf lamp that I already had.

Craft room

I’ve used old Kilner jars with labels printed from Graphics Fairy for my sewing supplies.

Modge podge jars

I’ve also covered jam jar lids with fabric for storage pots; much cheaper than buying new.

Craft room

I have recycled a mustard jar and more old Kilner jars for storage.

Wicker trunk

My fabric is in a wicker basket that I found in a skip (love a good skip-find!)

Home office and craft room

The finished room. There’s a filing cabinet tucked in the corner with all my magazines stored on top, that actually looks more like a bedside table (bought from eBay for £20). I hung hooks in this room for guests to hang their belongings when they come to stay. In total we spent about £120 on: desk, shelf, filing cabinet, storage and paint. Now, I just need to find two proper desk chairs although that will probably require quite a bit more than £30 (maybe more like £300!)


Jules has since realised that making a work space for two may not have been such a good idea; I like a good chat whilst I’m crafting or blogging and he has a lot of ‘real’ work to do! Ha! Too late now.


Tidy desk, tidy mind

I’ve been secretly beavering away on an interior decoration project, in an effort to transform our spare room. We have been trying to create a guest room combined with a home office (for Jules) combined with a craft room (for me): not an easy task.  I will be revealing all next week but in the mean time I thought it would be nice to share with you my inspiration for the room and my tips on how to create the perfect work space.

1. Plan carefully how you want to use the space.

You need to decide whether your work space is needed for just a computer or writing, drawing, crafting. This will then dictate how much space, storage and the type of desk you will need. Be careful to select a desk that is an appropriate shape and size according to the type of work you plan to do.  Make a clear list of everything you need to store and plan a space, drawer, pot for all of these things.

Home office Ercol desk

If you only work on the computer you can be a lot more flexible and opt for a much smaller desk. In this case they have re-purposed a small Ercol dining.

2. Keep your desk as clear as possible by using creative storage solutions.

Think carefully about how you can use the wall space in front of your desk for storage, as well as the space under your desk. Could you add a storage unit under your desk or put up shelves above the desk? Also, think carefully about what you will need to use on a regular basis and how you can make these things easily accessible, whilst remaining off your desk.

Craft room storage solutions

Hooks, jars and a paper dispenser are used to great effect here. Adding this wall unit, drawers under the desk and the filing cabinet to the left means this desk can remain clear and fully functional.

3. Don’t lose your style!

It can be difficult balancing style and function but there are so many ways you can inject your work space with your own style: antique desk or chair, vintage storage pots, stylish lamp, mid-century shelves. Look for pieces of furniture and storage with both form and function, otherwise your work space will not be a nice place to be.

Vintage work space

This beautiful, antique desk adds such style to this work space. The vintage boxes, pots and tins also add personality and character to what can otherwise be a very dull space.

4. Don’t scrimp on stationery.

It’s so nice to be surrounded by things you like the look of and this can only help stimulate creativity. Nice stationery will add to a space where form and function can exist together.

stylish stationery

5. Make an inspiration board.

I love being able to see images, post cards, photos, notes that inspire me. Why not make an inspiration board that be put in front of your desk? This can be added to when you are working on something particular to help inspire you. You can also pin up business cards, reminders or post-its to help keep you organsied.

Tidy desk

What about making this washing line instead of the traditional notice board?

6. Tidy your desk every week!

I genuinely believe that a tidy desk means a tidy mind. If you can’t find what you need to do your job or make your craft you are far less likely to do it at all! Choose a particular day each week to go over your desk and put things back into place, sort paper work, recycle paper you don’t need anymore. This will definitely help the creative process.

Danish desk

Tidy desk, tidy mind.

7. Develop a filing system.

There is a constant stream of paper work coming into most people’s work spaces. You need to have a clear system in place so you don’t get yourself into a mess and miss bills or a deadline. Generally, it’s a good idea to have three different paperwork stations: Paperwork that has not been looked at yet, paperwork you are currently  dealing with, storage for paperwork that has been dealt with. Try and develop your own system that will work best for you.

Filing solutions

Dividing up paperwork is a good idea so nothing gets lost or forgotten.

 8. Invest in a good lamp and a good chair.

Light and comfort are very important whilst working. You can not get by with a kitchen chair or with a dim ceiling light!

industrial style home office

Gorgeous Benjamin Hubert lamp (and look at the old mattress springs used as a noticeboard!)

9. Be creative with the space you have.

If you can not dedicate a whole room to your home office use a cupboard, a landing, a corner of your guest room. As long as you are organised and choose the right desk and chair it does not need to be an eyesore.

Small home office in a cupboard

An inbuilt cupboard in this living room is used as an occasional work-space. They have used a great chair and lamp so even when the cupboard is shut they become a design statement.  

 10. My favourite office accessories with both form and function:

stylish filing cabinet

Make your filing a bit more stylish with this cabinet from cb2.

stylish clipboards

Rose and Grey decorative clipboards – perfect for your filing system.

Mid century string shelving

Mid-century style string shelving.


I will reveal my new work space next week…hope you’ll join me!


Recycled planters

We’re off to Columbia Road flower market tomorrow for breakfast with friends and to enjoy the sun (and hopefully my boyfriend will buy me lots of pretty flowers!). Now that the weather is improving I’m turning my attention towards the garden; my seedlings are coming on and I’m collecting ideas for planters.

I try to design my balcony in the same way as my flat: I can’t, and don’t want to, rush out and buy everything new.  This way my outdoor space reflects my style and doesn’t cost me a fortune. One of the easiest ways for me to achieve this is to recycle vintage finds and old tins into planters. This is so easily achievable and I bet if you do a really quick scan of the room you are sitting in right now you, too, will be able to find something that could be re-purposed as a planter, rather than buying brand new ones. I promise you that once you start gardening, you won’t be able to stop.

Step 1: Source your planters

Either use what you already have, go to charity shops, use eBay or start collecting old food tins. Keep a look out for: vintage tins, bread bins, enamel pots or cups, colanders, tin jelly moulds, cake tins.

Step 2: Decide what to plant

You need to do a little research to ensure that what you plant will be happy in pots. Herbs are a good place to start as they are very hardy and don’t need much root space, bulbs also do well in small containers. If you want a quick and easy start, buy the pots of herbs from your local supermarket.

Step 3: Drainage

You need to ensure that the containers you use have drainage holes. You can drill holes (as you can see below) or for small containers just use a hammer and nail. If you buy an established plant you may be able to place it in your plant holder without the need to re-pot it, as long as it fits.

Recycled vintage tin planters

Have a look at my re-purposed planters for inspiration:

Vintage enamel bread bin

My vintage enamel bread bin, with a lost lid, used for daffodils.

Vintage recycled tin planters

Enamel cooking pot used for strawberries, enamel cups for thyme and mint, and an olive oil tin for mint (that you can buy at the supermarket). An old, large wicker basket is also used for a bean plant. Photograph from The Edible Balcony. I love the idea of arranging pots on a ladder.

Recycled vintage tin planters

I’m still waiting for my bluebells, planted in this Victorian enamel potty, to bloom.

Recycled vintage tin planters

I’ve planted thyme in this old food tin.

Vintage recycled tin planters

What about hanging your recycled containers on an old coat stand? Thyme in a retro enamel colander and a tomato plant in the blue colander. Photograph from the The Edible Balcony

Recycled vintage tin planters

Mint in a tea tin. Mint is best kept in pots as it is so voracious and can overrun a bed. It’s such a nice thing thing to have a ready supply of in the summer for cocktails and Pimms.

Vintage recycled tin planters

Tea tin for mint, olive oil tin for coriander, tinned tomatoes tin for thyme. I hammered a nail through the bottom of each tin for drainage. Start collecting food tins that are aesthetically pleasing.

Vintage recycled tin planters

A colander makes a perfect planter for lettuce as it needs lots of drainage. I bought this ‘growing’ lettuce from the supermarket and it is so easy to look after.

Butlers sink as planters for succulents

My boyfriend’s mum has these amazing butler’s sinks in her garden full of pretty succulents. Love them!

Vintage recycled tin planters

All of these herbs can be left outside or put on a windowsill in the kitchen so they are easily accessible, whilst cooking. Photograph from The Edible Balcony.

Vintage recycled tin planters

Look how sweet this is. Grape Hyacinths can be packed into any old containers as with all bulbs they don’t actually need soil to grow as their bulbs are packed with all the nutrients they need to grow. Photograph from Saidos da Concha blog.

Let me know what you find that can be used as a unique planter and happy planting. Enjoy the sun this weekend…


Sew Over It

Everyone is talking about sewing thanks, in part, to the Great British Sewing Bee. I have recently started sewing and if you are thinking about it, I urge you to go for it!

I asked my boyfriend, Jules, to buy me a sewing machine for Christmas. At the time, I didn’t know how to sew, but I was convinced that, given the chance, I would love it.  He very kindly did buy me  a machine and as I predicted, I do love it.  The moment of reveal is so satisfying and the creativity involved in choosing fabrics is one of my favourite parts of the process. That being said, it is not something that comes naturally to me; I would describe myself as a ‘sloppy sewer’ because generally in life I like to get things done as quickly as possible, regardless of the ‘finish’.  Sewing requires a huge amount of precision and patience so it is a good skill for me to practice.

I decided that I needed to do a sewing class to get me started so I didn’t pick up lots of bad habits. So, me and my friend, Farah, went along to Sew Over It, a lovely sewing cafe in Clapham run by Lisa Comfort. We did the ‘Intro to Sewing’ class over two Sundays and what a delightful time we had!

The sewing cafe…

Sew Over It sewing classes

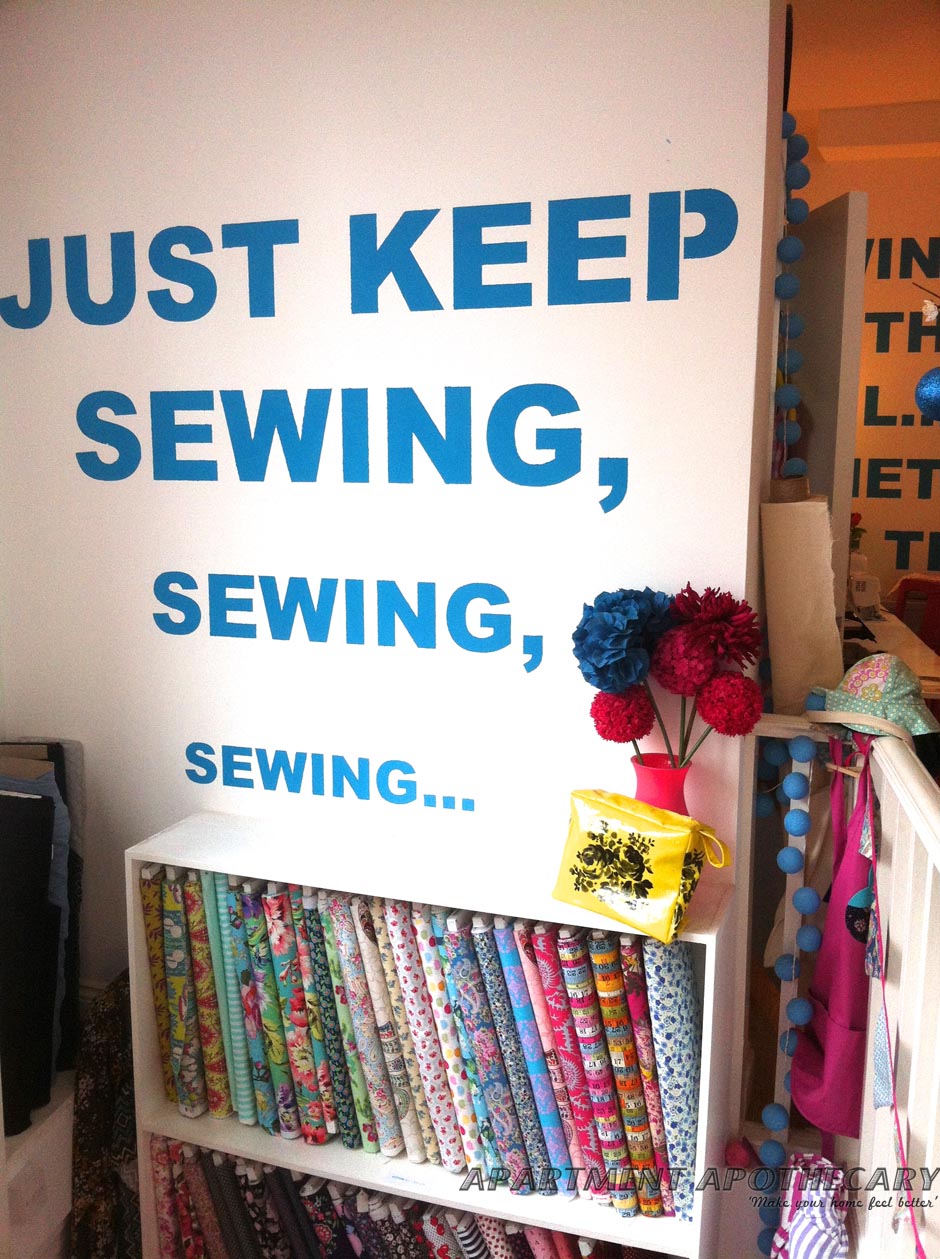
Sew Over It is nestled in Clapham North.

Sew Over It sewing classes

They stock a delightful range of fabrics to use during the class but also to buy online.

Sew Over It sewing classes

The cafe is lovely and homely, just what you need for a good day’s sewing.

Sew Over It sewing classes

They stock basic haberdashery bits as well as lovely adornments.

And to work…

Sew Over It sewing classes

We started the first day by learning how to make a basic cushion. This is my friend Farah concentrating very hard, whilst trying to resist eating her cake.

Sew Over It sewing classes

The tutor, Dominique, was lovely and her pace was perfect. She was also very patient with us when we went wrong!

Sew Over It sewing classes

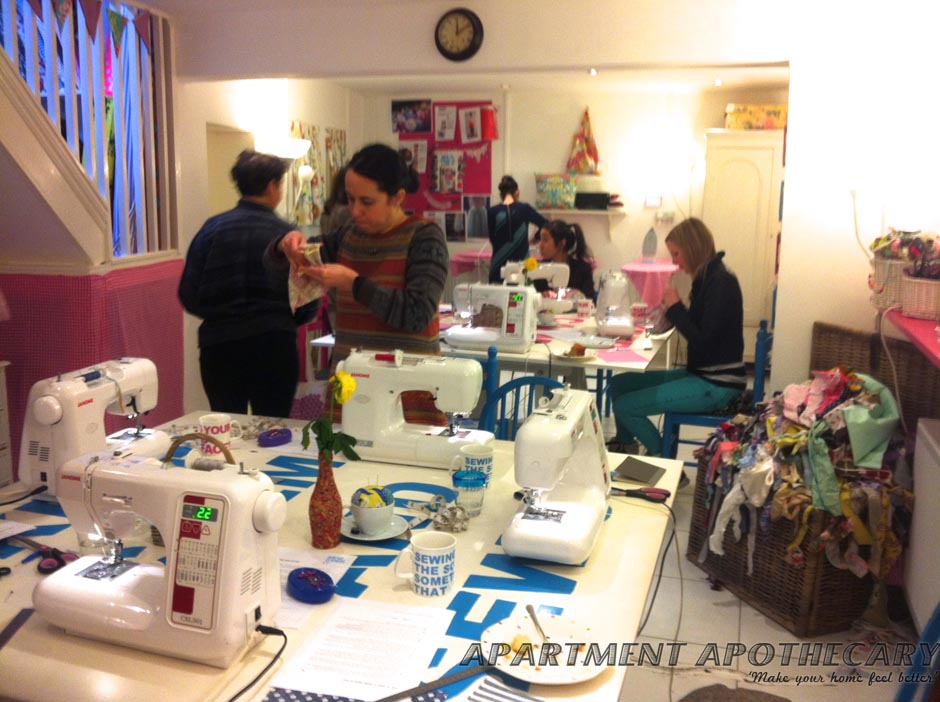
The downstairs studio is a great place to sew, whilst doing a lot of chatting. We met some really interesting ladies.

What we made…

Sew Over It sewing classes

Finished article number one!

Sew Over It sewing classes

I loved learning how to make covered buttons…so pretty!

Sew Over It sewing classes

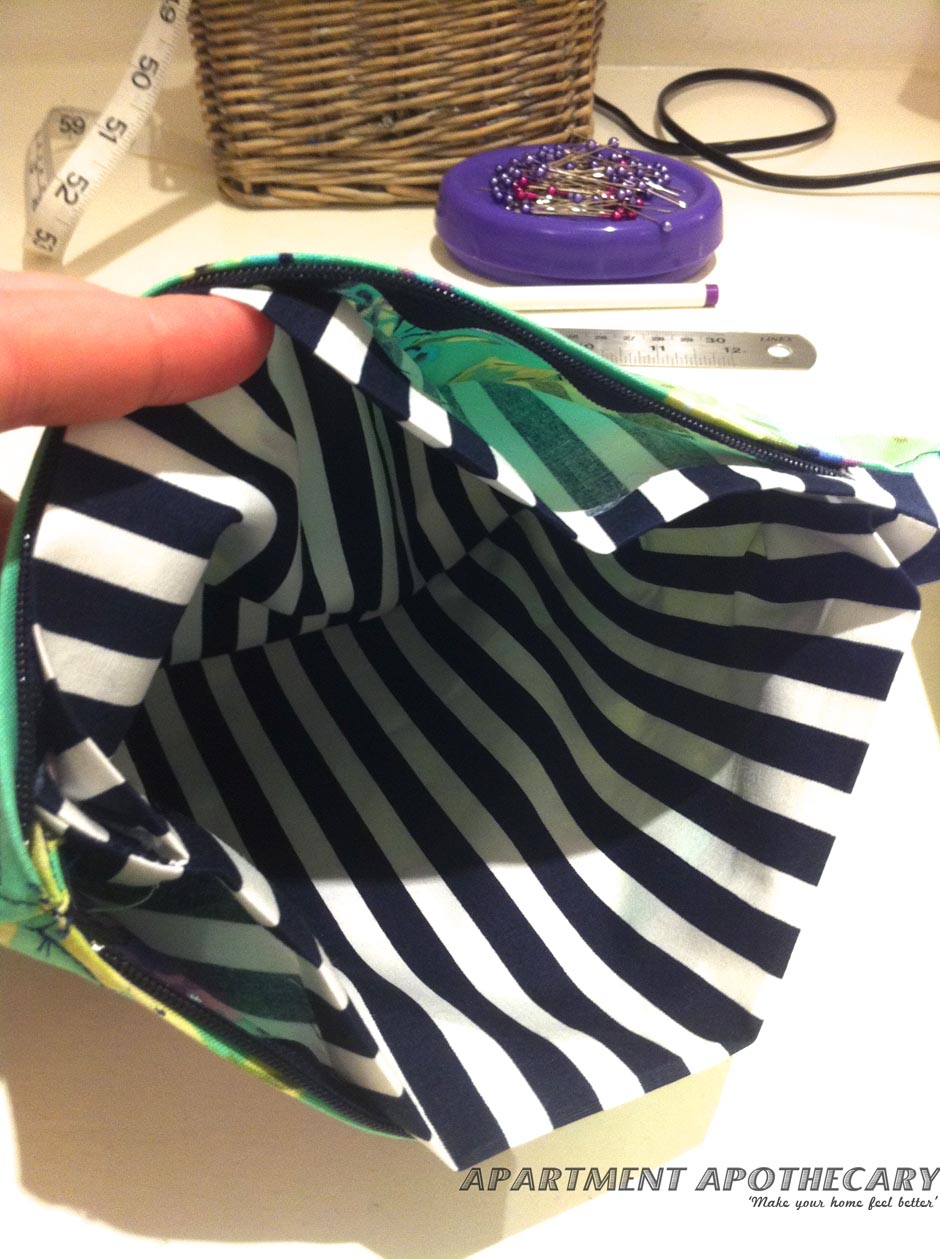
On the second Sunday we also learnt how to sew a make-up bag, although I still need lots of practice sewing in zips.

Sew Over It sewing classes

I also had time at the end of the second Sunday to put my new-found skills into practice and make some bunting.

What I’ve made since…

I have tried really hard to develop my sewing skills since the class and have taught myself new techniques: attaching bias binding, button holes, using interfacing. However, I am definitely planning to go back to Sew Over It  for their curtain making class. Have a look at the projects I have worked on since:

Liberty print quilt tutorial

I have made a Liberty print patchwork quilt. Follow my tutorial if you would like to make one too.

Liberty print cot tidy

I also used Liberty print to make this cot tidy for a friend’s baby shower. Follow my tutorial to give it a go.

Bunting

I started this bunting during the class and finished it at home (20 meteres worth!) This is a really good place to start as you can practice basic skills without it mattering too much if you go wrong – follow my tutorial .

Baby blanket

I’ve also sewn a couple of baby blankets – tutorial to come!


If you’re looking for a new hobby, give sewing a go.  I promise, you won’t be disappointed. Thank you lovely ladies at Sew Over It.


Growing up

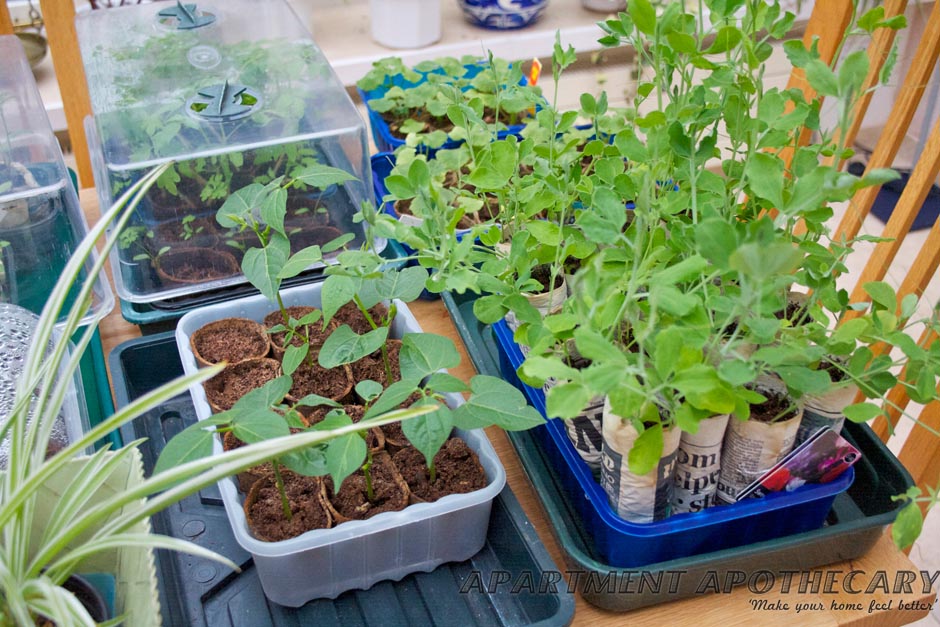
The seeds that I planted some weeks ago (see my Sowing the Seed post) are now coming up and it’s time to put some in bigger pots and others can be planted out now it seems the weather has improved.

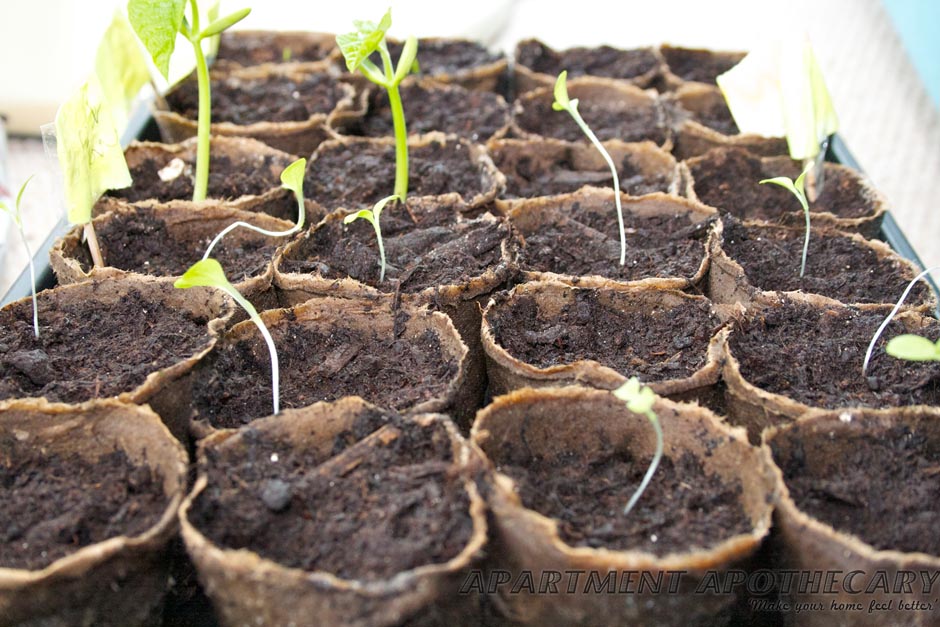
shoots

When the seeds start to sprout it is important that you leave them inside to become strong but they will need to be put in bigger pots otherwise their roots will not have space to develop.

French bean shoot

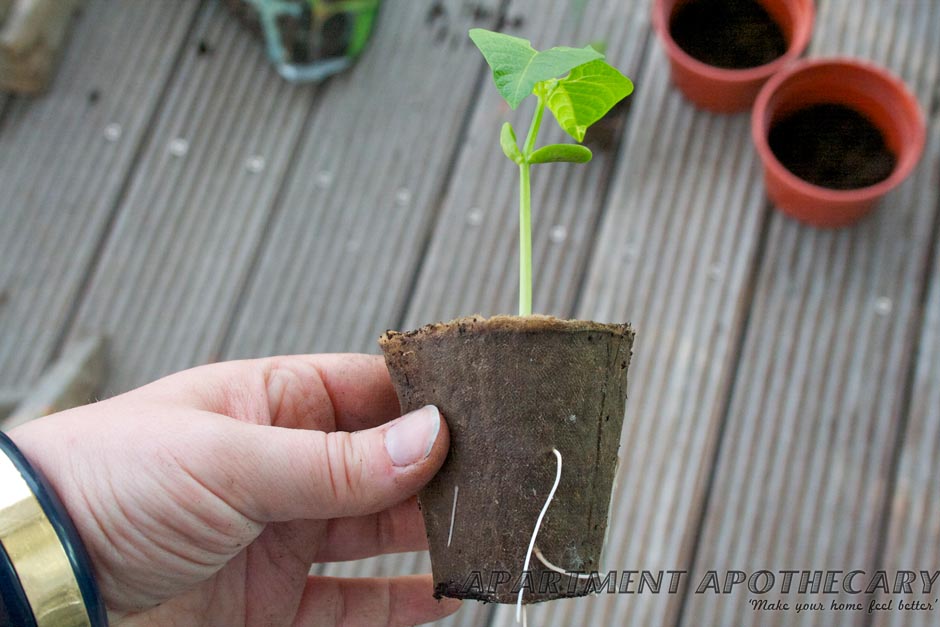
You can tell when shoots need to go into bigger pots by looking at the roots. If they have started to show they need more space to grow.
French bean shoots

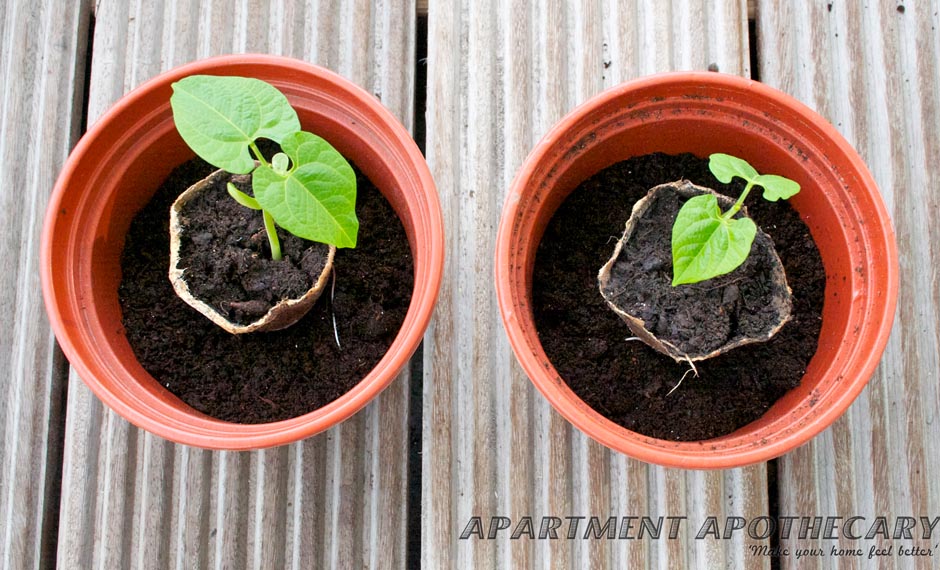
These French bean shoots can be put straight into bigger pots as the paper pots decompose.

French beans will need to be kept inside until they start growing up as they are not strong enough yet to cope with the weather, especially strong winds.

French beans

The French beans need canes to grow up.

Sweet pea shoots can be planted out now as they are very tenacious.

Check on the seed packet for how long each type of plant needs to be kept inside.

Plants like basil will do best if you keep them inside and don’t plant them out.

I’m so glad my hard work has paid off so far.  Who knew gardening could be so rewarding?